Connecting ServiceNow
editConnecting ServiceNow
editServiceNow is a cloud-based IT Service Management (ITSM) platform focusing on workflow automation and internal organizational support. The ServiceNow connector provided with Workplace Search automatically captures, syncs and indexes the following items:
Users |
Members of the ServiceNow platform associated to Incidents and other items, with associated email and activity data |
Incidents |
With associated ID, description, activity data and priority |
Items |
With associated ID, description, cost-related attributes, approval status, and activity data |
Articles |
Including article content, topic and activity data |
Configuring the ServiceNow Connector
editConfiguring the ServiceNow connector is the first step prior to connecting the ServiceNow service to Workplace Search, and requires that you create an OAuth App from the ServiceNow platform. To get started, first log in to ServiceNow and access your administrative dashboard:
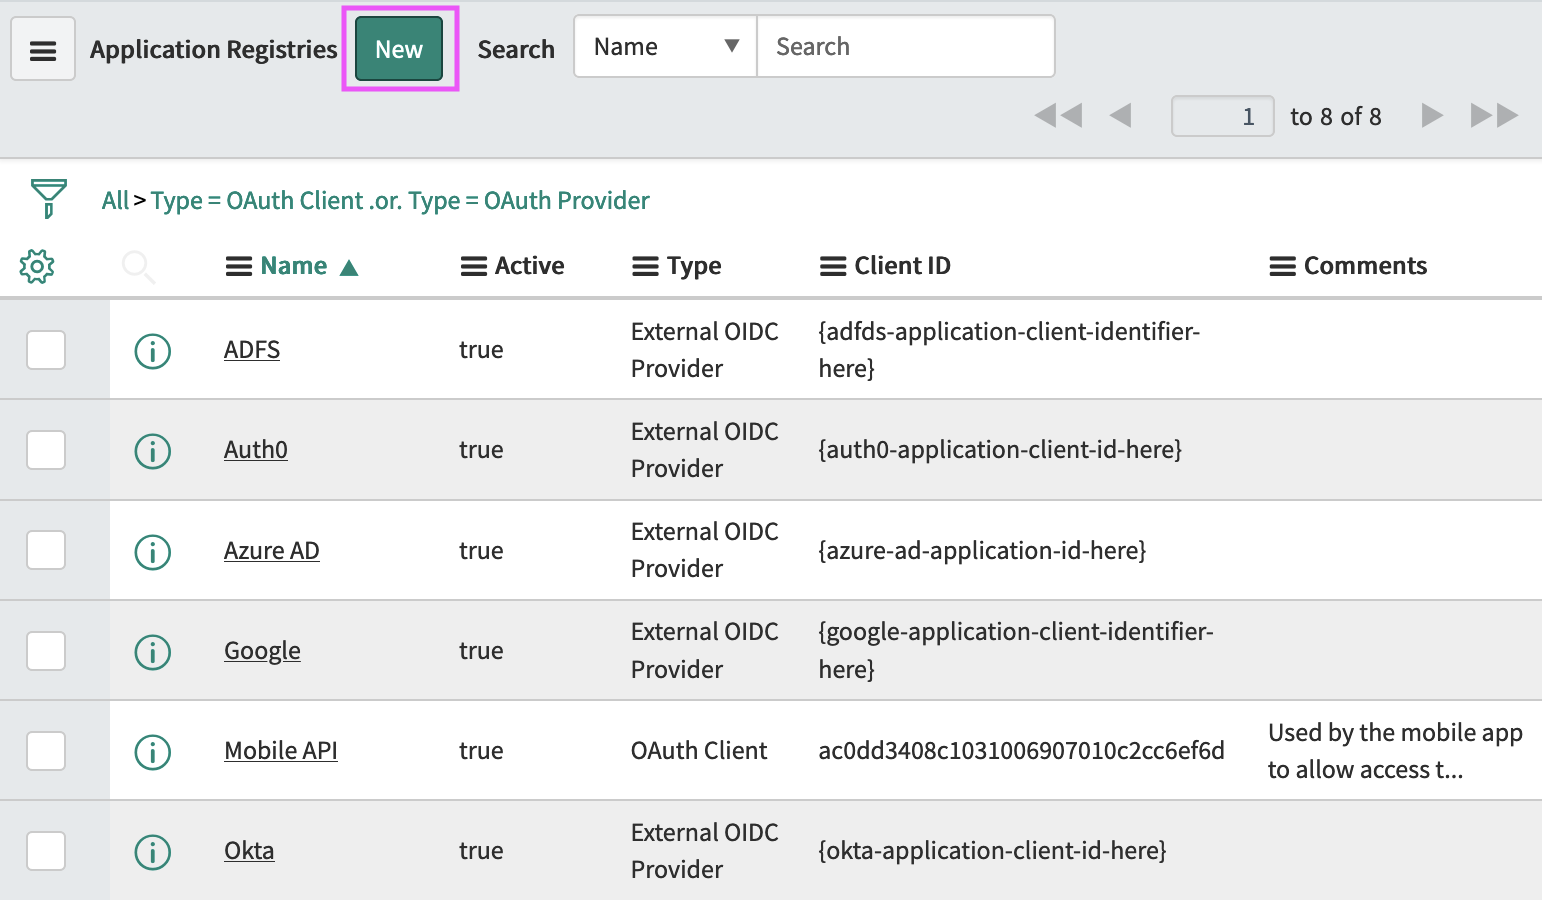
Step 1. Use the search bar on the left-hand side to search for Application Registry:

Step 2. We will need a new application. Click the New button:
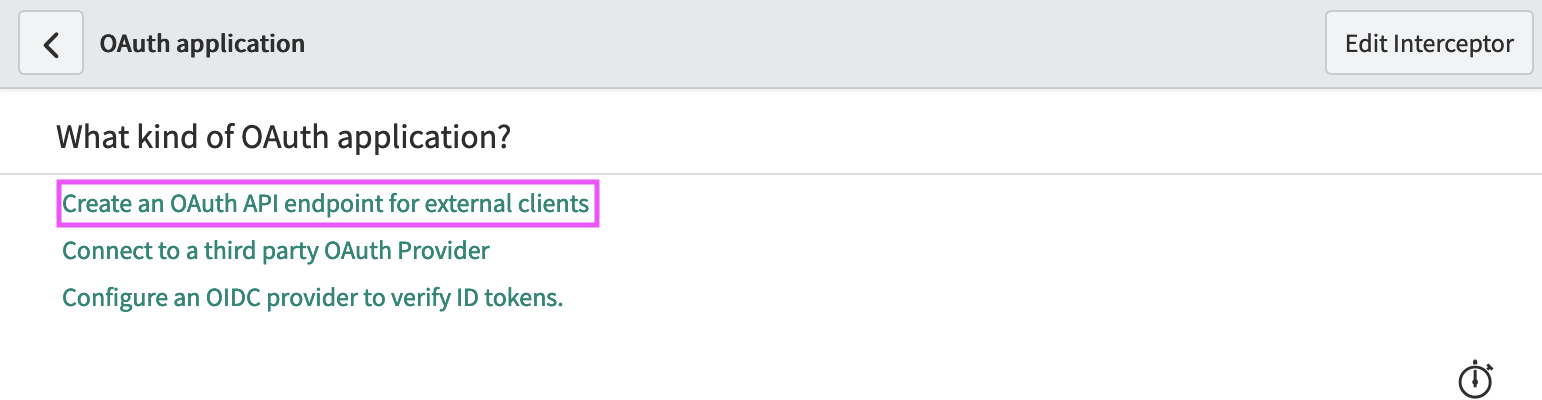
Step 3. A trio of text links appears. Select Create an OAuth API endpoint for external clients:
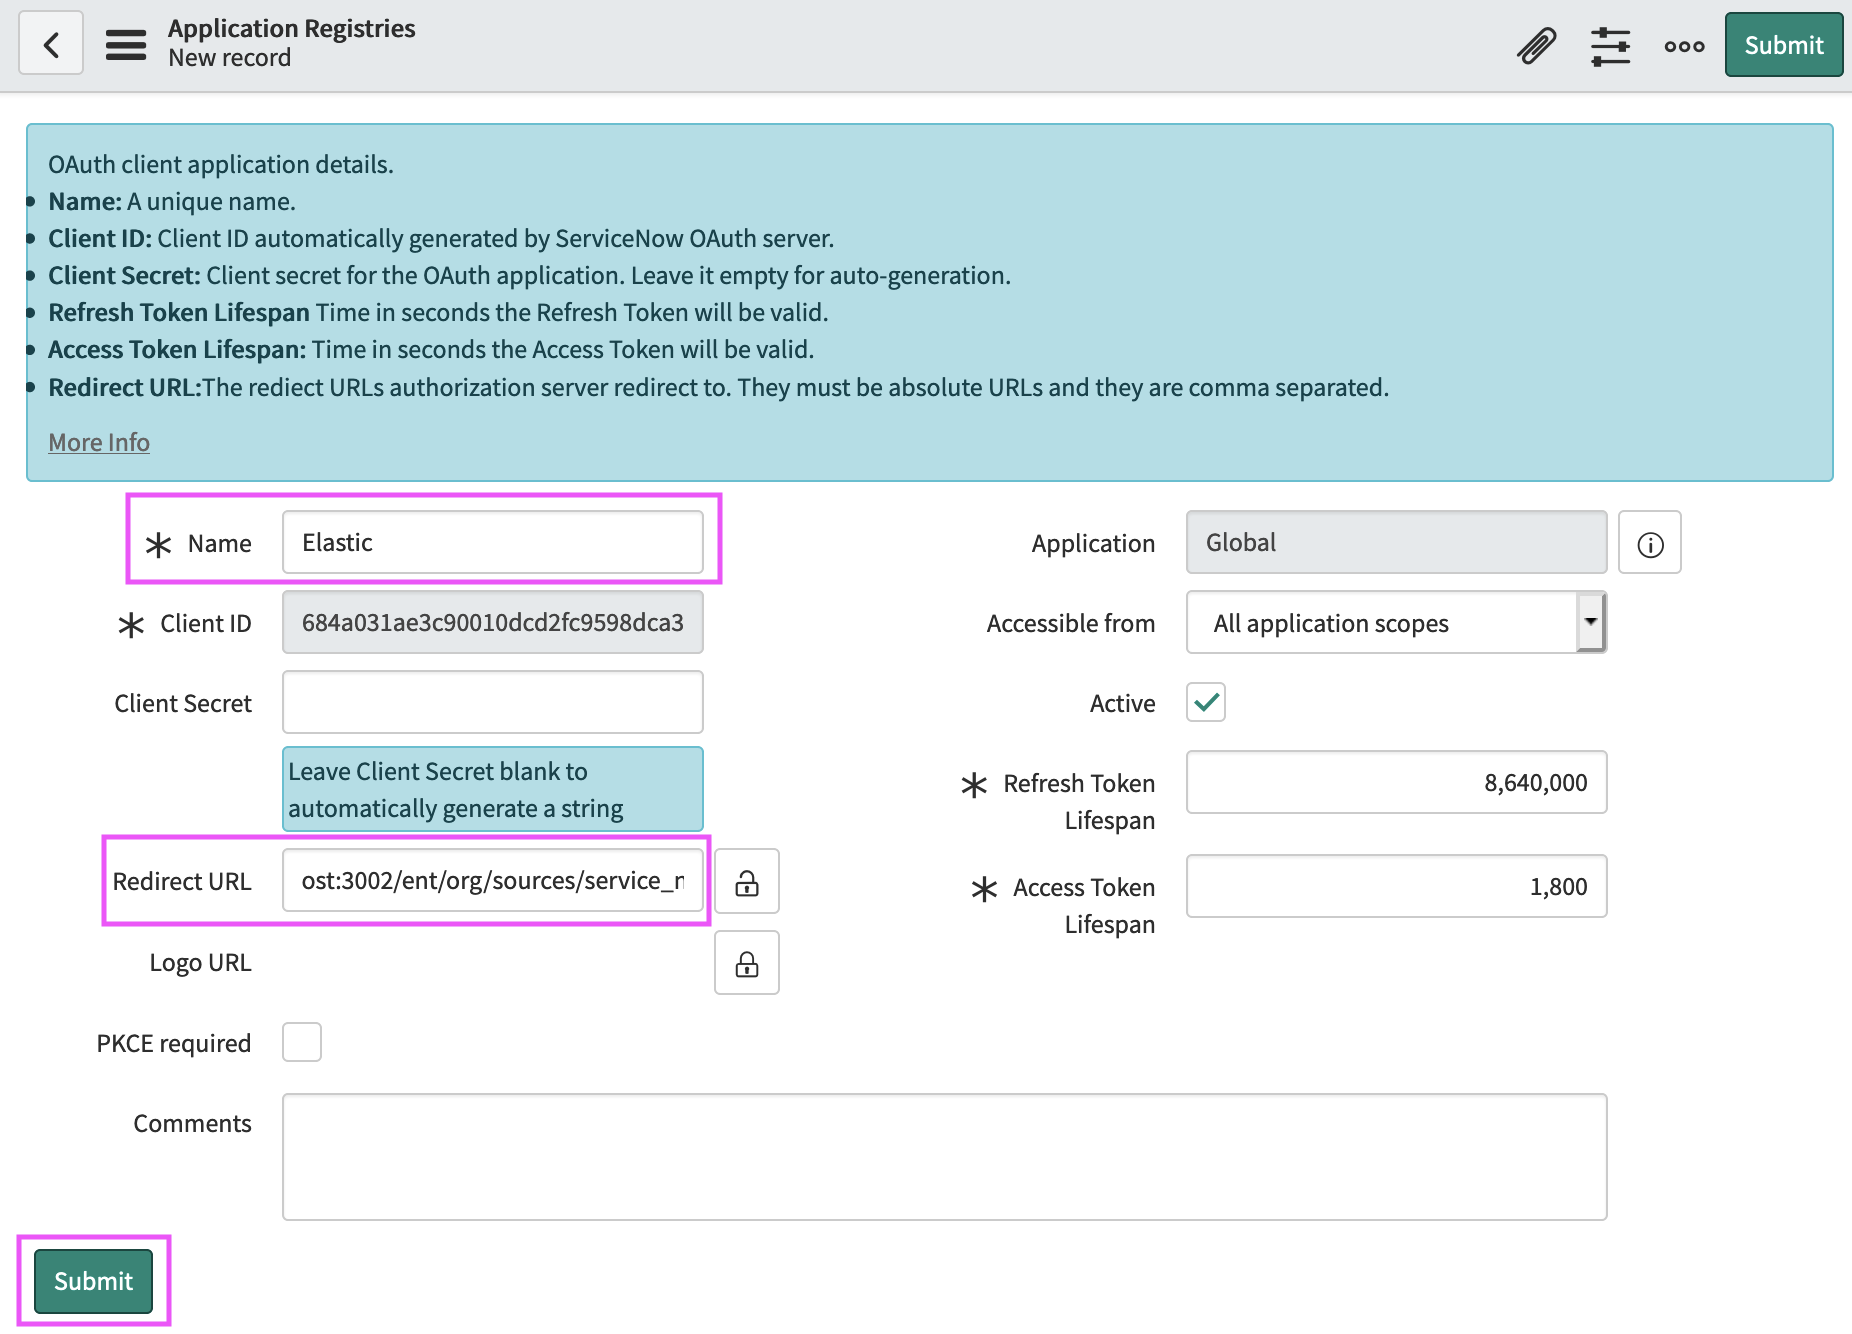
Step 4. Next, provide a name for the application, as well as a redirect URL:
# Important note: the hostname should be relative to the one you have configured.

http://localhost:3002/ws/org/sources/service_now/create
Step 5. Once the information has been properly entered, click Submit:
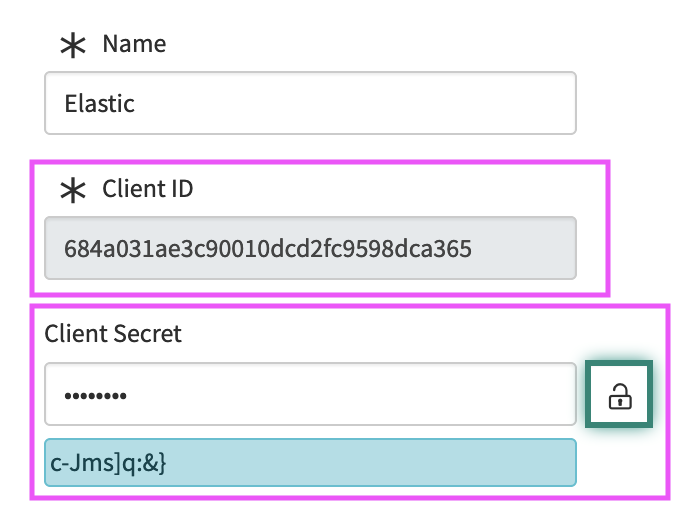
The app is created, and we may now retrieve the Client ID and Client Secret. Find your app within the list and access it:
Step 6. From the Workplace Search administrative dashboard’s Sources area, locate ServiceNow and provide both the Client ID and Client Secret. Voilà! The ServiceNow connector is now configured, and ready to be used to synchronize content. In order to capture data, you must now connect a ServiceNow instance with the adequate authentication credentials.
Connecting ServiceNow to Workplace Search
editOnce the ServiceNow connector has been configured, you may connect a ServiceNow instance to your organization.
Step 1. Head to your organization’s Workplace Search administrative dashboard, and locate the Sources tab.
Step 2. Click Add a new source.
Step 3. Select ServiceNow in the Configured Sources list, and follow the ServiceNow authentication flow as presented.
Step 4. Upon the successful authentication flow, you will be redirected to Workplace Search, and your organization’s ServiceNow content will now be captured and will be ready for search gradually as it is synced. Once successfully configured and connected, the ServiceNow synchronization automatically occurs every 2 hours.