Investigating events in Timeline
editInvestigating events in Timeline
editUse Timeline as your workspace for investigations and threat hunting. Data from multiple indices can be added to a Timeline, which enables investigating complex threats.
You can drag or send items of interest to Timeline to create the query you need
to investigate an alert or event. You can add items from tables and histograms
on the Overview, Detections, Hosts and Network pages, as well as from
within a Timeline itself. Additionally, you can add a query directly in Timeline
(click + Add field).

Timelines are responsive, and they persist as you move through the Elastic Security app collecting data. Auto-saving ensures that the results of your investigation are available for review by other analysts and incident response teams. To record and share your findings with others, attach your Timeline to a case.
An untitled Timeline is saved as a draft. To attach a Timeline to a case, you must give it a title.
In addition to Timelines, you can create and attach Timeline templates to detection rules. Timeline templates allow you to define the source event fields used when you investigate a detections alert in Timeline. You can select whether the fields use predefined values or values retrieved from the alert. For more information, see About Timeline templates.
View and refine Timeline results
editUsing the drop-down options by the KQL bar, you can select whether alerts, other raw events, or both are displayed in the Timeline.
Configure Timeline event context and display
editMany events in Timeline are presented in easy-to-follow rendered views that include relevant contextual information. These views are called Event Renderers, and they can be configured via the Settings icon in the upper left corner of the result’s pane:
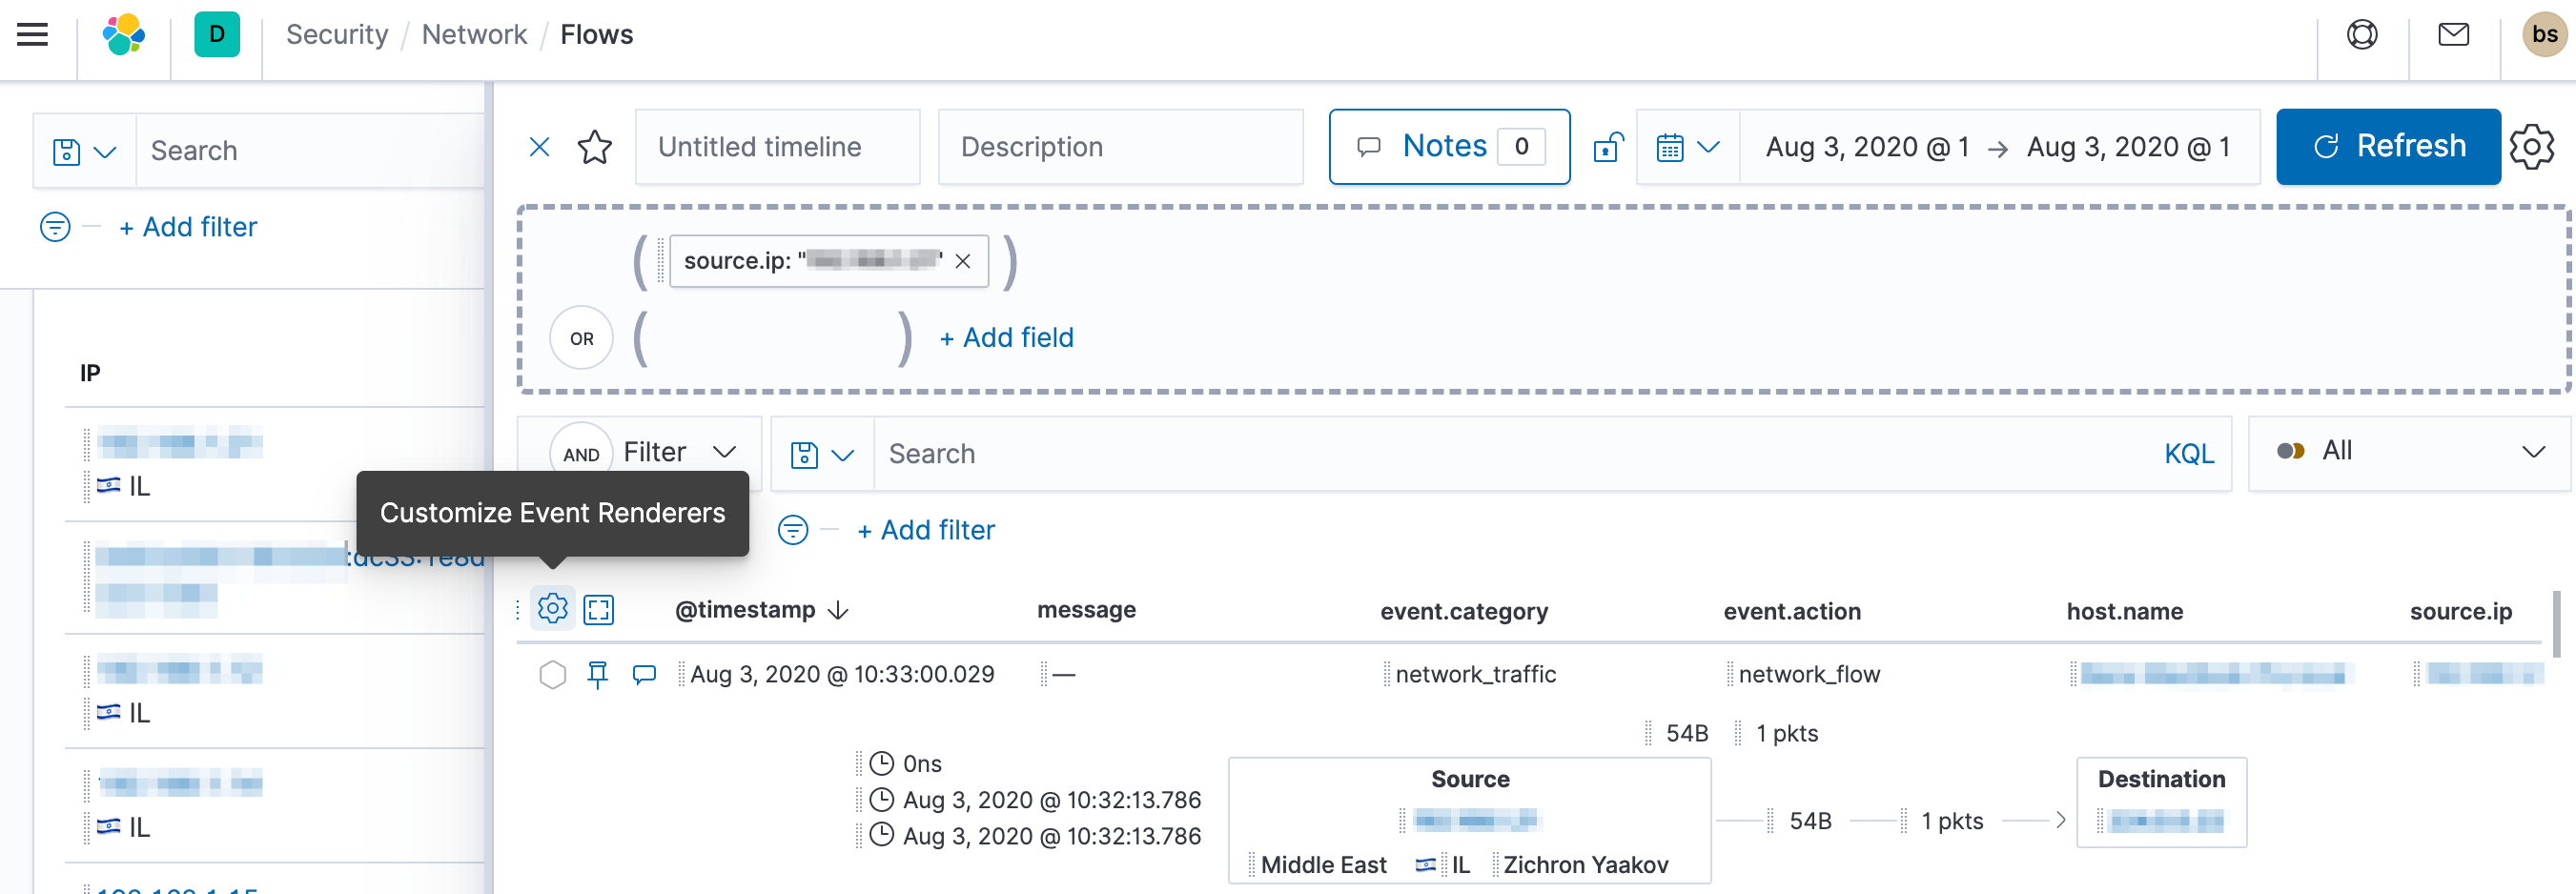
The example above displays a flow event renderer. If you see a particular item that interests you, you can drag it to the dropzone for further investigation.
Other display options include:
- View in full screen mode
- Add, remove, reorder, and resize columns
- Add notes to individual events
- Add investigation notes for the entire Timeline
- Pin interesting events in the Timeline
Narrow or expand your query
editYou can specify logical AND and OR operations with an item’s placement in
the drop area. Multiple horizontal filters use AND logic, vertical filters use
OR.
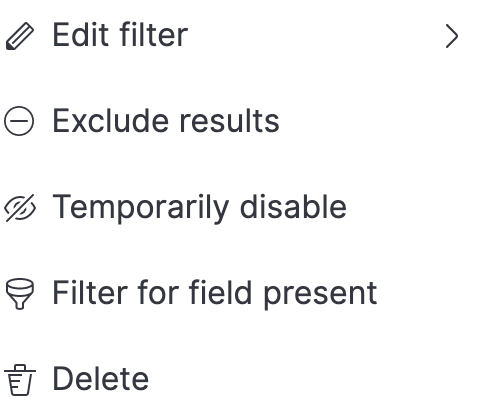
Edit existing filters
editClick a filter to access additional operations such as exclude, temporarily disable, or delete items from the query:
This is how the filters appear in the UI:
- Field with value
-
Filters for events with the specified field value:

- Field exists
-
Filters for events containing the specified field:
- Exclude results
-
Filters for events that do not contain the specified field value (
field with valuefilter) or the specified field (field existsfilter):
- Temporarily disable
-
The filter is not used in the query until it is enabled again:

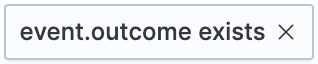
- Filter for field present
-
Converts a
field with valuefilter to afield existsfilter.
When you convert a Timeline template to a Timeline, some fields may be disabled. For more information, see Timeline template legend.
Attach Timeline to a case
editTo attach a Timeline to a new or existing case, click the Settings in the upper right corner, and then select one of these:
- Attach timeline to new case
- Attach timeline to existing case
For more information about cases, see Cases.
Manage existing Timelines
editYou can view, duplicate, delete, and create templates from existing Timelines:
- Go to Security → Timelines.
-
Click the All actions icon in the relevant row, and then select the action:
- Create template from timeline (see About Timeline templates)
- Duplicate timeline
- Delete timeline
To perform the same action on multiple Timelines, select Timelines and then the required action from the Bulk actions menu.
Export and import Timelines
editYou can import and export Timelines, which enables importing Timelines from one Kibana space or instance to another. Exported Timelines are saved in an ndjson` file.
- Go to Security → Timelines.
-
To export Timelines, do one of the following:
- To export one Timeline, click the All actions icon in the relevant row and then select Export selected.
- To export multiple Timelines, select all the required Timelines and then click Bulk actions → Export selected.
-
To import Timelines, click Import Timeline and then select or drap-and-drop the Timeline
ndjsonfile.Each Timeline object in the file must be represented in a single line. Multiple Timeline objects are delimited with newlines.