Configure and install Elastic Endpoint Integration (beta)
editConfigure and install Elastic Endpoint Integration (beta)
editThis functionality is in beta and is subject to change. The design and code is less mature than official GA features and is being provided as-is with no warranties. Beta features are not subject to the support SLA of official GA features.
Like other Elastic integrations, Elastic Endpoint Security can be integrated into the Elastic Agent through Ingest Manager. Upon configuration, the integration allows the Elastic Agent to monitor for events on your host and send data to the Elastic Security app.
Configuring the Endpoint Integration on the Elastic Agent requires that the user have permission to use Ingest Manager in Kibana.
Before you begin
editIf you’re using the Elastic Agent on macOS Mojave (10.14) or later, ensure that you have enabled Full Disk Access. Lastly, review the Elastic Security system requirements.
Add Elastic Security integration
edit-
In Kibana, select Security > Administration. If this is not your first time using Elastic Security, select Ingest Manager > Integrations and search for "Elastic Endpoint Security".
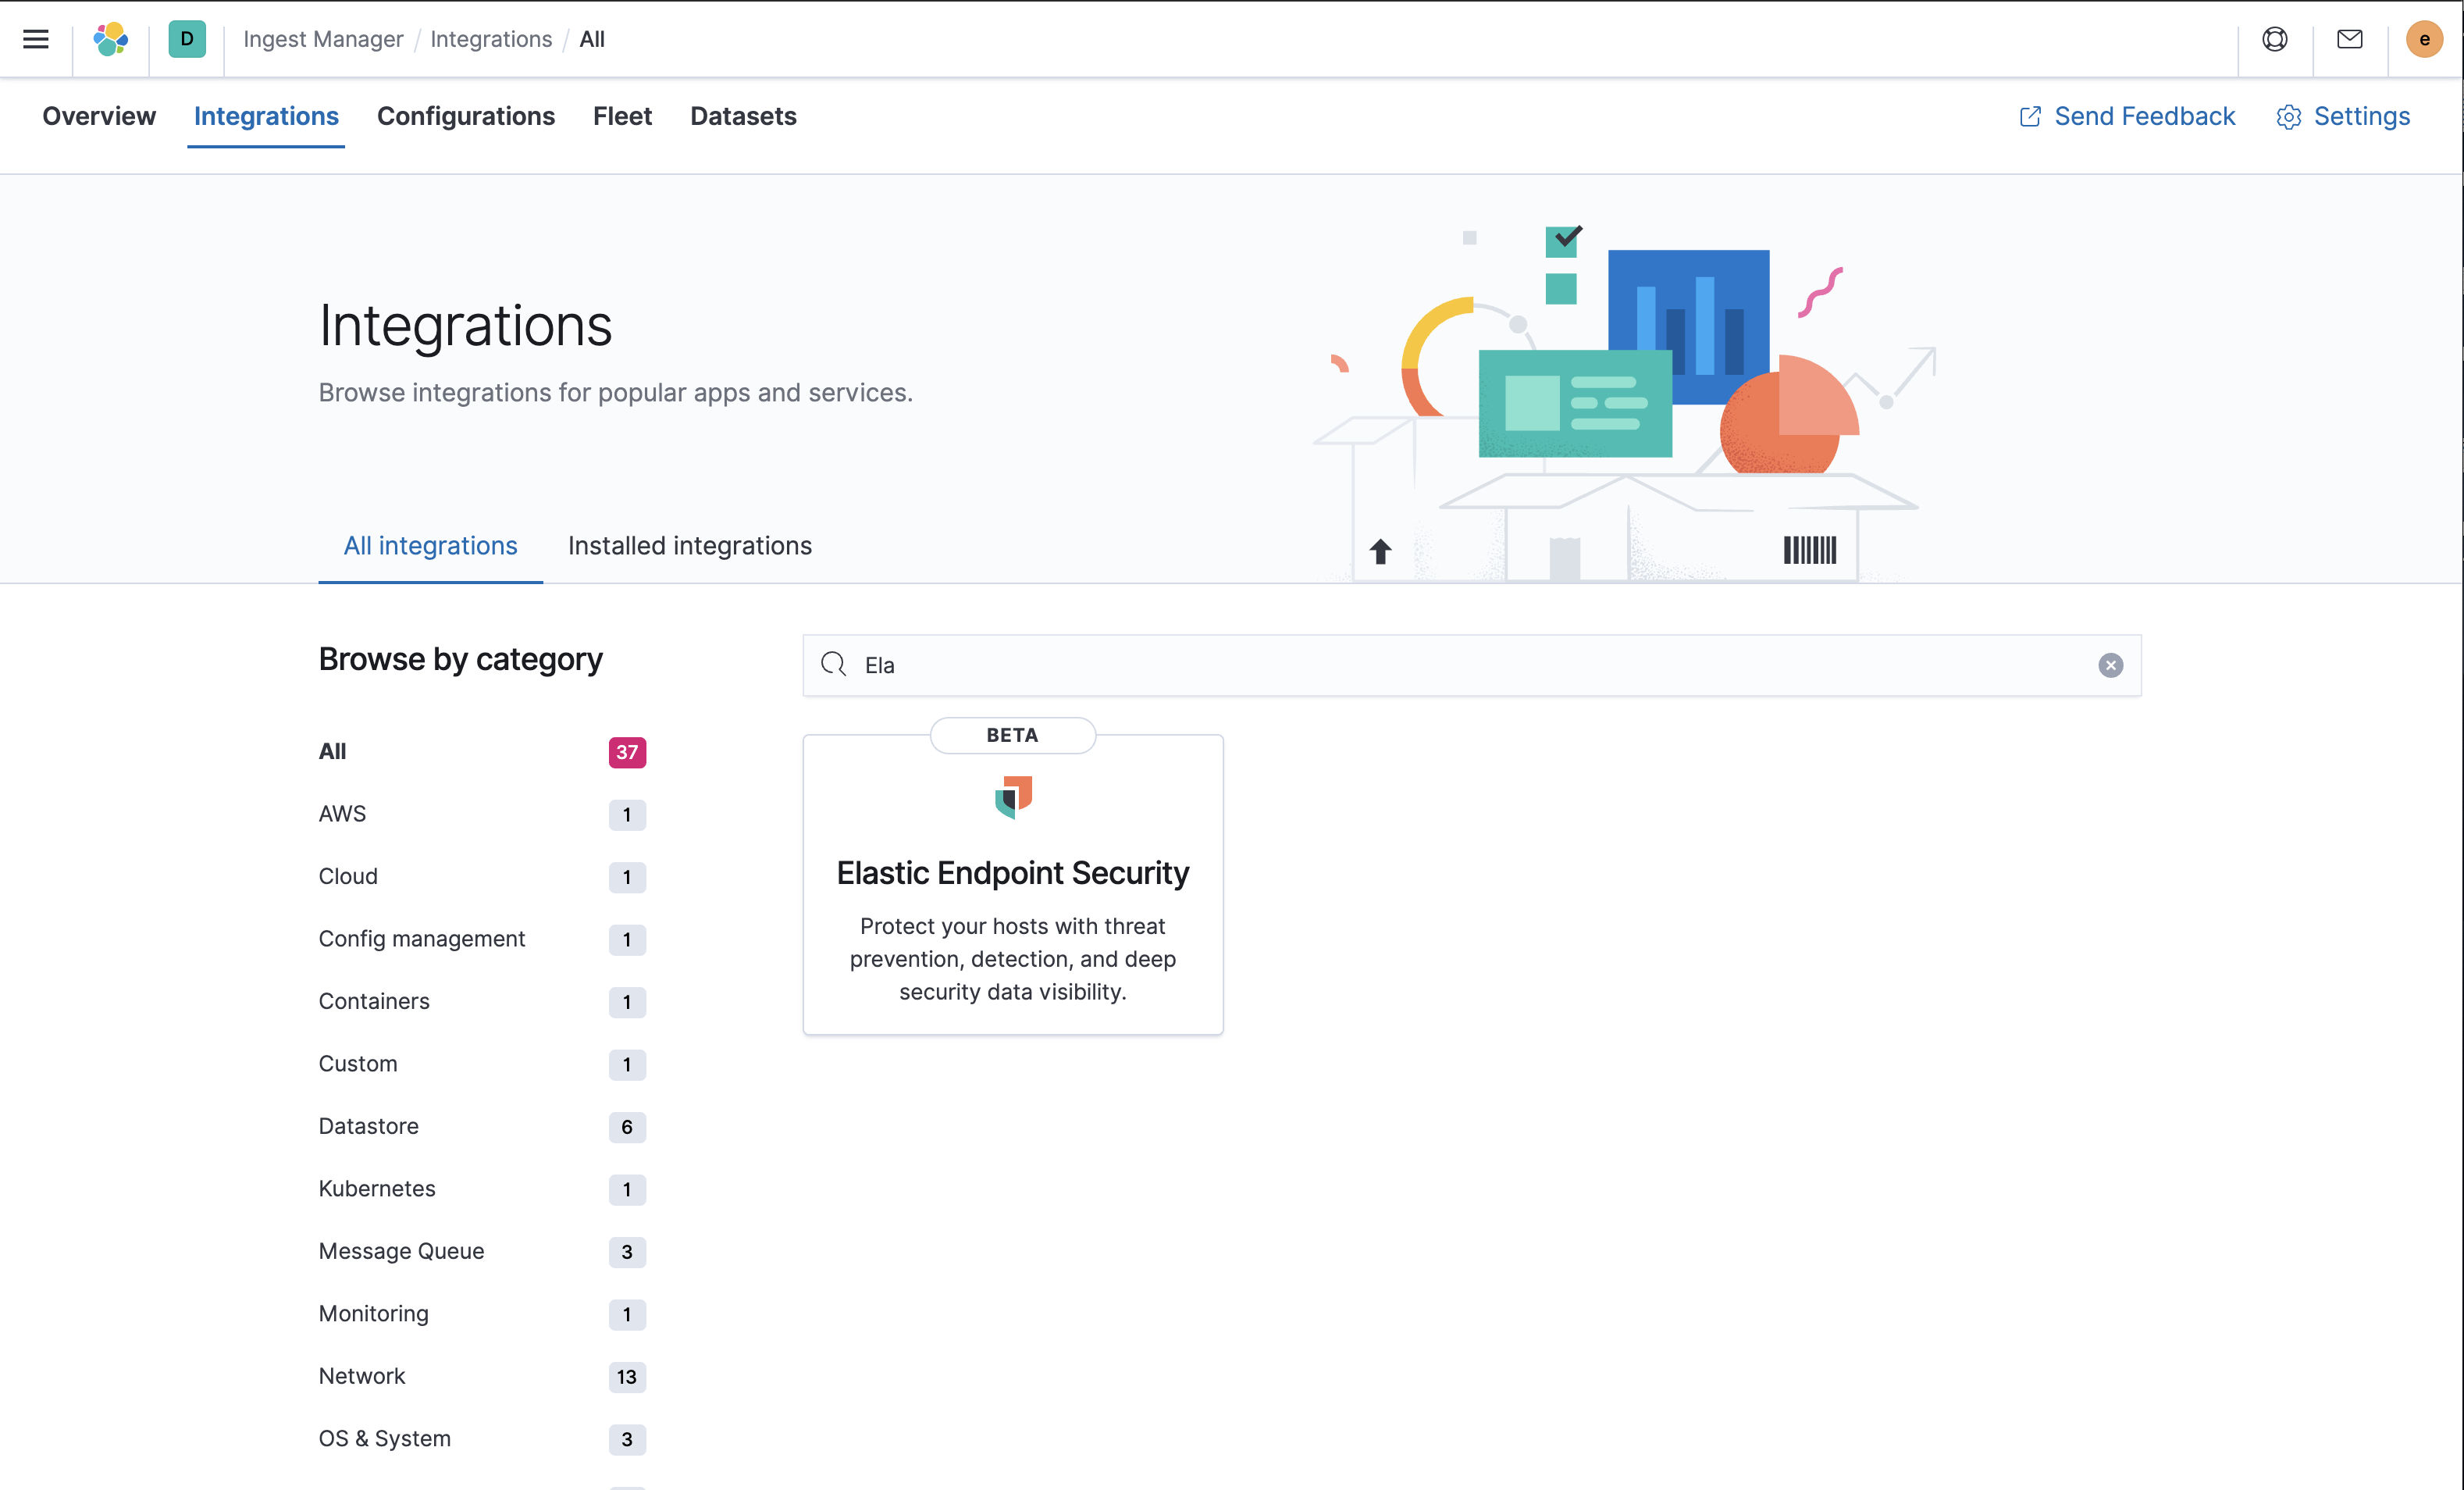
- On the Administration page of the security app or the Elastic Endpoint Security integration page in Ingest Manager, select Add Endpoint Security. The integration configuration page appears.
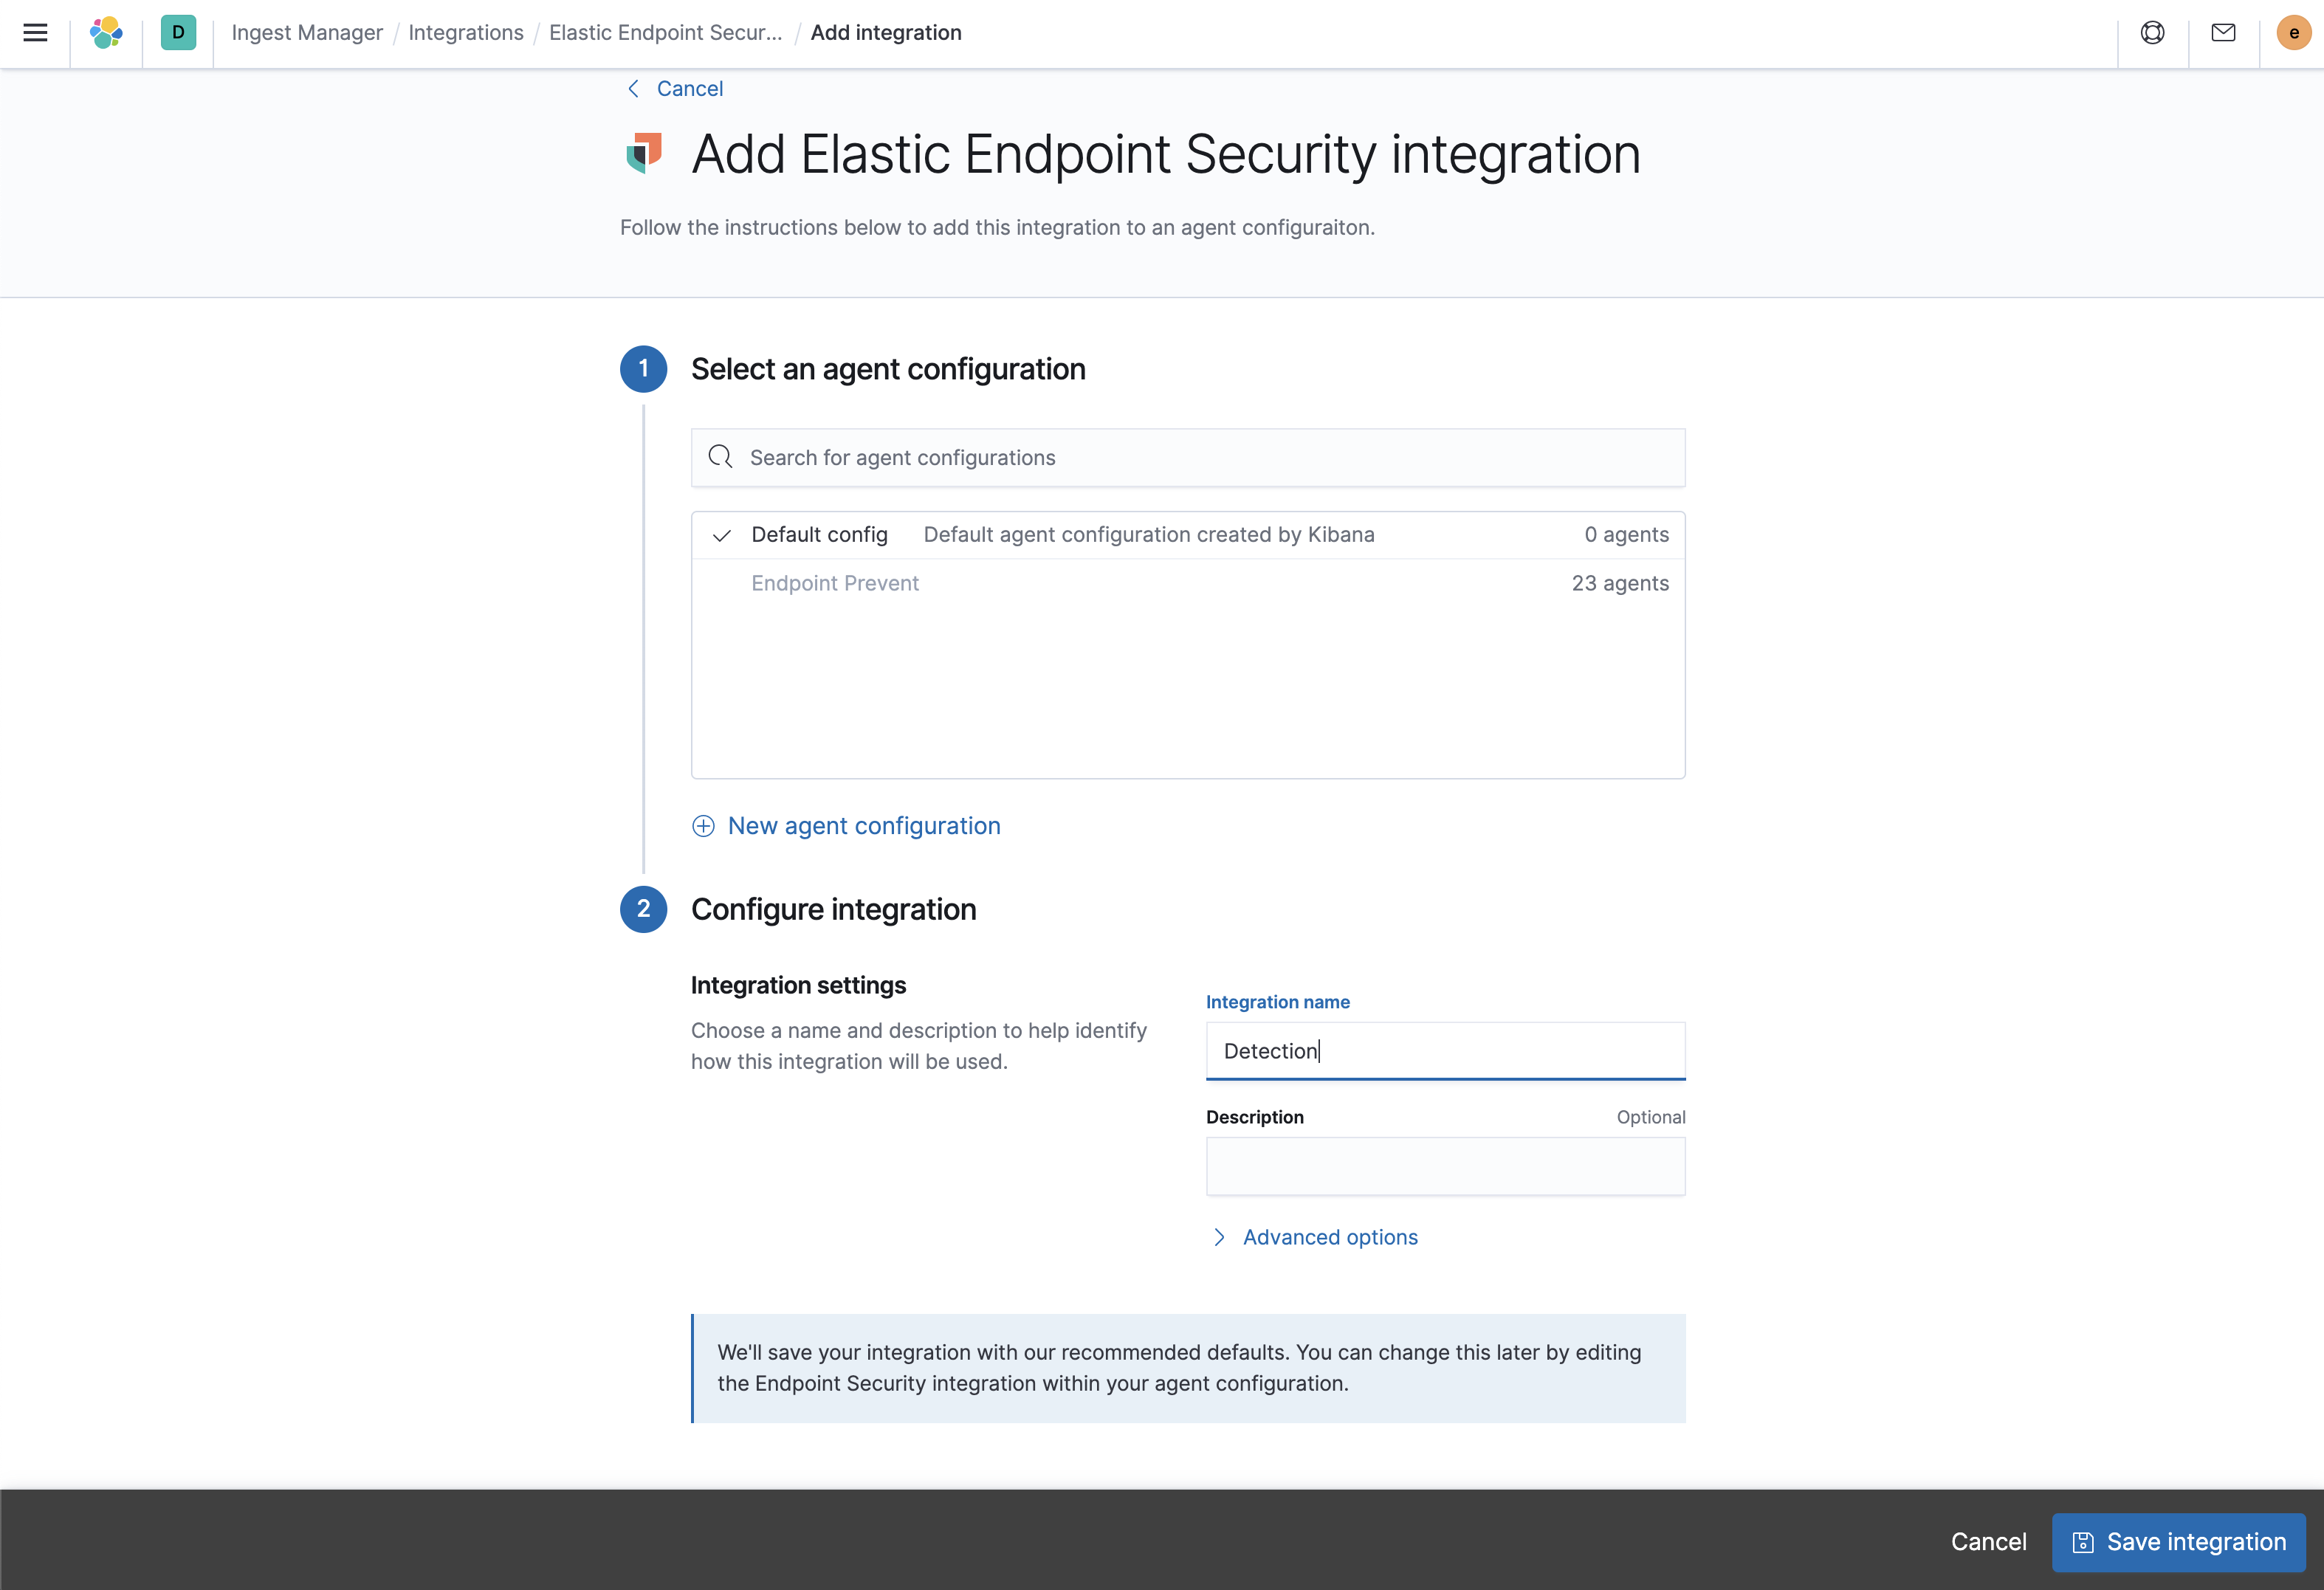
- Select a configuration for the Elastic Agent. You can use either the Default config, or adds security integration to a custom or existing configuration. For more details on Elastic Agent configuration settings, see Configuration settings.
-
Configure the Elastic Endpoint Security integration with a name and optional description. When done configuring, select Save integration. Kibana redirects you back to the administration section of the security app.
- On the Enable Elastic Endpoint Security on your Agent’s page, select the name of your new integration. To enroll your Agents with Endpoint Security, select Enroll Agent.
- Kibana redirects you back to Ingest manager to add the Elastic Agent to your host.
Configure and enroll Elastic Agent
editWhen integrating with the Elastic Agent, Elastic Endpoint Security requires enrollment through Fleet to enable the integration.
Elastic Endpoint Security cannot be integrated with an Elastic Agent in Standalone mode.
-
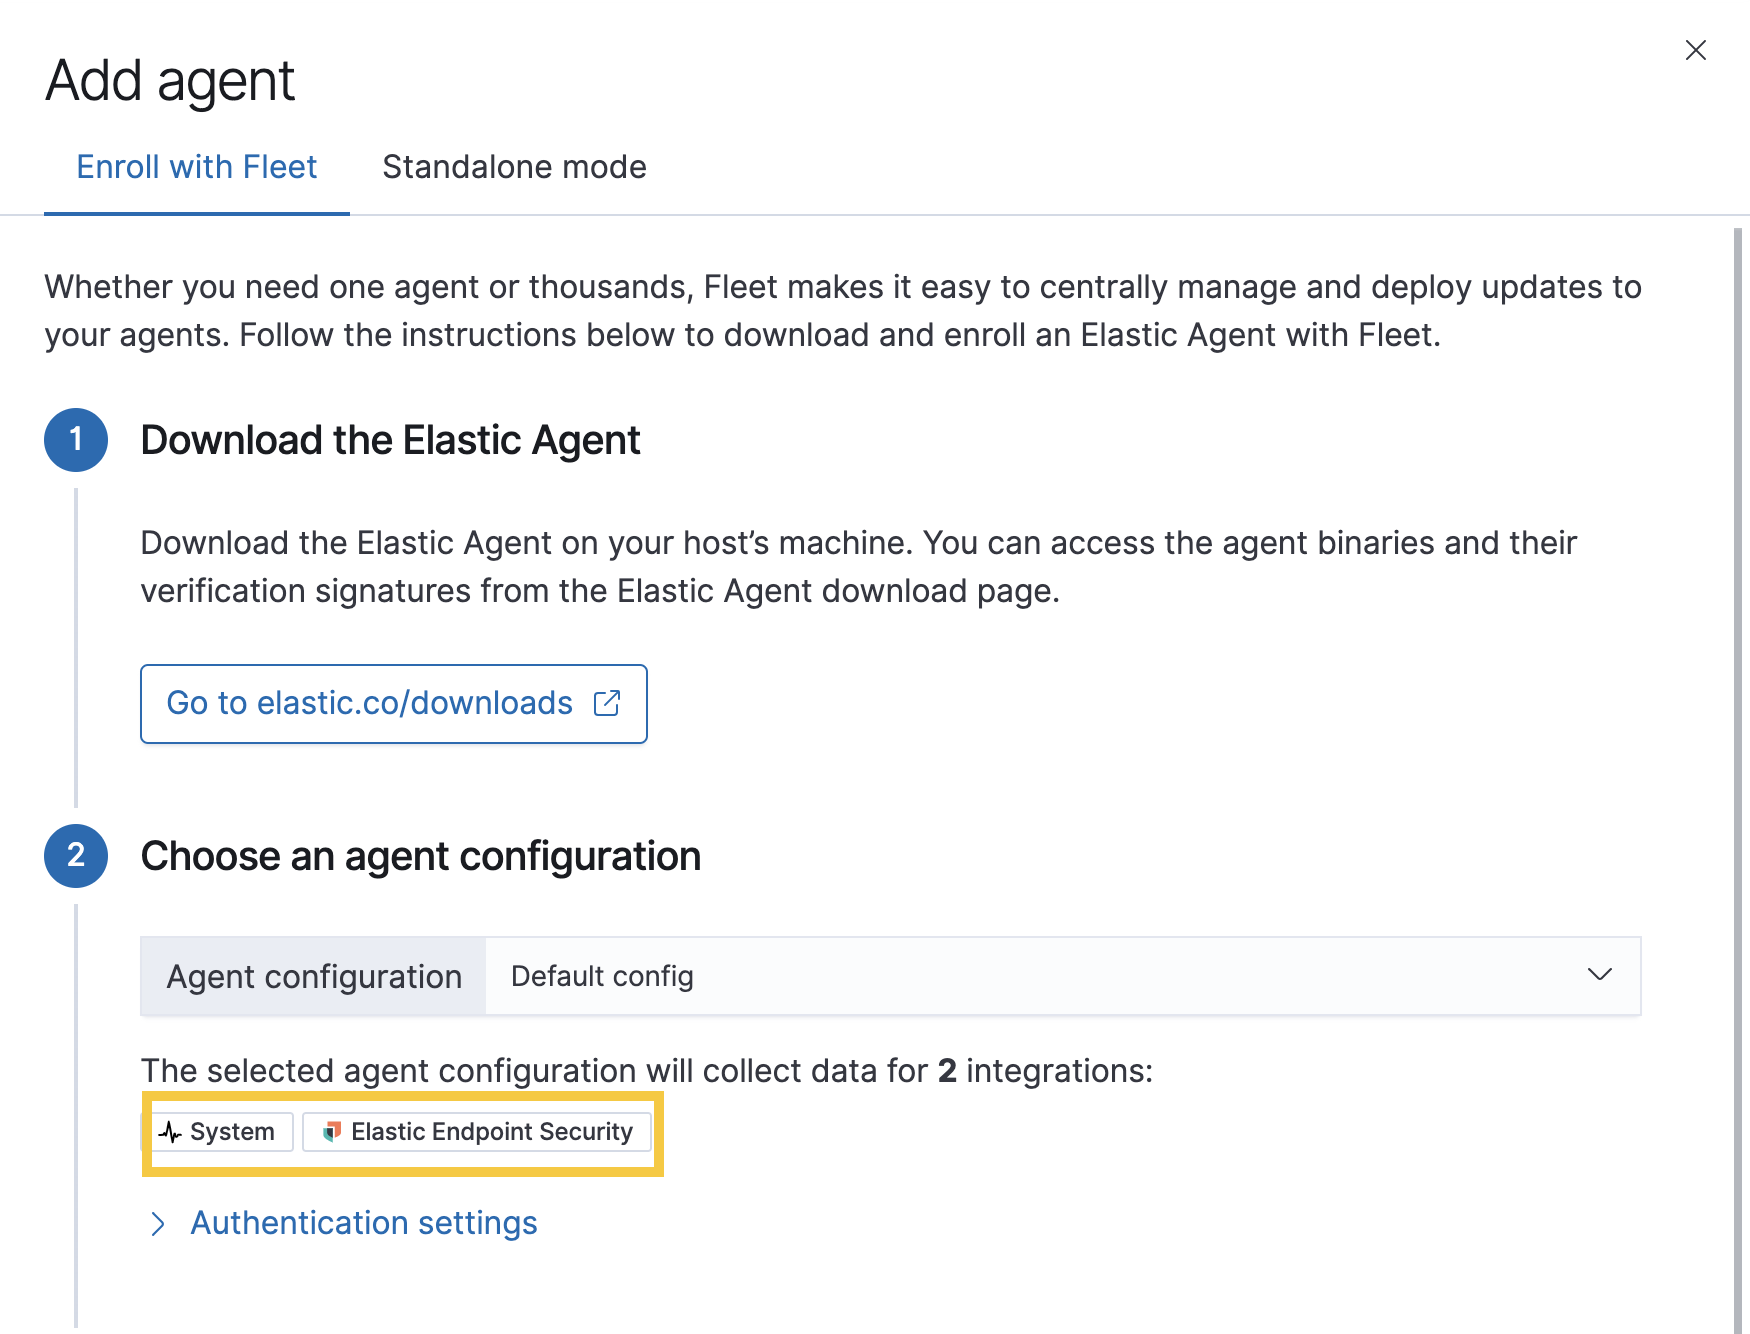
Go to Ingest Manager. Select Overview > Add agent.
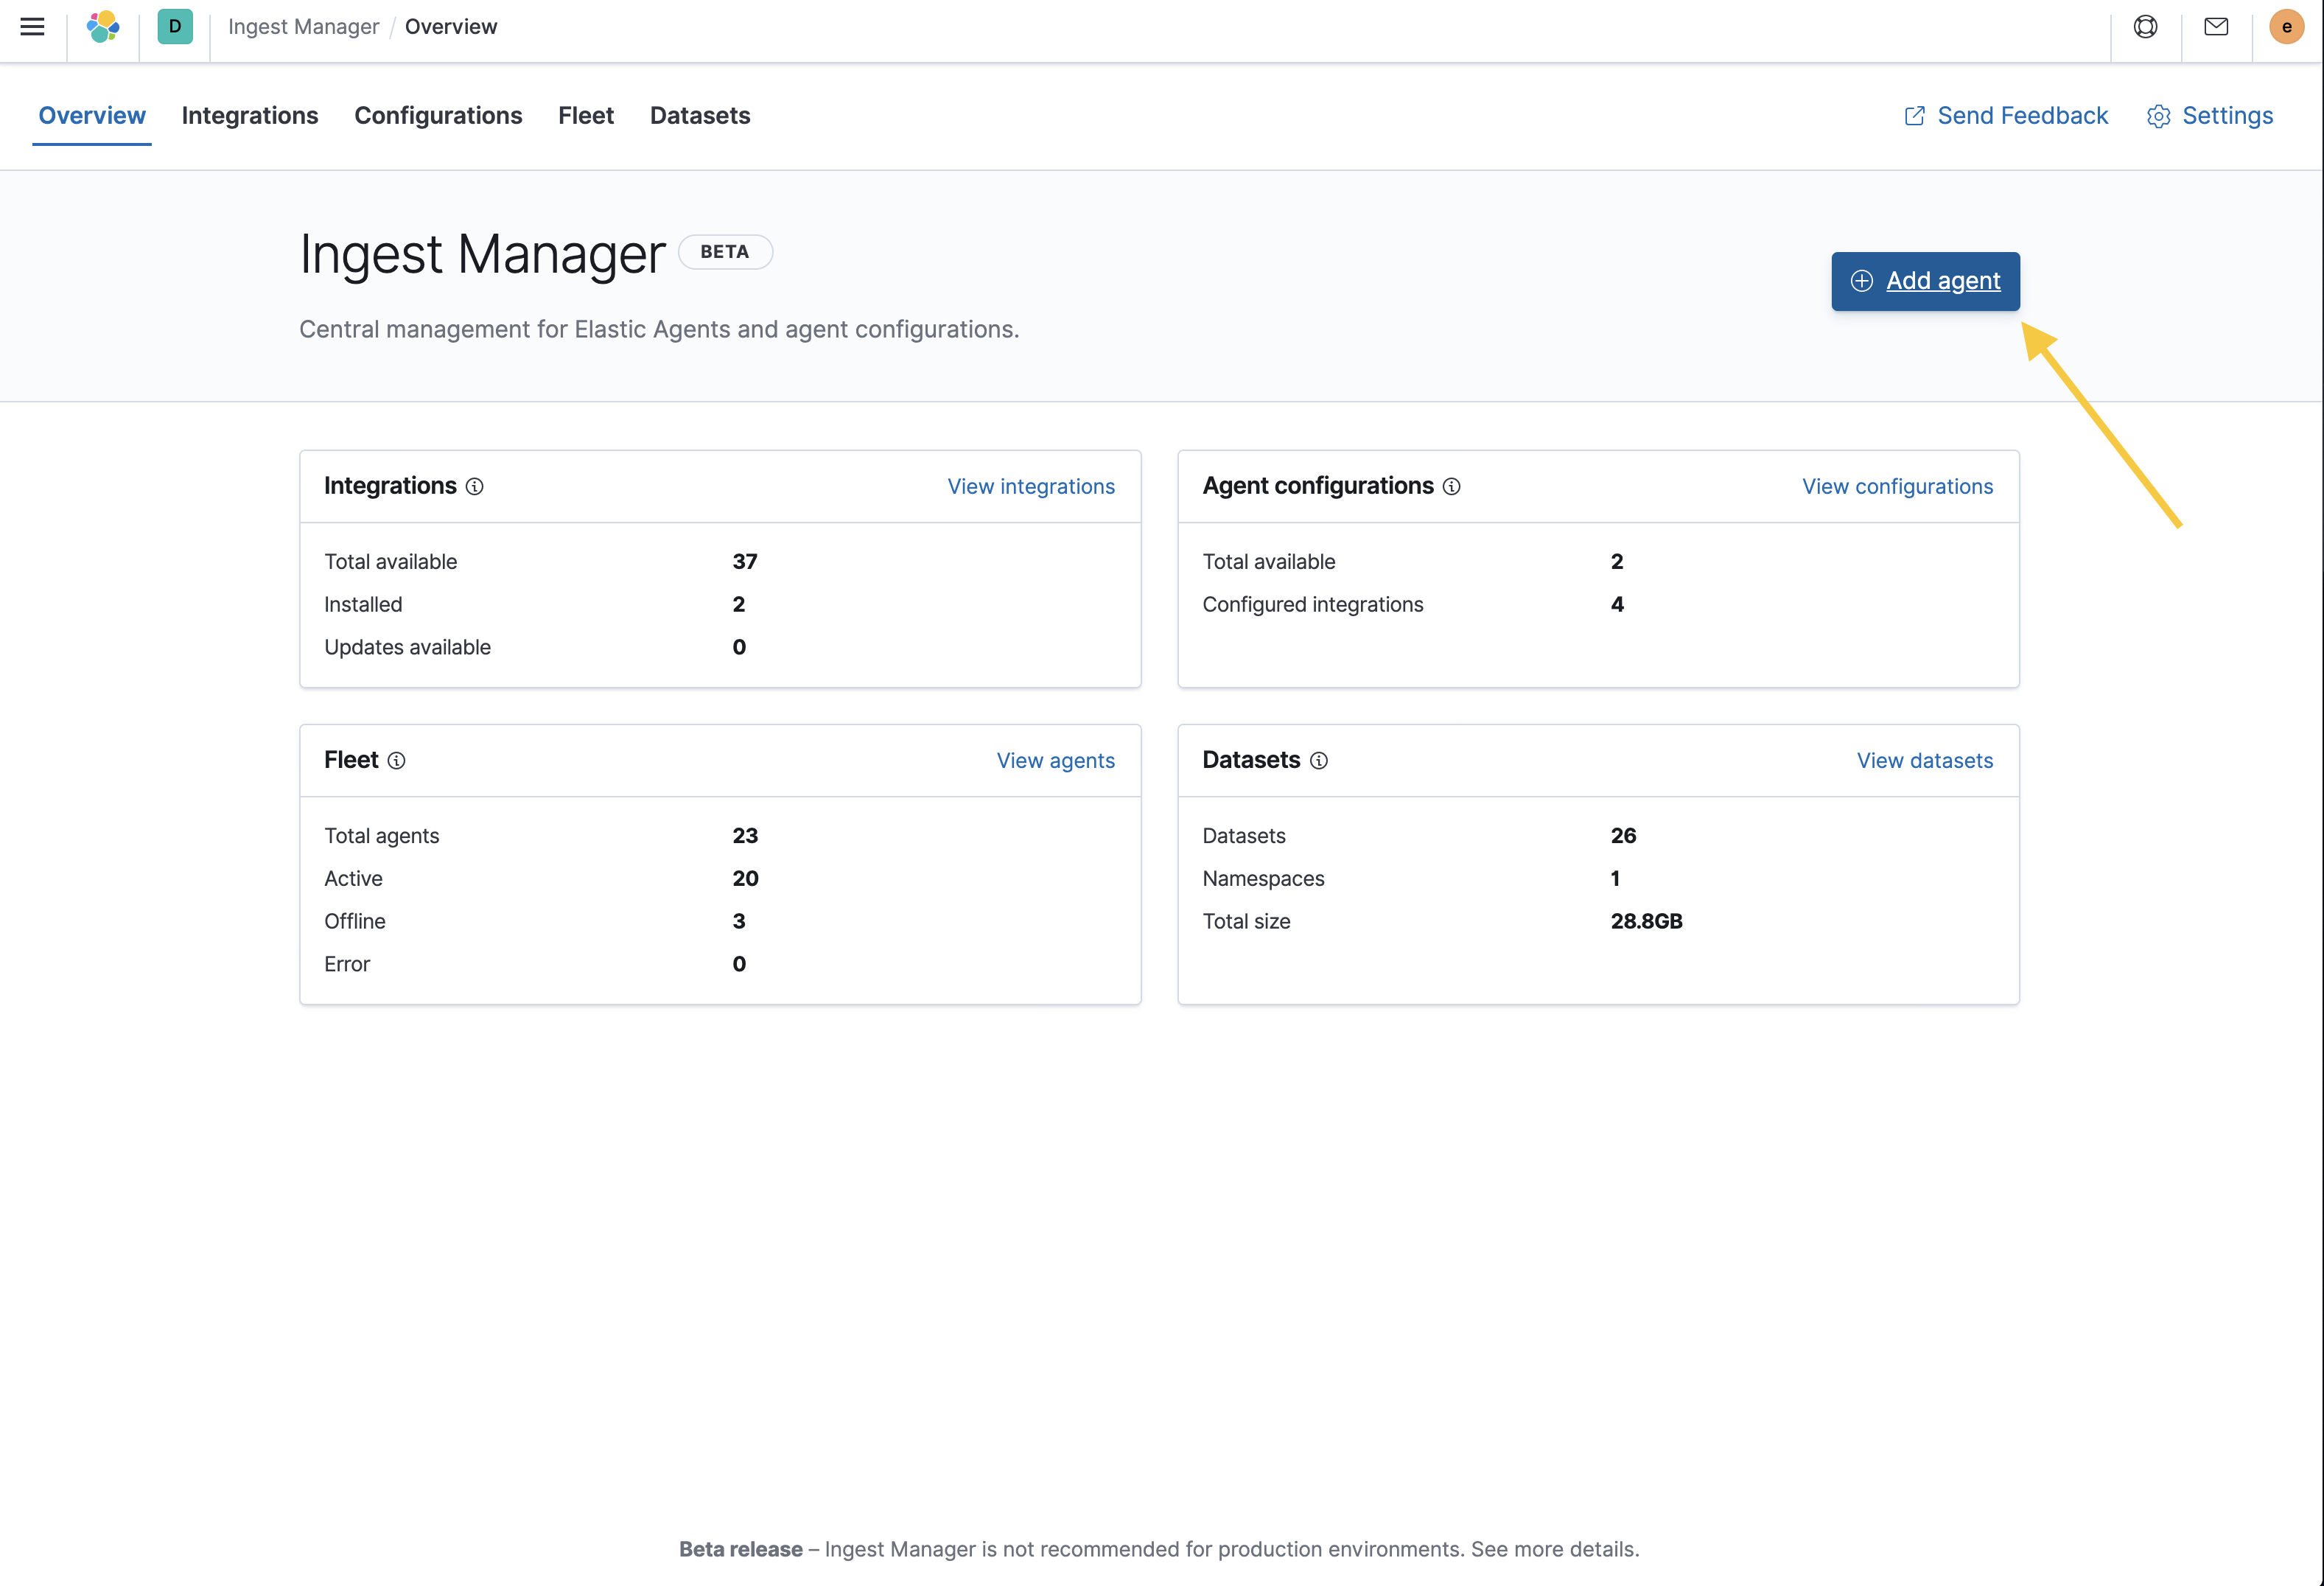
- In the Add agent pane of the Configurations section, download the Elastic Agent on your host’s machine.
-
After the download is complete, select an agent configuration. The selected integrations should include Elastic Endpoint Security.
- After the Elastic Agent is installed on your host machine, open a command-line interface, and navigate to your Agent’s directory. Copy the commands from Ingest Manager for your OS to enroll and run the Agent.
After you have enrolled the Elastic Agent on your host, select Continue. The host now appears on the Hosts view page inside the Elastic Security app.
To unenroll an agent from your host, see Unenroll Elastic Agent.
Enable Elastic Endpoint kernel
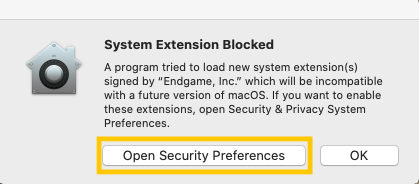
editWhen running the Elastic agent with endpoint integrated on macOS, you might be prompted to approve a kernel extension from "Endgame, Inc". To approve the extension:
JAMF users can approve the Kernel the same way for the Elastic Endgame app.
-
Select Open Security Preferences. The Security and Privacy window opens.
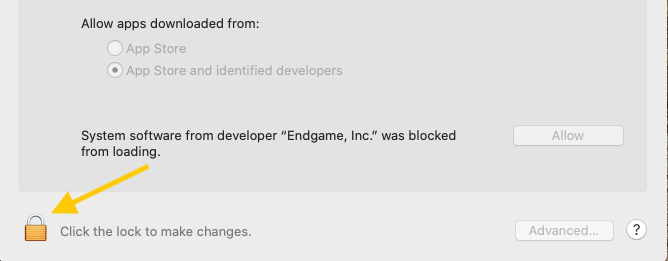
-
Select the Lock icon at the bottom left of the window to make changes to your security settings.
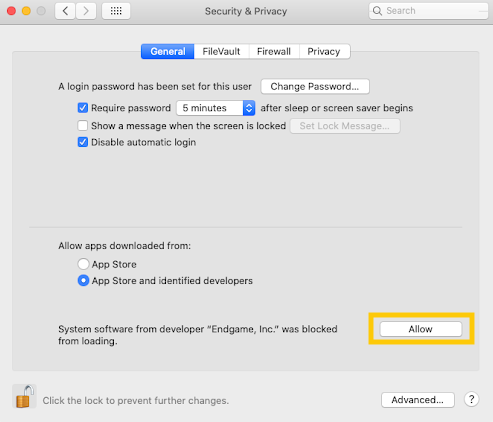
-
Allow "Endgame, Inc" by selecting the Allow button.
If the prompt does not appear when trying to run the Elastic Agent:
- Open a Terminal application.
-
Enter
kextload /Library/Extension/kendpoint.kext. Prepend the command withsudoif necessary. -
Confirm the kernel extension has loaded, enter
kextstat | grep co.elastic.kendpoint. -
You should receive and output similar to
149 0 0xffffff7f82e7b000 0x21000 0x21000 co.elastic.kendpoint (7.9.0) BD152A57-ABD3-370A-BBE8-D15A0FCBD19A <6 5 2 1>.
Configure malware protection settings
editAfter you have installed the agent, malware prevention is automatically enabled on protected hosts. If needed, you can configure malware protection settings to meet your company’s security needs.
- In the security app, select the Admin tab to view the Administration page. Remember that you must have admin permissions in Kibana to access this page.
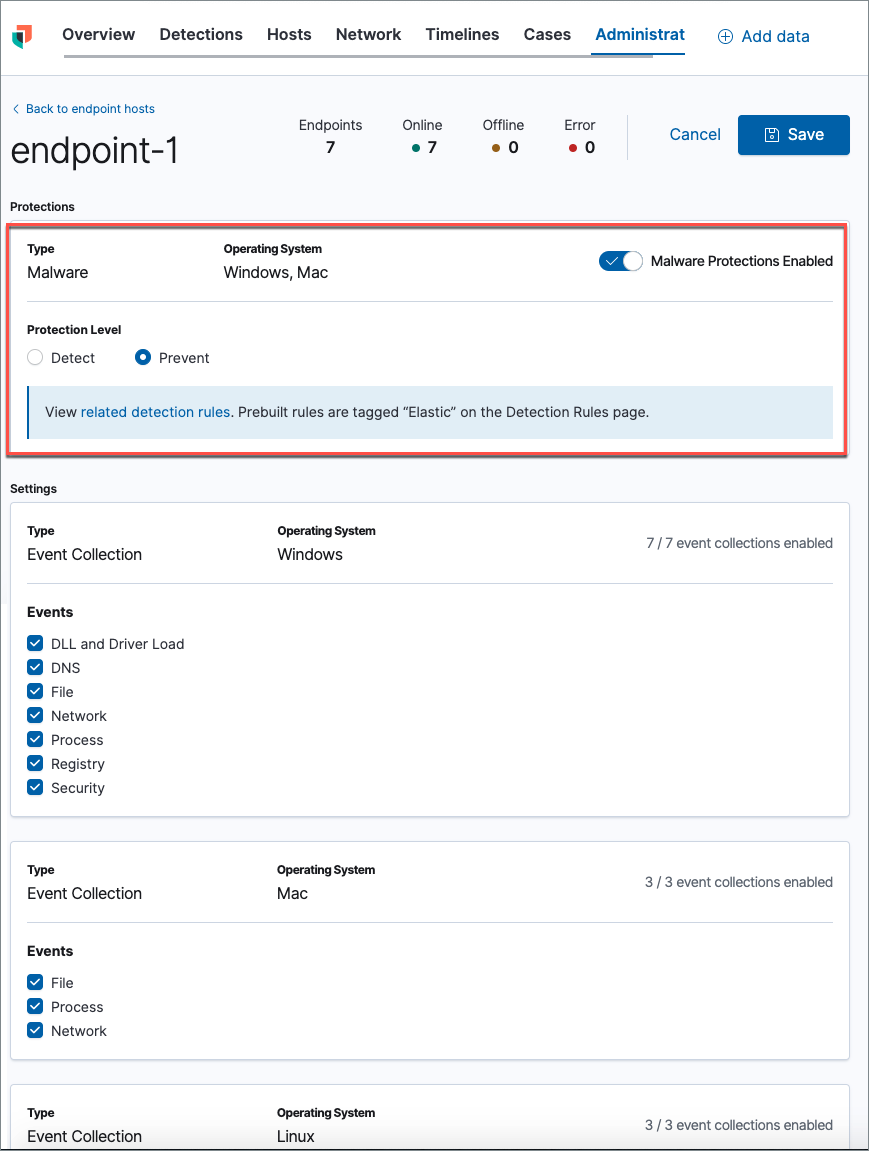
- From the Integration column, select the integration you want to configure. The Host Configuration page appears.
-
By default, the Malware Protection Enabled toggle is on. To disable malware protection, switch the toggle off. Malware protection levels are as follows:
- Detect: Detects malware on the host and generates an alert. When set to detect, the agent will not block malware. You must pay attention to and analyze any malware alerts that are generated.
- Prevent (Default): Detects malware on the host, blocks it from executing, and generates an alert.
- Click Save to save changes to the integration.
- On the dialog box that says, "Saving these changes will apply updates to number endpoints assigned to this agent policy," click Save and Deploy changes. If successful, a "Success" confirmation appears in the lower right corner.