Exploring single metric job results
editExploring single metric job results
editThe machine learning features analyze the input stream of data, model its behavior, and perform analysis based on the detectors you defined in your job. When an event occurs outside of the model, that event is identified as an anomaly.
Result records for each anomaly are stored in .ml-anomalies-* indices in Elasticsearch.
By default, the name of the index where machine learning results are stored is labelled
shared, which corresponds to the .ml-anomalies-shared index.
You can use the Anomaly Explorer or the Single Metric Viewer in Kibana to view the analysis results.
- Anomaly Explorer
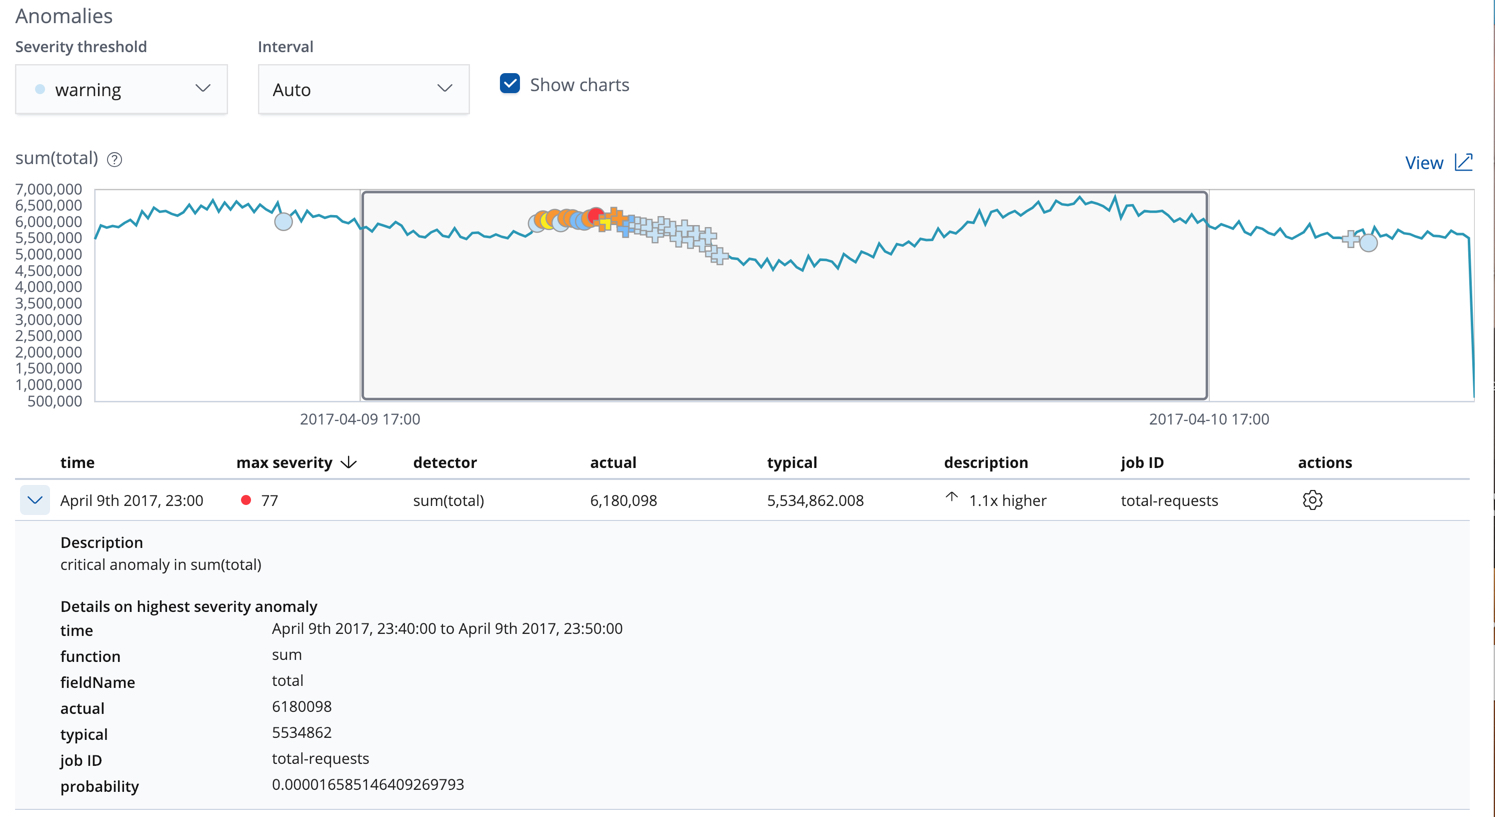
- This view contains swim lanes showing the maximum anomaly score over time. There is an overall swim lane that shows the overall score for the job, and also swim lanes for each influencer. By selecting a block in a swim lane, the anomaly details are displayed alongside the original source data (where applicable).
- Single Metric Viewer
-
This view contains a chart that represents the actual and expected values over
time. This is only available for jobs that analyze a single time series and
where
model_plot_configis enabled. As in the Anomaly Explorer, anomalous data points are shown in different colors depending on their score.
By default when you view the results for a single metric job, the Single Metric Viewer opens:
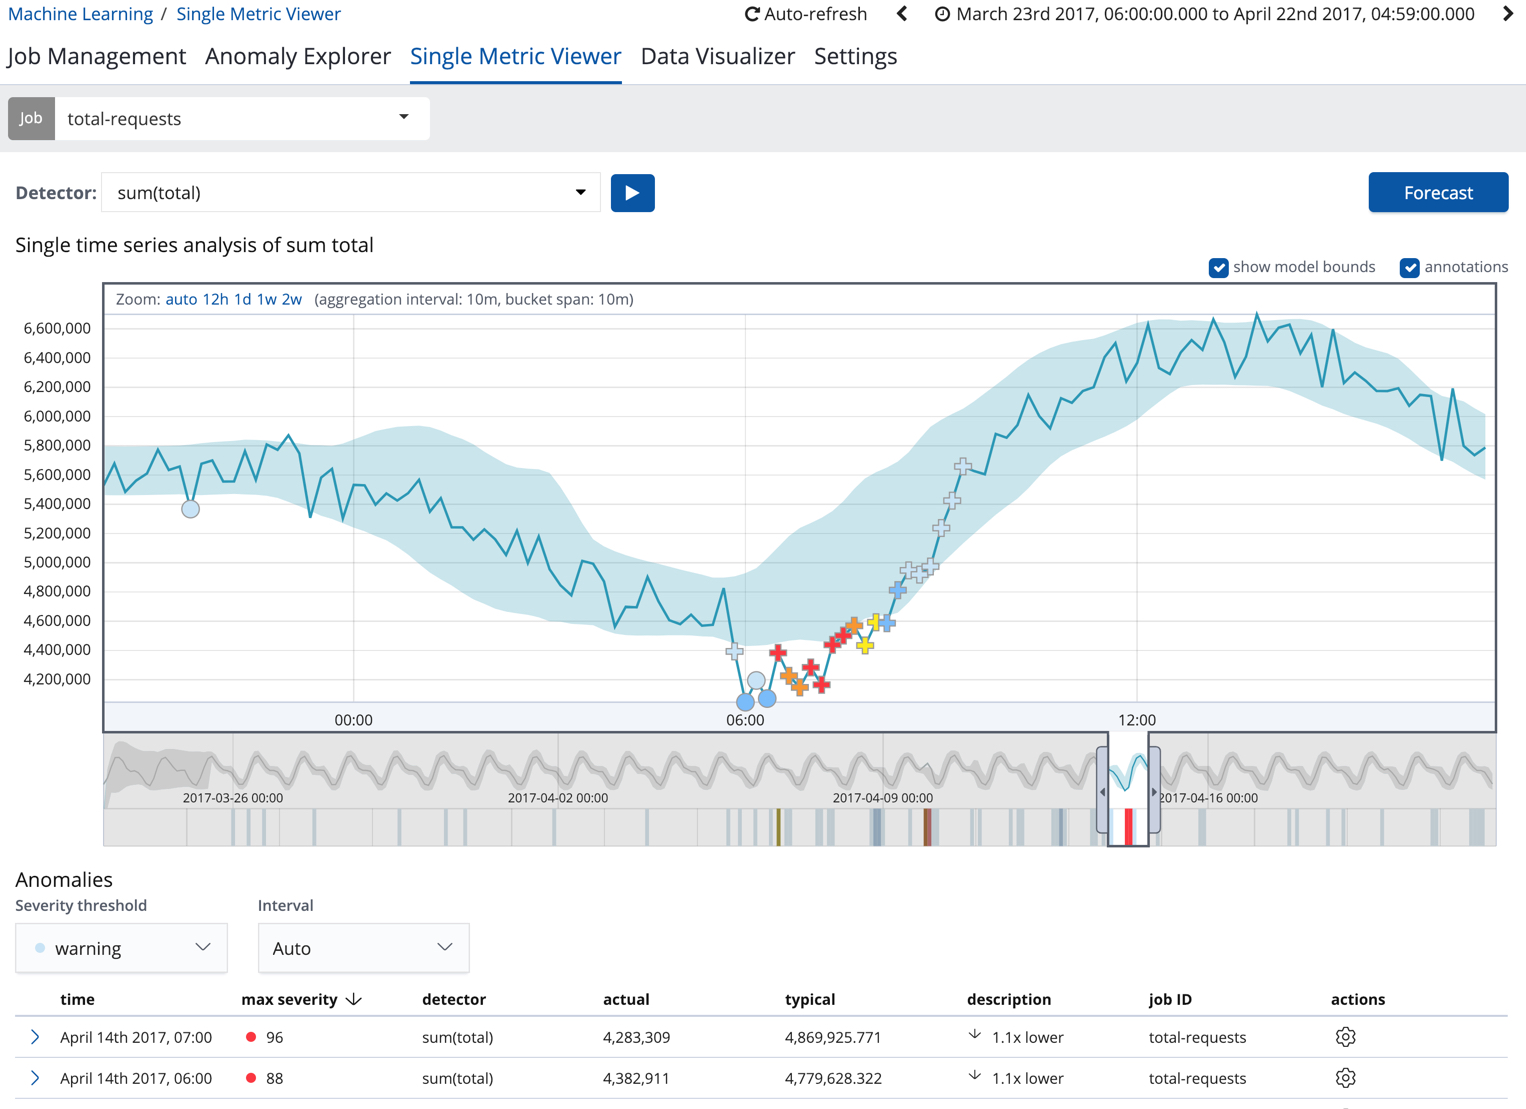
The blue line in the chart represents the actual data values. The shaded blue area represents the bounds for the expected values. The area between the upper and lower bounds are the most likely values for the model. If a value is outside of this area then it can be said to be anomalous.
If you slide the time selector from the beginning of the data to the end of the data, you can see how the model improves as it processes more data. At the beginning, the expected range of values is pretty broad and the model is not capturing the periodicity in the data. But it quickly learns and begins to reflect the daily variation.
Any data points outside the range that was predicted by the model are marked as anomalies. When you have high volumes of real-life data, many anomalies might be found. These vary in probability from very likely to highly unlikely, that is to say, from not particularly anomalous to highly anomalous. There can be none, one or two or tens, sometimes hundreds of anomalies found within each bucket. There can be many thousands found per job. In order to provide a sensible view of the results, an anomaly score is calculated for each bucket time interval. The anomaly score is a value from 0 to 100, which indicates the significance of the observed anomaly compared to previously seen anomalies. The highly anomalous values are shown in red and the low scored values are indicated in blue. An interval with a high anomaly score is significant and requires investigation.
Slide the time selector to a section of the time series that contains a red anomaly data point. If you hover over the point, you can see more information about that data point. You can also see details in the Anomalies section of the viewer. For example:
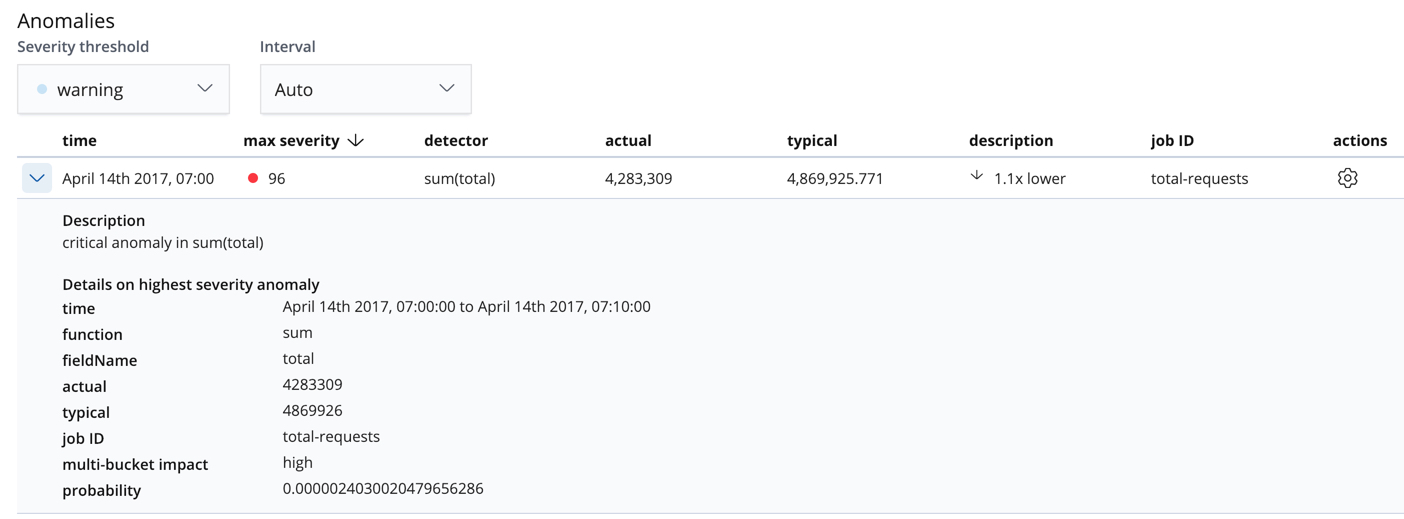
For each anomaly you can see key details such as the time, the actual and expected ("typical") values, and their probability.
By default, the table contains all anomalies that have a severity of "warning" or higher in the selected section of the timeline. If you are only interested in critical anomalies, for example, you can change the severity threshold for this table.
The anomalies table also automatically calculates an interval for the data in the table. If the time difference between the earliest and latest records in the table is less than two days, the data is aggregated by hour to show the details of the highest severity anomaly for each detector. Otherwise, it is aggregated by day. You can change the interval for the table, for example, to show all anomalies.
You can see the same information in a different format by using the Anomaly Explorer:
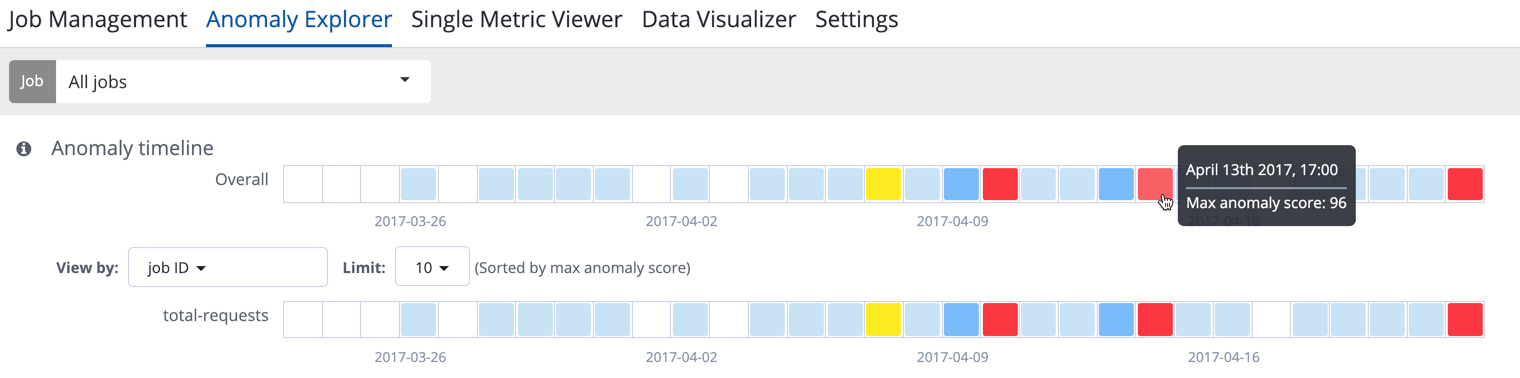
Click one of the red sections in the swim lane to see details about the anomalies that occurred in that time interval. For example:
After you have identified anomalies, often the next step is to try to determine the context of those situations. For example, are there other factors that are contributing to the problem? Are the anomalies confined to particular applications or servers? You can begin to troubleshoot these situations by layering additional jobs or creating multi-metric jobs.