Control access to APM data
editControl access to APM data
editStarting in version 8.2.0, the APM app is Kibana Space aware. This allows you to separate your data—and access to that data—by team, use case, service environment, or any other filter that you choose.
To take advantage of this feature, your APM data needs to be written to different data steams.
One way to accomplish this is with different namespaces.
For example, you can send production data to an APM integration with a namespace of production,
while sending staging data to a different APM integration with a namespace of staging.
Multiple APM integration instances is not required though. The simplest way to take advantage of this feature is by creating filtered aliases. See the guide below for more information.
Guide: Separate staging and production data
editThis guide will explain how to separate your staging and production data. This can be helpful to either remove noise when troubleshooting a production issue, or to create more granular access control for certain data.
This guide assumes that you:
- Are sending both staging and production APM data to an Elasticsearch cluster.
-
Have configured the
environmentvariable in your APM agent configurations. This variable sets theservice.environmentfield in APM documents. You should have documents whereservice.environment: productionandservice.environment: staging. If this field is empty, see service environment filter to learn how to set this value.
Step 1: Create filtered aliases
editThe APM app uses index patterns to query your APM data. An index pattern can match data streams, indices, and/or aliases. The default values are:
| Index setting | Default index pattern |
|---|---|
Error |
|
Span/Transaction |
|
Metrics |
|
The default index settings also query the apm-* data view.
This data view matches APM data shipped in earlier versions of APM (prior to v8.0).
Instead of querying the default APM data views, we can create filtered aliases for the APM app to query. A filtered alias is a secondary name for a group of data streams that has a user-defined filter to limit the documents that the alias can access.
To separate staging and production APM data, we’d need to create six filtered aliases—three
aliases for each service environment:
| Index setting | production env |
staging env |
|---|---|---|
Error |
|
|
Span/Transaction |
|
|
Metrics |
|
|
The production-<event>-apm aliases will contain a filter that only provides access to documents
where the service.environment is production.
Similarly, the staging-<event>-apm aliases will contain a filter that only provides access to documents
where the service.environment is staging.
To create these six filtered aliases, use the Elasticsearch Aliases API. In Kibana, open Dev Tools and run the following POST requests.
traces-apm* production alias example
logs-apm* production alias example
metrics-apm* production alias example
traces-apm* staging alias example
logs-apm* staging alias example
metrics-apm* staging alias example
Step 2: Create Kibana spaces
editNext, you’ll need to create a Kibana space for each service environment.
To create these spaces, navigate to Stack Management > Spaces > Create a space.
For this guide, we’ve created two Kibana spaces, one named production and one named staging.
See View, create, and delete spaces for more information on creating a space.
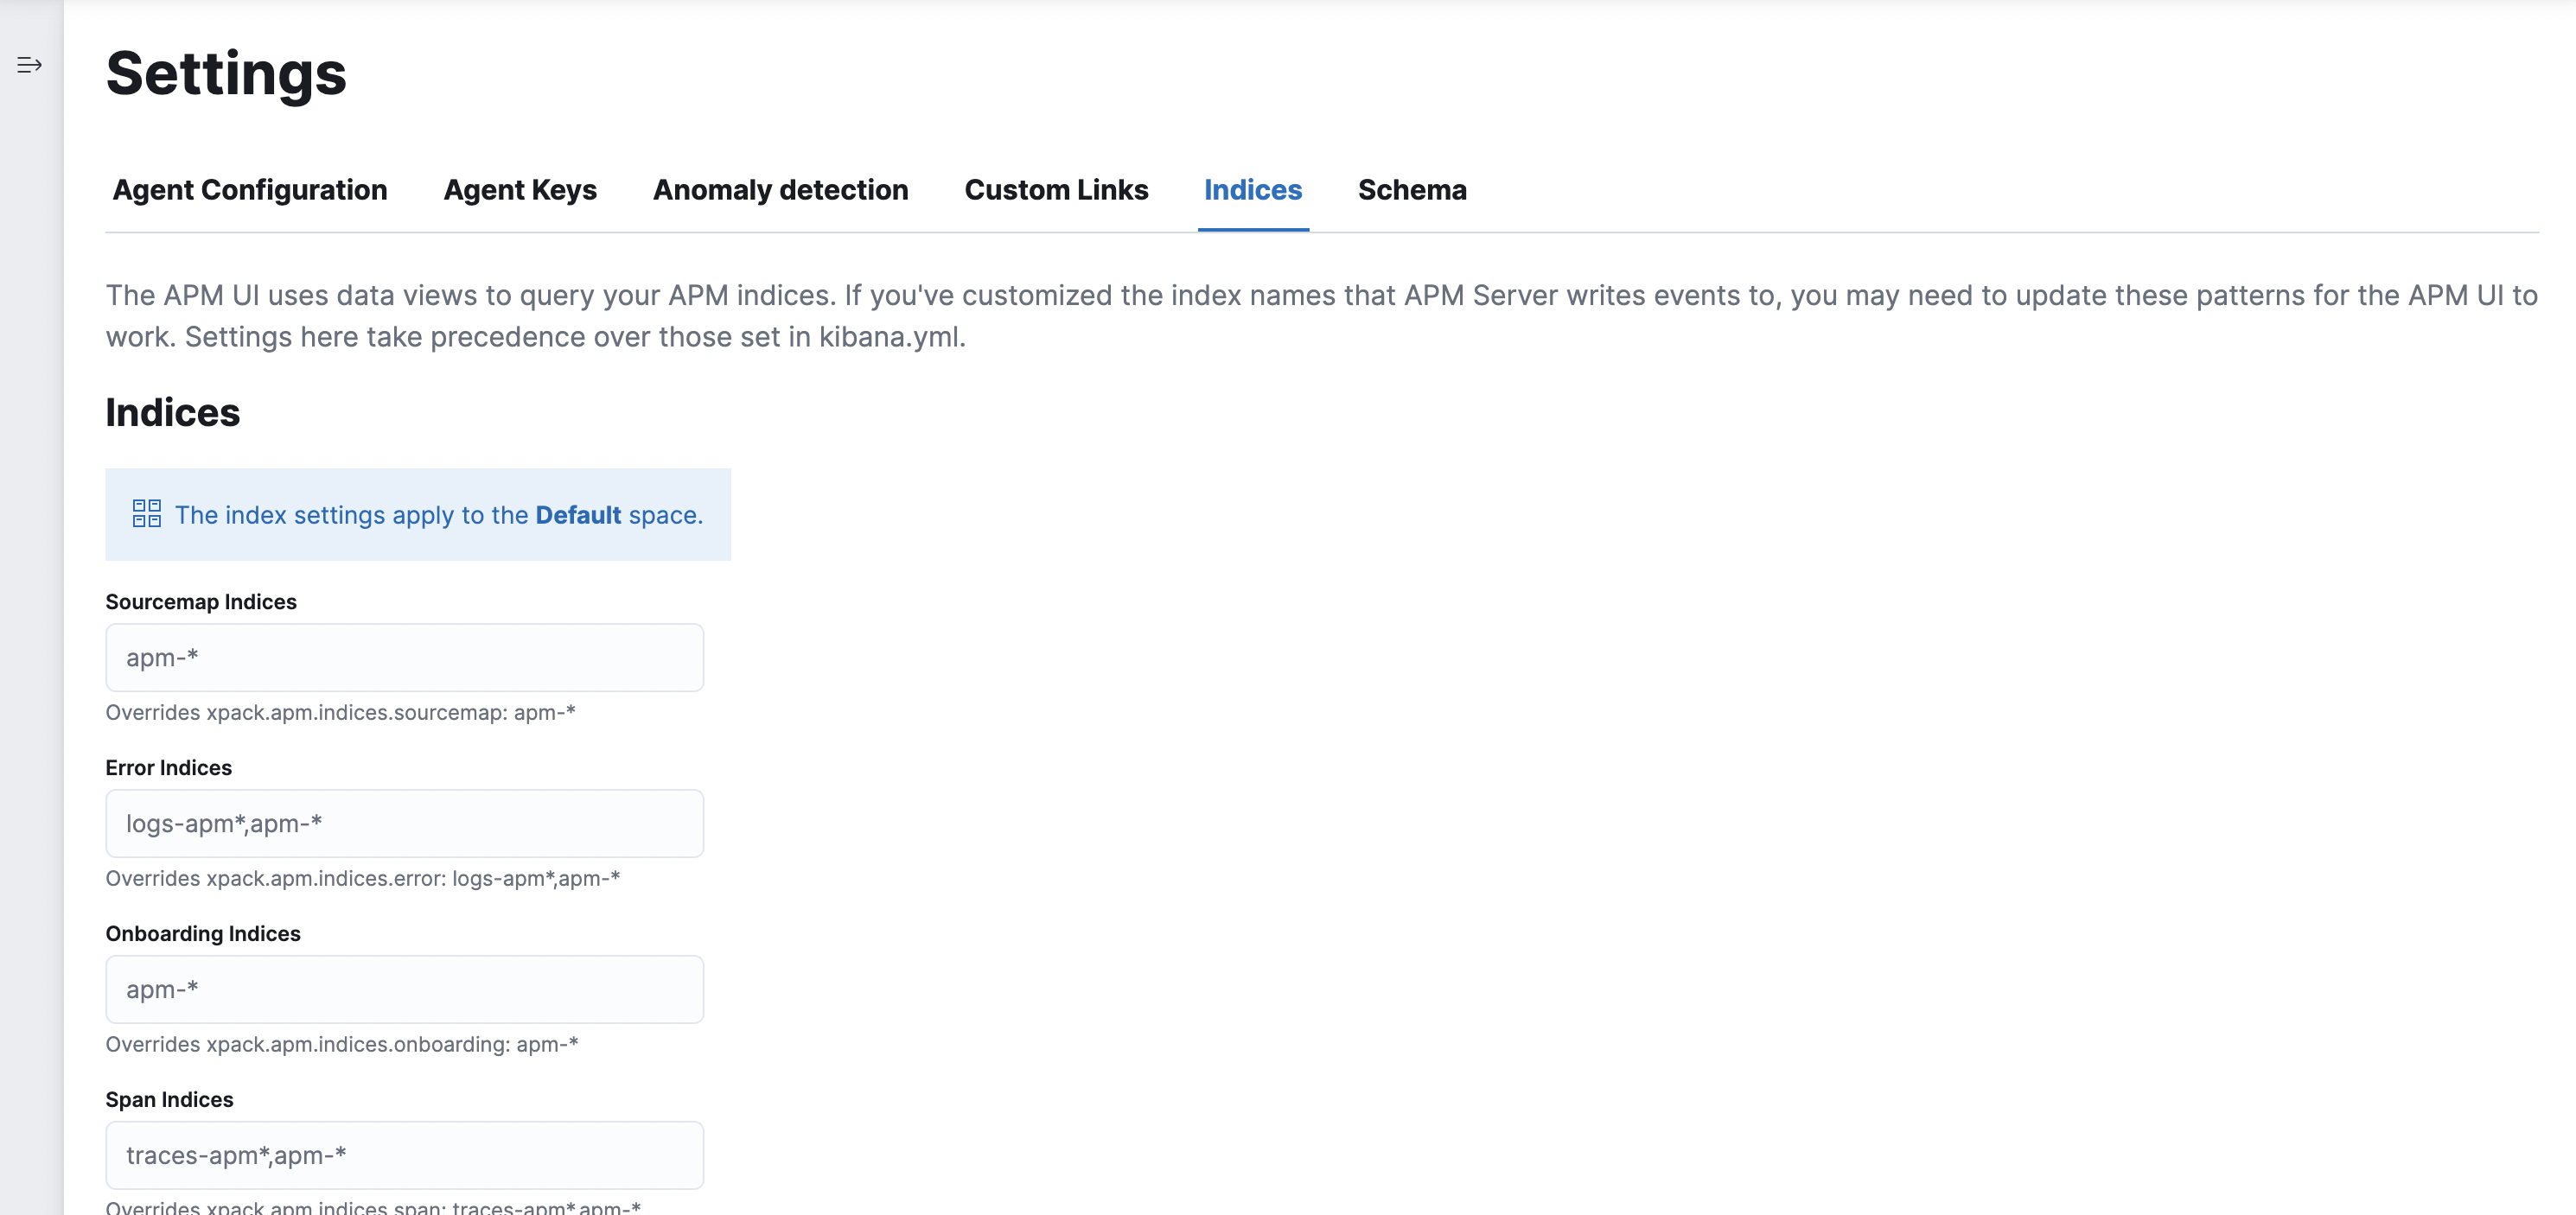
Step 3: Update APM index settings in each space
editNow we can change the default data views that the APM app queries in each space.
Open the APM app and navigate to Settings > Indices. Use the table below to update your settings for each space. The values in each column match the names of the filtered aliases we created in step one.
| Index setting | production space |
staging space |
|---|---|---|
Error indices |
|
|
Span indices |
|
|
Transaction indices |
|
|
Metrics indices |
|
|
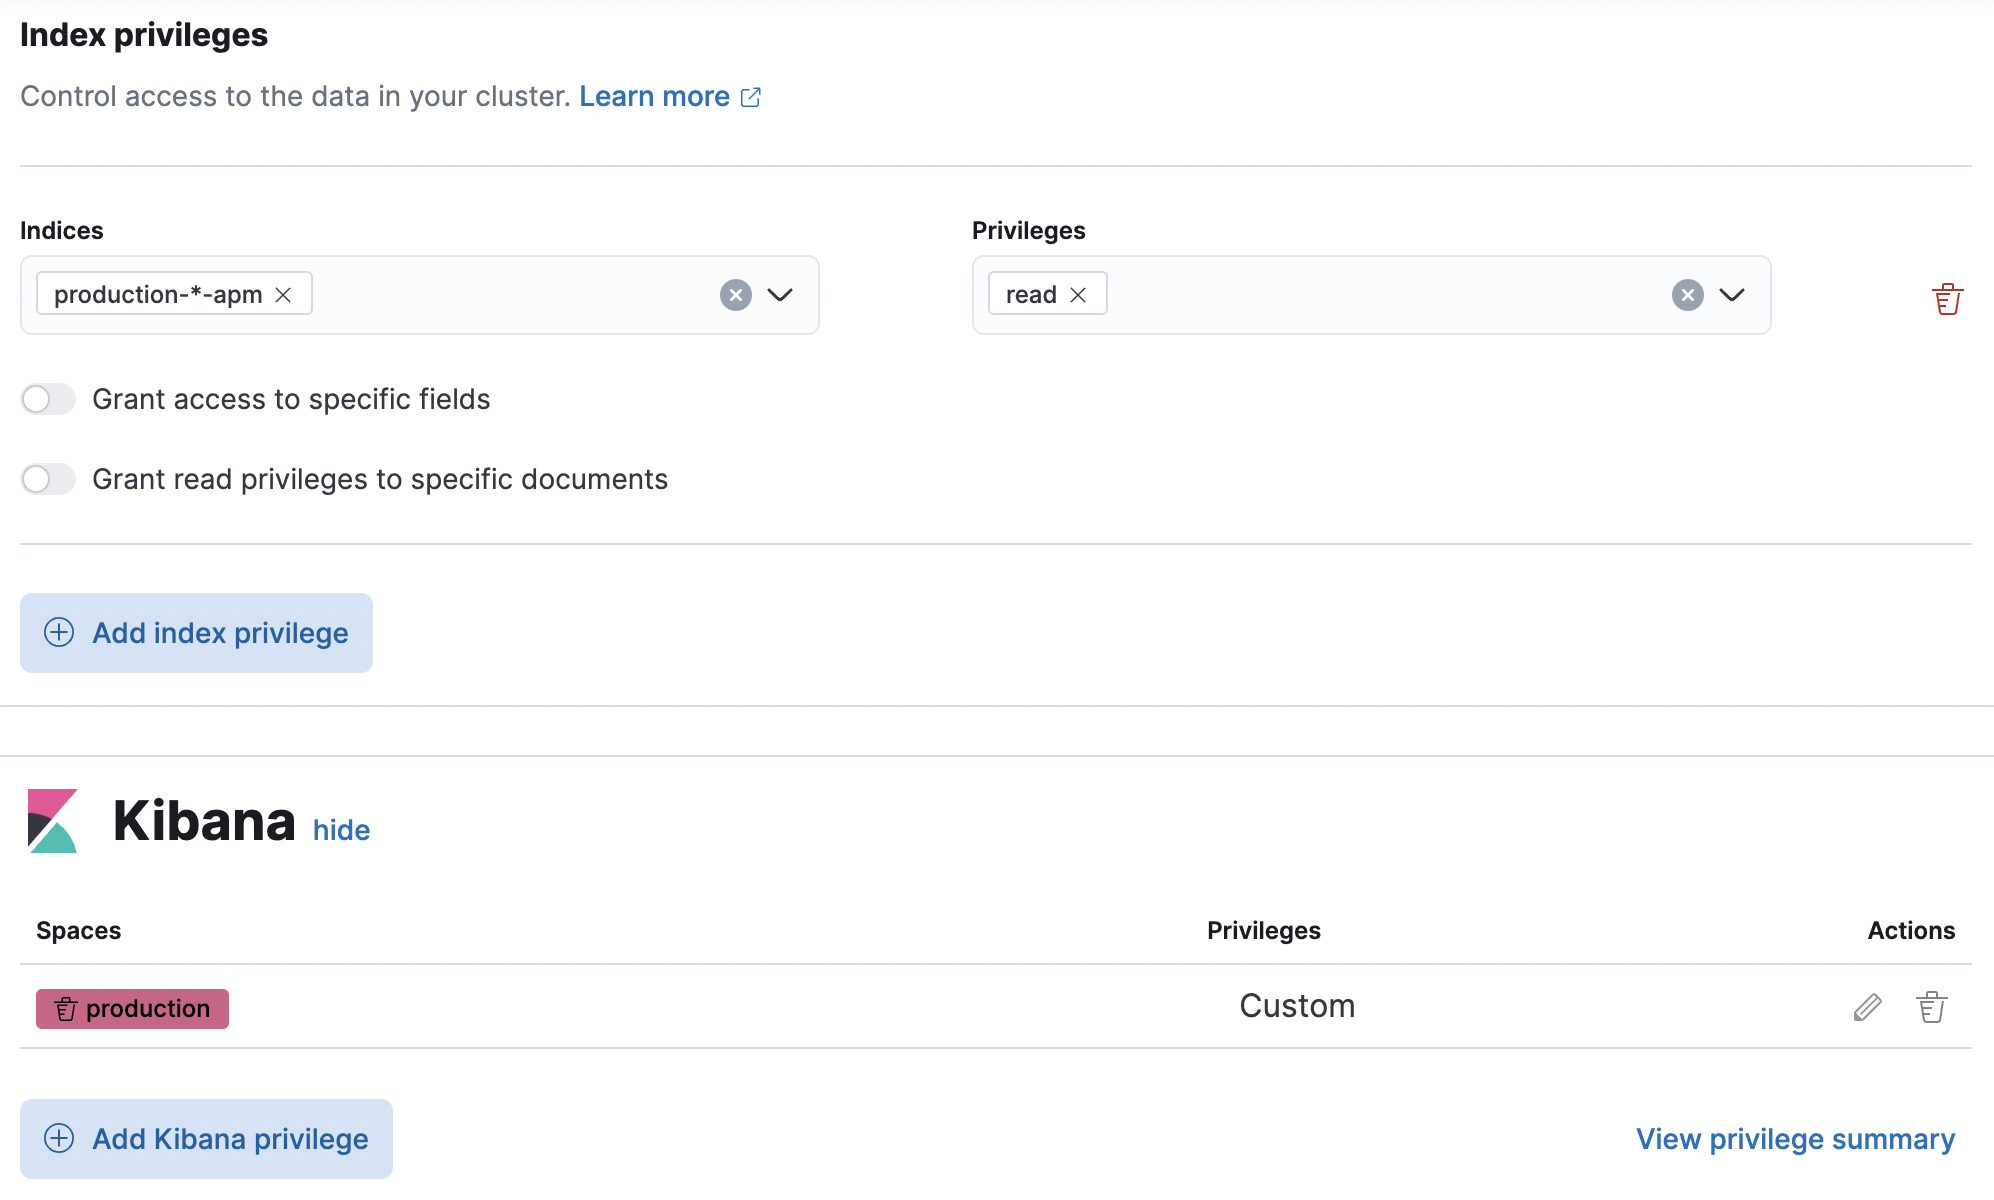
Step 4: Create Kibana access roles
editIn Kibana, navigate to Stack Management > Roles and click Create role.
You’ll need to create two roles: one for staging users (we’ll call this role staging_apm_viewer)
and one for production users (we’ll call this role production_apm_viewer).
Using the table below, assign each role the following privileges:
| Privileges | production_apm_viewer |
staging_apm_viewer |
|---|---|---|
Index privileges |
index: |
index: |
Kibana privileges |
space: |
space: |
Alternatively, you can use the Elasticsearch Create or update roles API:
Create a production_apm_viewer role
This request creates a production_apm_viewer role:
Create a staging_apm_viewer role
This request creates a staging_apm_viewer role:
Step 5: Assign users to roles
editThe last thing to do is assign users to the newly created roles above. Users will only have access to the data within the spaces that they are granted.
For information on how to create users and assign them roles with the Kibana UI, see Securing access to Kibana.
Alternatively, you can use the Elasticsearch Create or update users API.
This example creates a new user and assigns them the production_apm_viewer role created in the previous step.
This user will only have access to the production space and data with a service.environment of production.
Remember to change the password, full_name, and email fields.
POST /_security/user/production-apm-user
{
  "password" : "l0ng-r4nd0m-p@ssw0rd",
  "roles" : [ "production_apm_viewer" ],
  "full_name" : "Jane Production Smith",
  "email" : "janesmith@example.com"
}
This example creates a new user and assigns them the staging_apm_viewer role created in the previous step.
This user will only have access to the staging space and data with a service.environment of staging.
Remember to change the password, full_name, and email fields.
POST /_security/user/staging-apm-user
{
  "password" : "l0ng-r4nd0m-p@ssw0rd",
  "roles" : [ "staging_apm_viewer" ],
  "full_name" : "John Staging Doe",
  "email" : "johndoe@example.com"
}
Step 6: Marvel
editThat’s it! Head back to the APM app and marvel at your space-specific data.