Discover
editDiscover
editWhen you know what your data includes, you can create visualizations that best display that data and build better dashboards. Discover enables you to explore your data, find hidden insights and relationships, and get answers to your questions.
With Discover, you can:
- Access every document in every index that matches your selected index pattern
- Search your data and filter the search results
- Get field-level details about the documents that match your search
- View the events that occurred just before and after a document
Set up your index pattern
editThe first thing to do in Discover is to select an index pattern, which defines the data you want to explore and visualize. If you haven’t yet created an index pattern, you can add a sample data set, which has a pre-built index pattern.
Set a time filter
editBy default, Discover shows data for the last 15 minutes. If you have a time-based index, and no data displays, you might need to increase the time range. Using the time filter, you can specify a common or recently-used time range, a relative time from now, or an absolute time range.
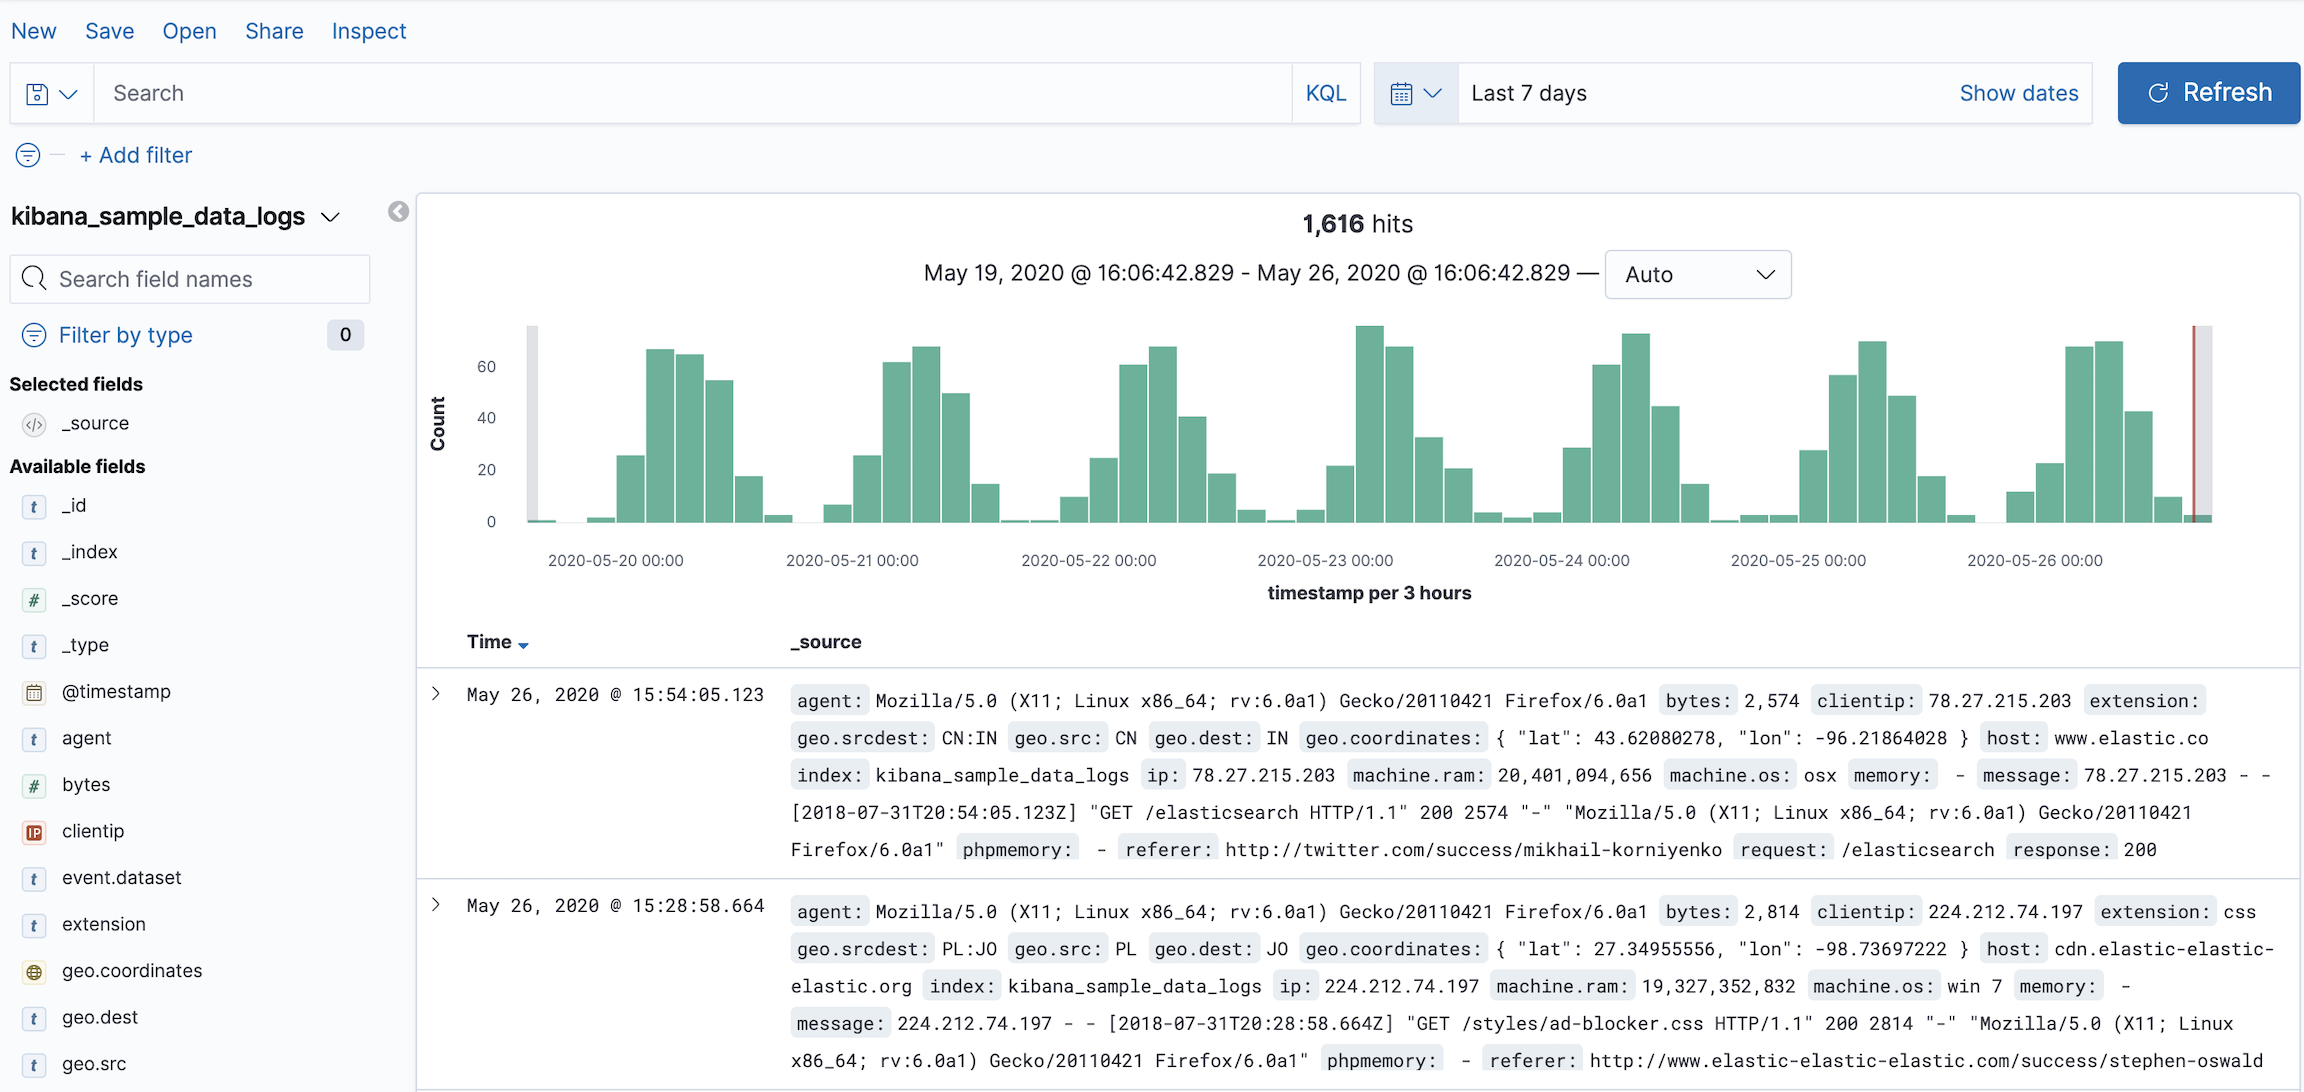
Search your data
editNow that you have your data and set the time span, you can start asking your questions.
You can search your data using the Kibana Query language,
which offers a simplified query syntax.
For example, if
you search for day_of_week : Friday, you’ll get a list of all documents
in which day_of_week is set to Friday. If you prefer
Lucene query syntax, you can access it from the KQL menu.
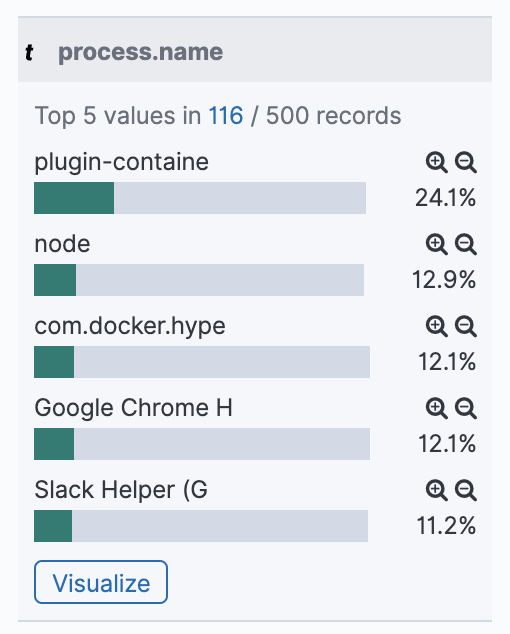
Filter your search results
editNext, you’ll want narrow your search results to a more manageable data set. When you click on a name in the field list, you’ll see the top five values for the field, the number of documents that contain the field, and the percentage of documents that contain each value. From this view, you can use the (+) magnifier icon to quickly find all documents that have that value, or (-) to exclude all documents with that value. For more filter options, see filtering by field.
Add and remove fields
editThe sortable documents table
lists the documents that match your search.
By default, the table includes columns for the time field and the document _source.
To zero in on a specific field, click add next to the field name.
For example, if you add the currency, customer_last_name, and day_of_week fields,
the document table includes columns for those three fields.
Examine document contents
editFrom the documents table, you can expand a document to examine its field data in either table or JSON format. The table view provides yet another filtering option—filtering for whether the field is present. See Viewing document data for details.
View a document in context
editSuppose you’re troubleshooting your data, and you’ve narrowed down your results to a single document. Now you want to to see the events that occurred just before and after the document that you are looking at. You can do that by expanding the document and clicking View surrounding documents.
Save and share your search
editFinally, its time to save and share your data. You can export your data as a CSV file or create a direct link to share. The Save and Share actions are in the menu bar.