WARNING: Version 5.0 of Kibana has passed its EOL date.
This documentation is no longer being maintained and may be removed. If you are running this version, we strongly advise you to upgrade. For the latest information, see the current release documentation.
Searching Your Data
editSearching Your Data
editYou can search the indices that match the current index pattern by entering your search criteria in the Query bar. You can perform a simple text search, use the Lucene query syntax, or use the full JSON-based Elasticsearch Query DSL.
When you submit a search request, the histogram, Documents table, and Fields list are updated to reflect the search results. The total number of hits (matching documents) is shown in the toolbar. The Documents table shows the first five hundred hits. By default, the hits are listed in reverse chronological order, with the newest documents shown first. You can reverse the sort order by clicking the Time column header. You can also sort the table by the values in any indexed field. For more information, see Sorting the Documents Table.
To search your data, enter your search criteria in the Query bar and
press Enter or click Search  to submit
the request to Elasticsearch.
to submit
the request to Elasticsearch.
-
To perform a free text search, simply enter a text string. For example, if
you’re searching web server logs, you could enter
safarito search all fields for the termsafari. -
To search for a value in a specific field, prefix the value with the name
of the field. For example, you could enter
status:200to find all of the entries that contain the value200in thestatusfield. -
To search for a range of values, you can use the bracketed range syntax,
[START_VALUE TO END_VALUE]. For example, to find entries that have 4xx status codes, you could enterstatus:[400 TO 499]. -
To specify more complex search criteria, you can use the Boolean operators
AND,OR, andNOT. For example, to find entries that have 4xx status codes and have an extension ofphporhtml, you could enterstatus:[400 TO 499] AND (extension:php OR extension:html).
These examples use the Lucene query syntax. You can also submit queries using the Elasticsearch Query DSL. For examples, see query string syntax in the Elasticsearch Reference.
Saving a Search
editSaving searches enables you to reload them into Discover and use them as the basis for visualizations. Saving a search saves both the search query string and the currently selected index pattern.
To save the current search:
- Click Save in the Kibana toolbar.
- Enter a name for the search and click Save.
You can import, export and delete saved searches from Management/Kibana/Saved Objects.
Opening a Saved Search
editTo load a saved search into Discover:
- Click Open in the Kibana toolbar.
- Select the search you want to open.
If the saved search is associated with a different index pattern than is currently selected, opening the saved search also changes the selected index pattern.
Changing Which Indices You’re Searching
editWhen you submit a search request, the indices that match the currently-selected index pattern are searched. The current index pattern is shown below the toolbar. To change which indices you are searching, click the index pattern and select a different index pattern.
For more information about index patterns, see Creating an Index Pattern.
Refreshing the Search Results
editAs more documents are added to the indices you’re searching, the search results shown in Discover and used to display visualizations get stale. You can configure a refresh interval to periodically resubmit your searches to retrieve the latest results.
To enable auto refresh:
-
Click the Time Picker
 in the
Kibana toolbar.
in the
Kibana toolbar.
- Click Auto refresh.
-
Choose a refresh interval from the list.
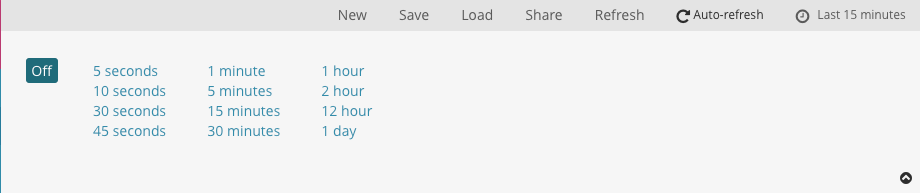
When auto refresh is enabled, the refresh interval is displayed next to the Time Picker, along with a Pause button. To temporarily disable auto refresh, click Pause.
If auto refresh is not enabled, you can manually refresh visualizations by clicking Refresh.