It is time to say goodbye: This version of Elastic Cloud Enterprise has reached end-of-life (EOL) and is no longer supported.
The documentation for this version is no longer being maintained. If you are running this version, we strongly advise you to upgrade. For the latest information, see the current release documentation.
Manage users and roles in X-Pack
editManage users and roles in X-Pack
editFor version 5.0 and later: You work with users and roles in the Kibana Management app.
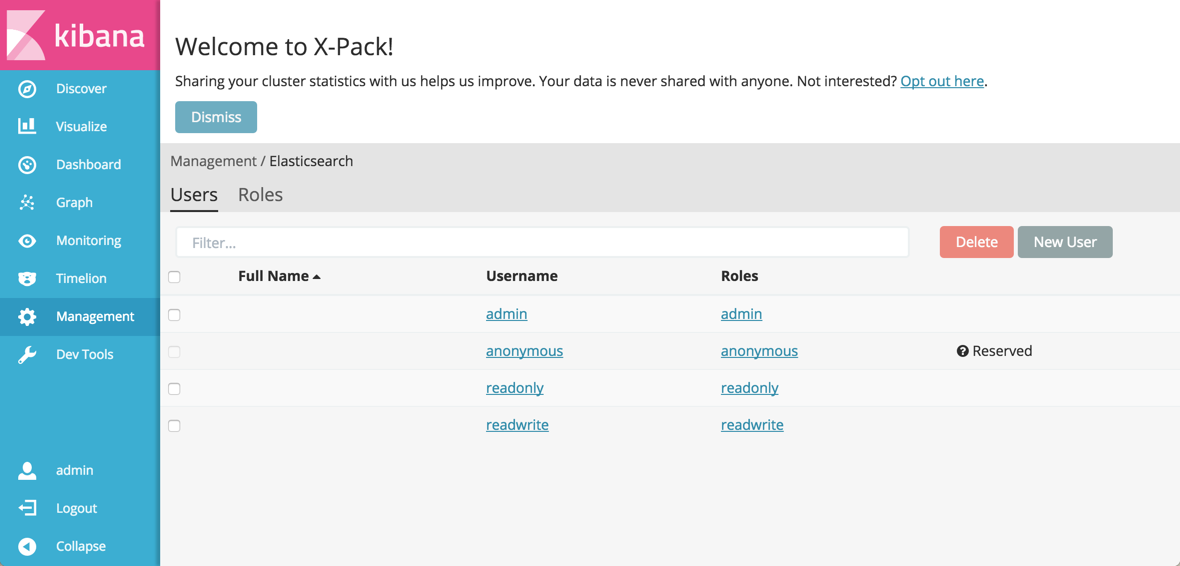
The Users tab shows the users that have been defined on your cluster. You can add or delete users here and assign roles that give users specific privileges. A user can hold several roles.
 admin user in X-Pack">
If you upgraded a cluster to Elasticsearch 5.0 or later from a version before 5.0, the users defined in your Shield were also migrated to X-Pack and show up in this list. You can work with these users after they have been migrated like any other user in the Kibana Management app.
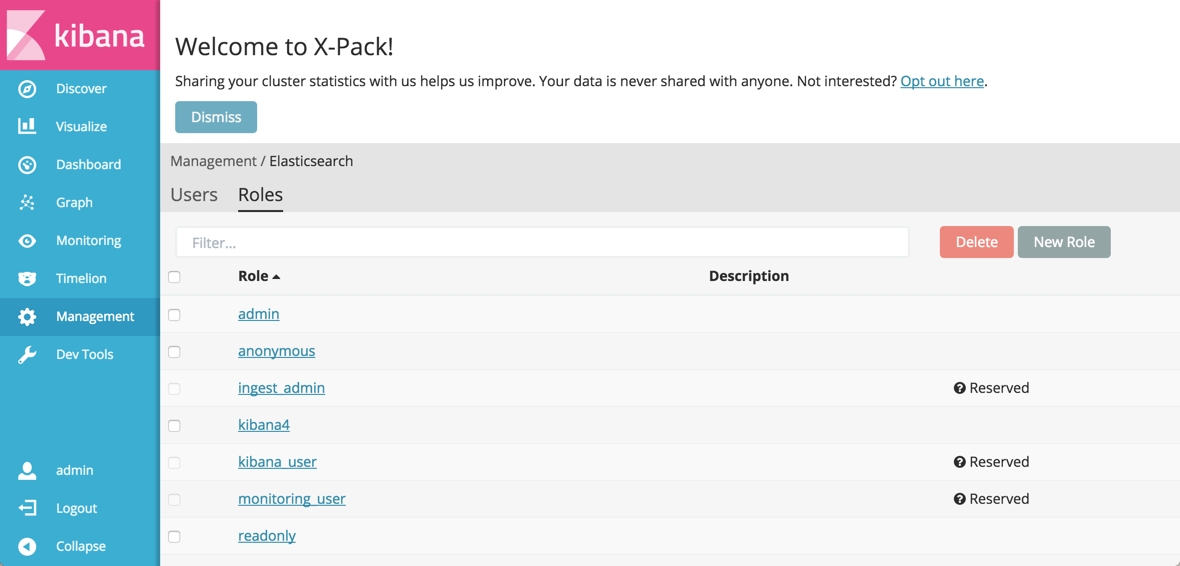
The Roles tab shows the roles that exist on your cluster. Roles let you customize exactly which actions a user with the role can do, both on a cluster and an index level. Several users can have the same role. You can also add or delete users
 admin role in X-Pack">
One user is always created with new version 5.0 clusters:
-
elastic -
A superuser that is somewhat similar in scope to the default
adminuser in Shield configurations on Elastic Cloud Enterprise before version 5.0. Theelasticuser is not shown in the Kibana Management app and you cannot modify this user, other than to reset the password.
To learn more about users and roles, see User authentication.
Example: Create a Filebeat role and user
editTo send Beats data to a secured cluster in Elastic Cloud Enterprise, you should use a user that has the right privileges. In this example, we create a user filebeat_shipper, with role privileges based on the recommendations in Beats and Security.
To create a similar user and role in the Management app in Kibana:
- Log into the Cloud UI and open the Kibana Management app, accessible from the Security page.
-
Select the Roles tab, click New Role and give the role the
filebeat-writername. -
Specify the right privileges. Under Cluster Privileges, select
monitorandmanage_index_templates. Under Indeces Privileges, specifyread,write, andcreate_indexprivileges for thefilebeat-*indices that the Beat creates.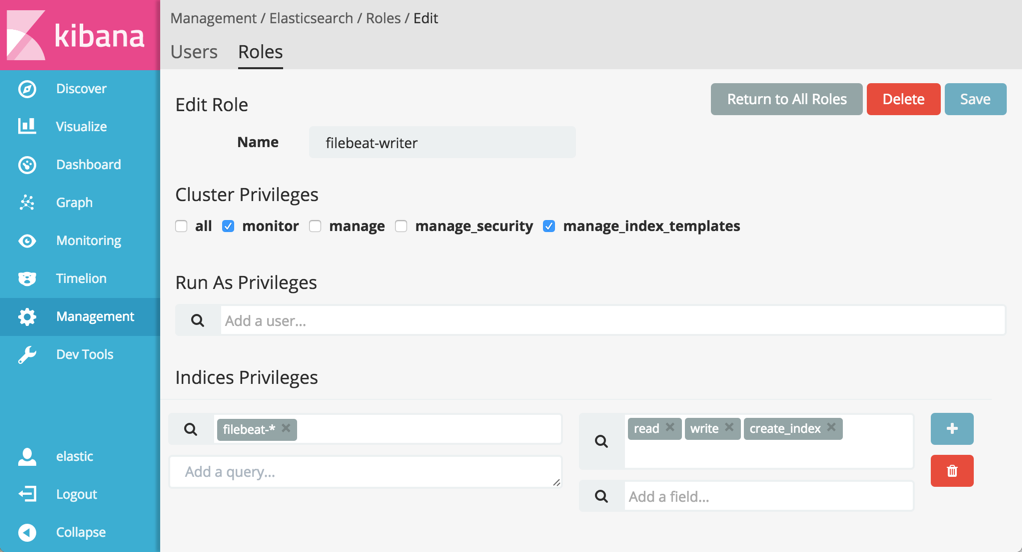
- Click Save.
-
Select the Users tab, click New User and give the user the
filebeat_shippername. -
Assign the
filebeat-writerrole to the user under Roles.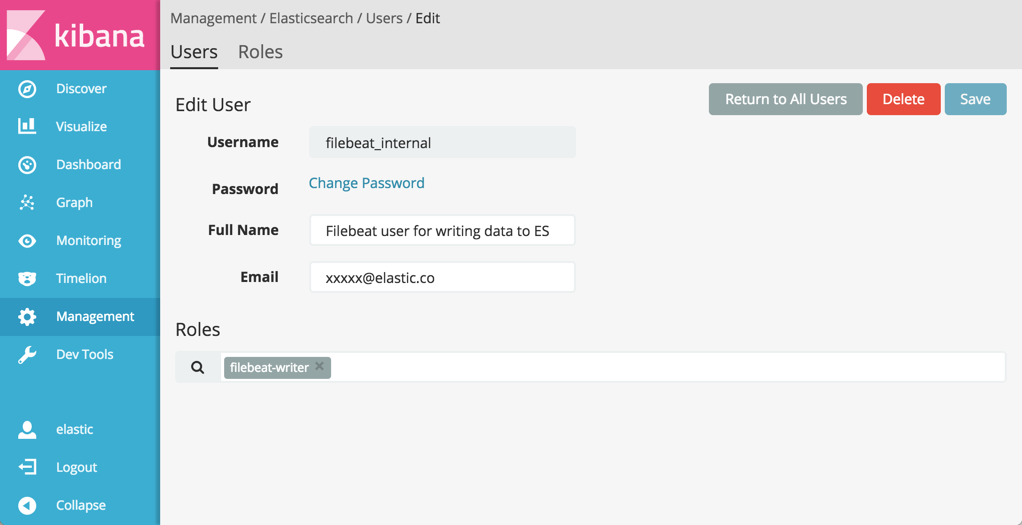
- Enter a password and confirm the password. Make a note of the password and keep it in a secure location.
- Click Save.
After the user and role are saved, you can use the new user to authenticate when sending data from Filebeat to your cluster.