How to apply source maps to error stack traces when using minified bundlesedit
This guide is only for standalone APM Server users. Users running the APM integration need to use the Kibana source map upload API instead.
Minifying JavaScript bundles in production is a common practice; it can greatly improve the load time and network latency of your applications. The problem with minifying code is that it can be hard to debug.
For best results, uploading source maps should become a part of your deployment procedure, and not something you only do when you see unhelpful errors. That’s because uploading source maps after errors happen won’t make old errors magically readable — errors must occur again for source mapping to occur.
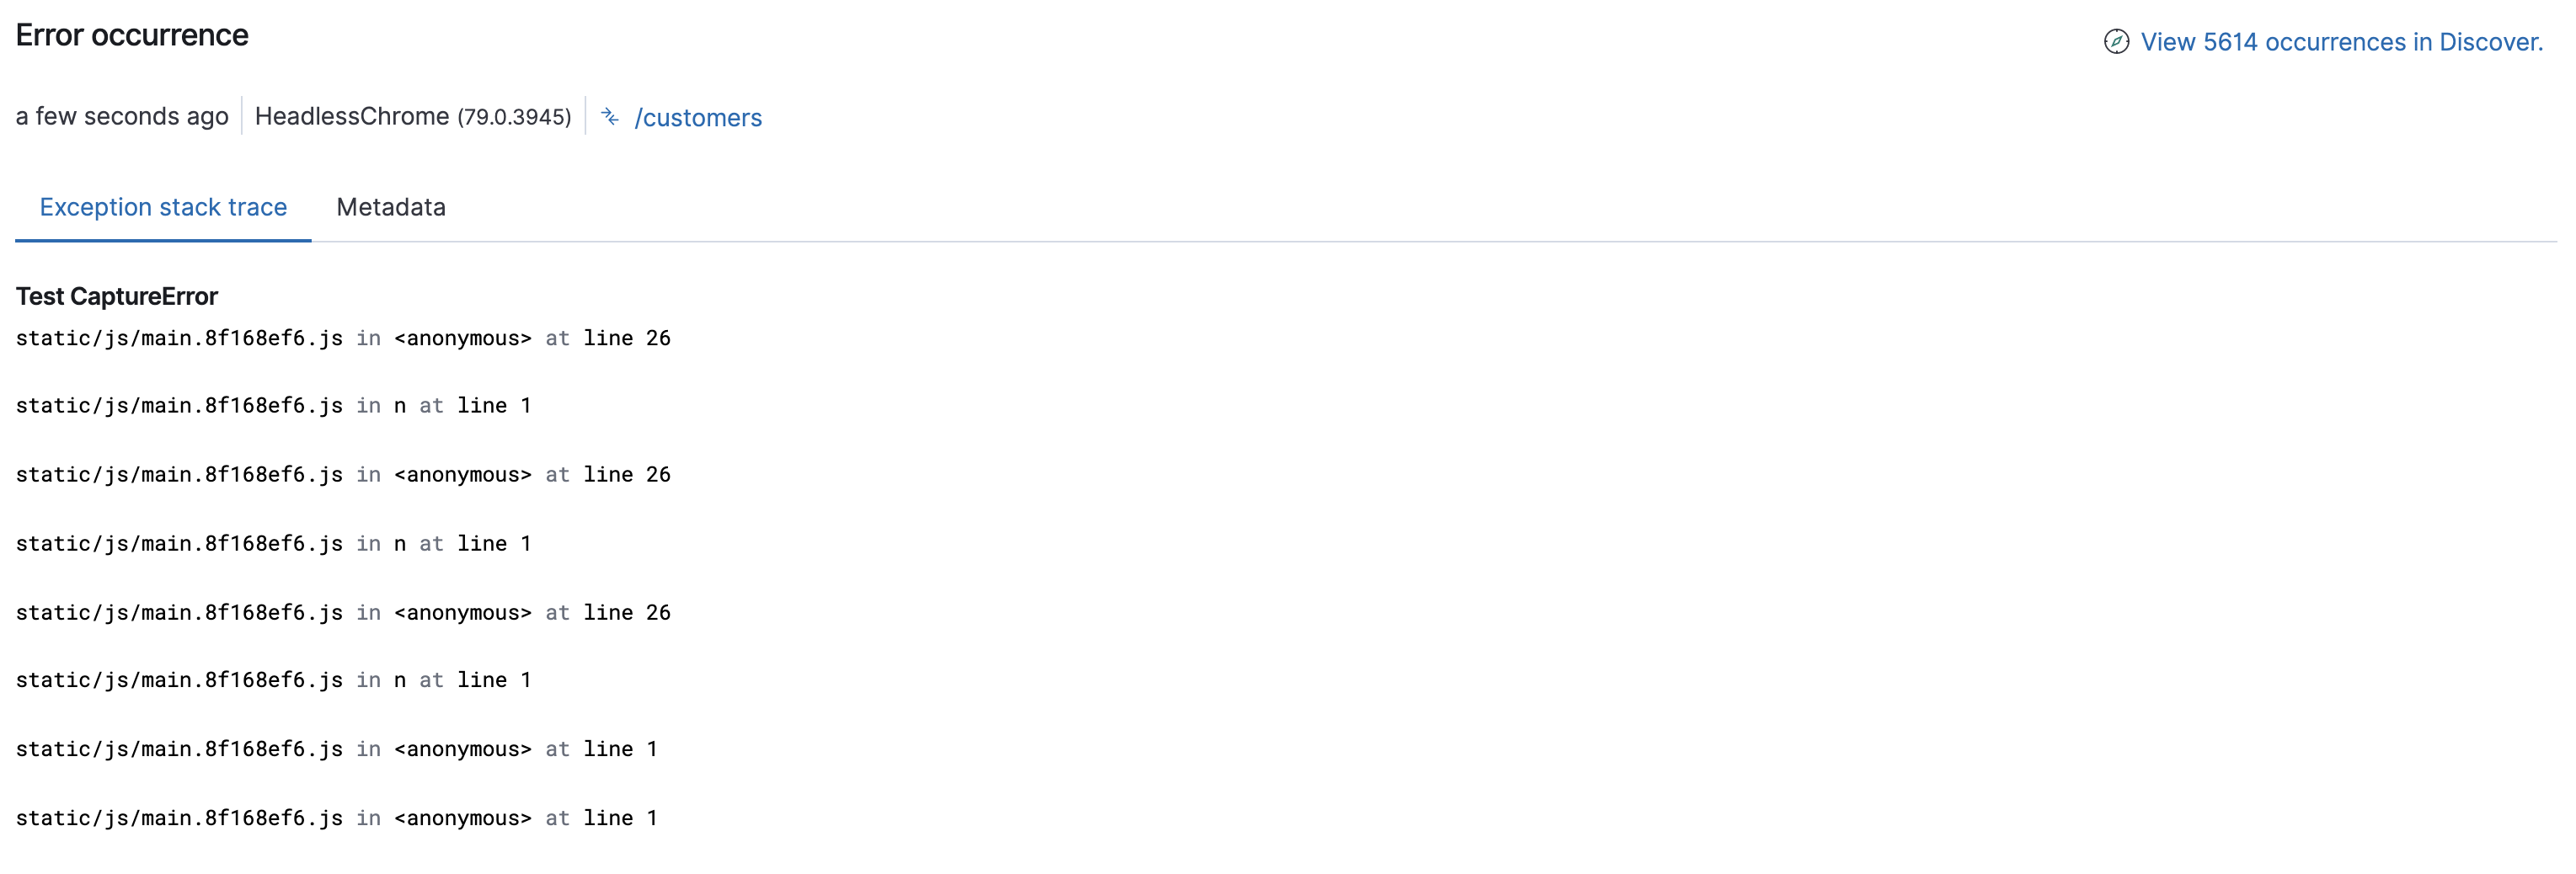
Here’s an example of an exception stack trace in the APM app when using minified code. As you can see, it’s not very helpful.
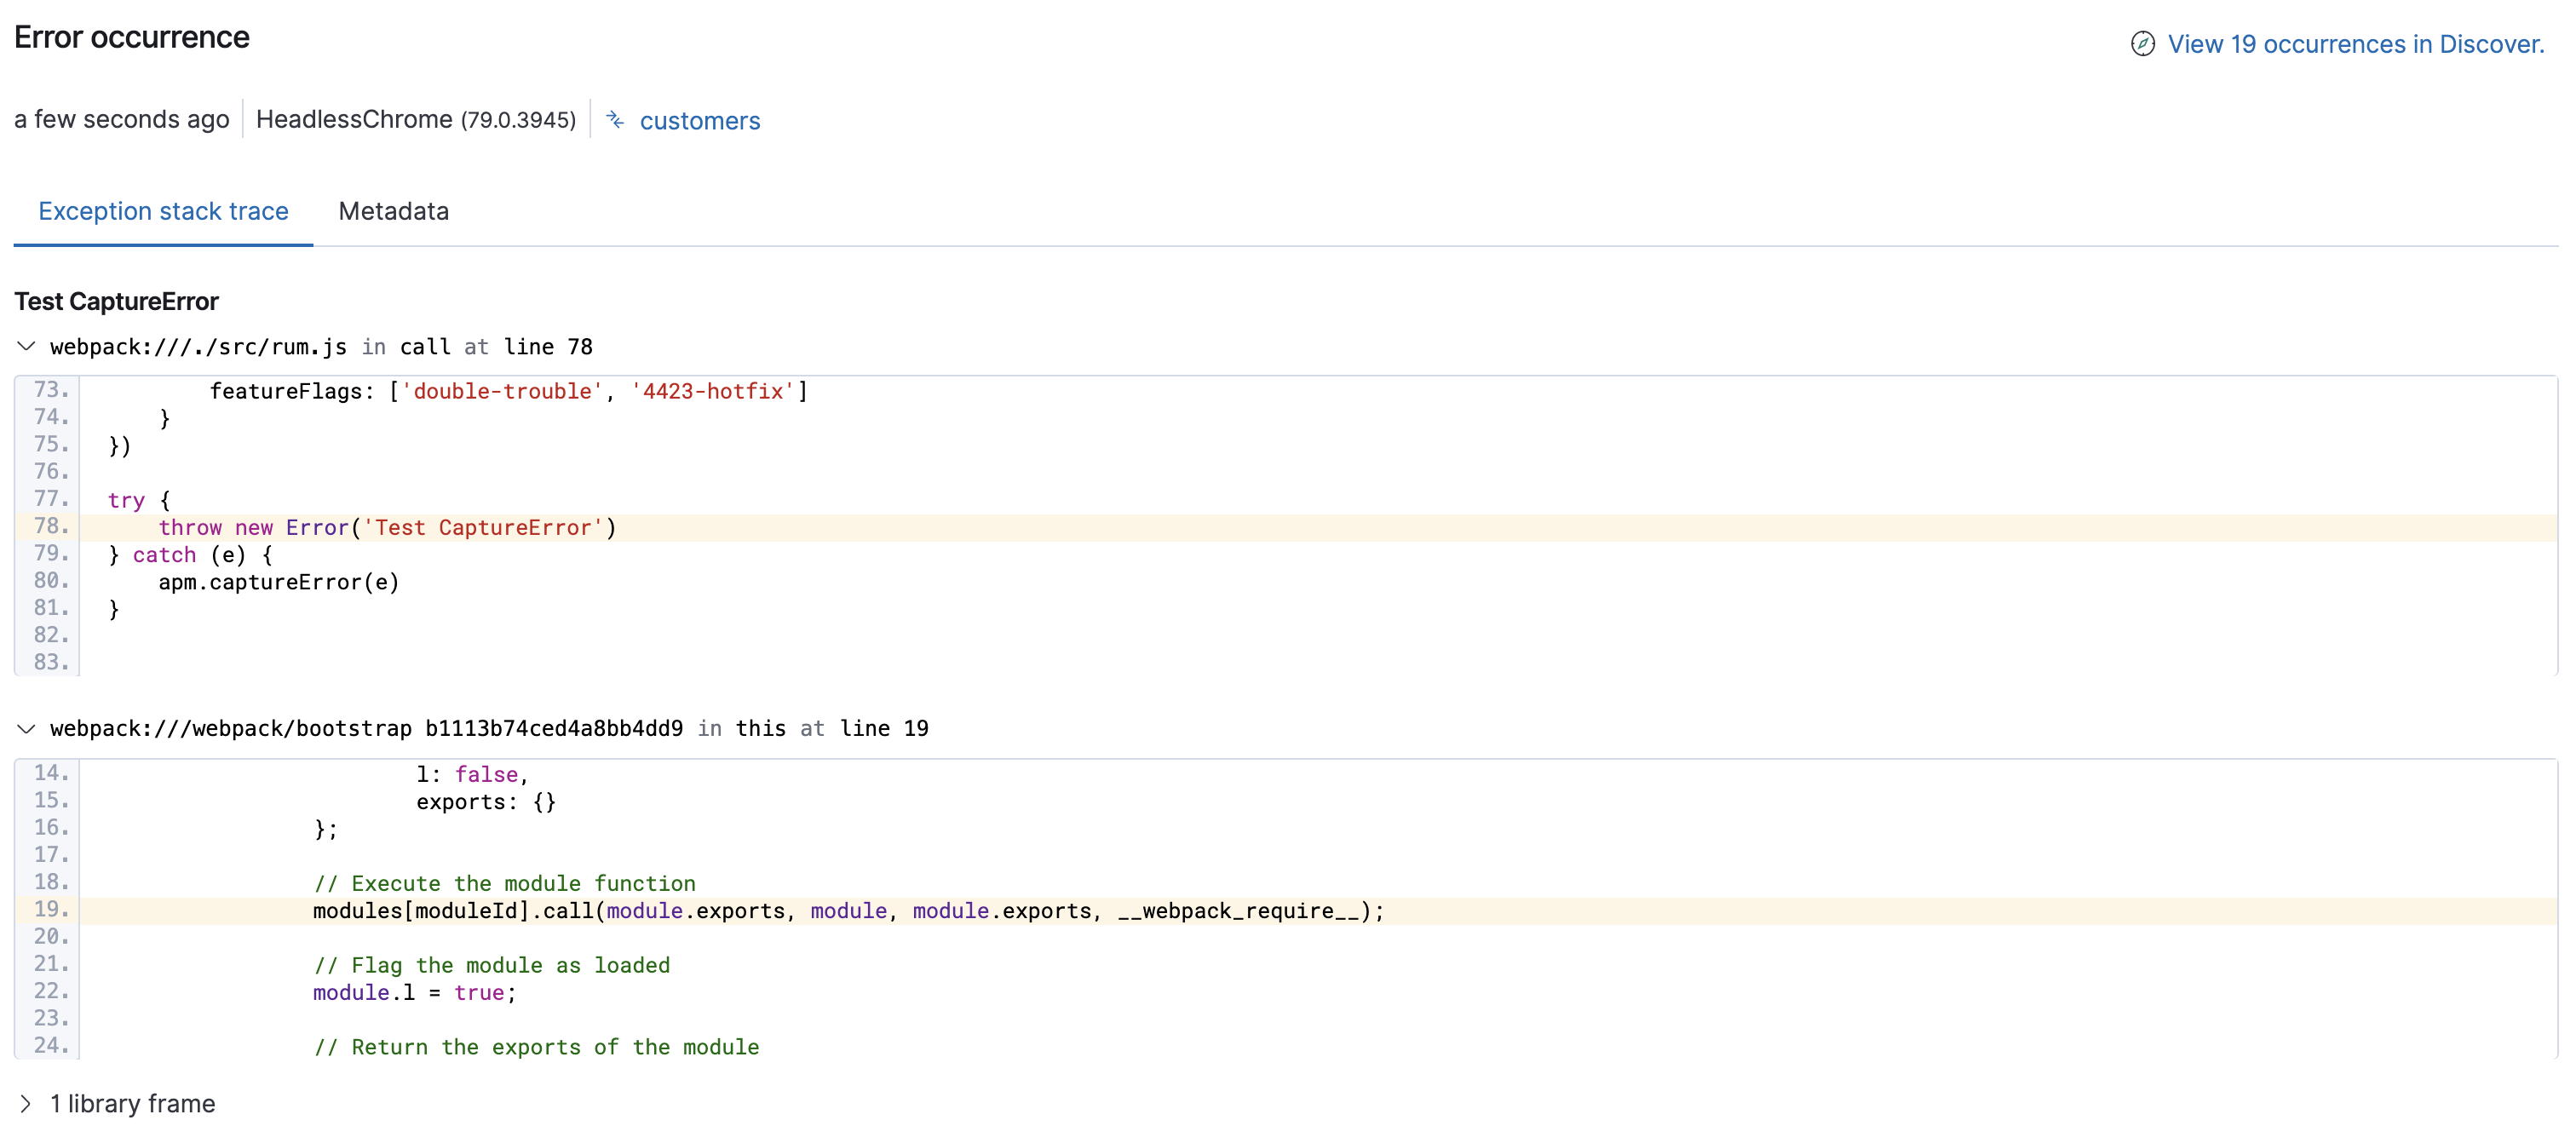
With a source map, minified files are mapped back to the original source code, allowing you to maintain the speed advantage of minified code, without losing the ability to quickly and easily debug your application. Here’s the same example as before, but with a source map uploaded and applied:
Follow the steps below to enable source mapping your error stack traces in the APM app:
Initialize the RUM Agentedit
First, set the service name and version of your application when initializing the RUM Agent.
The serviceVersion you choose might be the version from your package.json. For example:
import { init as initApm } from '@elastic/apm-rum'
const serviceVersion = require("./package.json").version

const apm = initApm({
  serviceName: 'myService',
  serviceVersion: serviceVersion
})
Or, serviceVersion could be a git commit reference. For example:
const git = require('git-rev-sync')
const serviceVersion = git.short()
It can also be any other unique string that indicates a specific version of your application.
APM Server uses the serviceVersion to match the correct source map file to each stack trace.
Generate a source mapedit
To be compatible with Elastic APM, source maps must follow the source map revision 3 proposal spec.
Source maps can be generated and configured in many different ways. For example, if you’re using parcel, they are generated by default. If you are using webpack, some configuration may need to be done to generate a source map:
const webpack = require('webpack')
const serviceVersion = require("./package.json").version
const TerserPlugin = require('terser-webpack-plugin');
module.exports = {
  entry: 'app.js',
  output: {
    filename: 'app.min.js',
    path: './dist'
  },
  devtool: 'source-map',
  plugins: [
    new webpack.DefinePlugin({'serviceVersion': JSON.stringify(serviceVersion)}),
    new TerserPlugin({
      sourceMap: true
    })
  ]
}
Upload the source map to APM Serveredit
The APM Server exposes a source map endpoint for uploading source maps.
Source maps are cached in memory for as long as the cache expiration setting indicates.
Source maps must be attached as a file upload and you can configure an API key or secret token to restrict uploads.
Before uploading a source map, ensure that:
-
RUM support is enabled in APM Server by setting
apm-server.rum.enabledtotrue. -
apm-server.rum.source_mapping.enabledistrue(the default). This means that if a source map has previously been uploaded, source mapping will automatically be applied to all incoming transactions and errors.
Let’s look at two different ways to upload a source map: curl and a custom application. Each example includes the four fields necessary for APM Server to later map minified code to its source:
-
service_name- Should match theserviceNamefrom step one -
service_version- Should match theserviceVersionfrom step one -
bundle_filepath- The absolute path of the final bundle as used in the web application -
sourcemap- The location of the source map. If you have multiple source maps, you’ll need to upload each individually.
Upload via curledit
Here’s an example curl request that uploads the source map file created in the previous step. This request uses an API key for authentication.
SERVICEVERSION=`node -e "console.log(require('./package.json').version);"` && \
curl http://localhost:8200/assets/v1/sourcemaps -X POST \
    -F sourcemap="@./dist/app.min.js.map" \
    -F service_version="$SERVICEVERSION" \
    -F bundle_filepath="http://localhost/app.min.js" \
    -F service_name="myService"
    -H "Authorization: ApiKey <token>"
|
This example uses the version from |
|
|
The API key used here needs to have the sourcemap privilege. |
Alternatively, you can use a secret token for authentication.
Upload via a custom appedit
To ensure uploading source maps become a part of your deployment process, consider automating the process with a custom application. Here’s an example Node.js application that uploads the source map file created in the previous step:
console.log('Uploading sourcemaps!')
var request = require('request')
var filepath = './dist/app.min.js.map'
var formData = {
  sourcemap: fs.createReadStream(filepath),
  service_version: require("./package.json").version, // Or use 'git-rev-sync' for git commit hash
  bundle_filepath: 'http://localhost/app.min.js',
  service_name: 'service-name’
}
request.post({url: 'http://localhost:8200/assets/v1/sourcemaps',formData: formData}, function (err, resp, body) {
  if (err) {
    console.log('Error while uploading sourcemaps!', err)
  } else {
    console.log('Sourcemaps uploaded!')
  }
})
Next stepsedit
That’s it! The source map has been uploaded to Elasticsearch, and any new exception stack traces should now be correctly mapped to your source code.
More information: