Index lifecycle management
editIndex lifecycle managementedit
Index lifecycle policies allow you to automate the lifecycle of your APM indices as they grow and age. A default policy is applied to each APM data stream, but can be customized depending on your business needs.
See ILM: Manage the index lifecycle to learn more.
Default policiesedit
The table below describes the default index lifecycle policy applied to each APM data stream. Each policy includes a rollover definition; using rollover indices prevents a single index from growing too large and optimizes indexing and search performance. Rollover, i.e. writing to a new index, occurs after either an age or size metric is met.
| Data stream | Rollover after |
|---|---|
|
30 days / 50 gb |
|
30 days / 50 gb |
|
30 days / 50 gb |
|
30 days / 50 gb |
|
30 days / 50 gb |
|
30 days / 50 gb |
The APM index lifecycle policies can be viewed in Kibana.
Navigate to Stack Management / Index Lifecycle Management, and search for apm.
Configure a custom index lifecycle policyedit
When the APM package is installed, Fleet creates a default *@custom component template for each data stream.
The easiest way to configure a custom index lifecycle policy per data stream is to edit this template.
This tutorial explains how to apply a custom index lifecycle policy to the traces-apm data stream.
Step 1: View data streamsedit
The Data Streams view in Kibana shows you the data streams, index templates, and index lifecycle policies associated with a given integration.
- Navigate to Stack Management > Index Management > Data Streams.
-
Search for
traces-apmto see all data streams associated with APM trace data. -
In this example, I only have one data stream because I’m only using the
defaultnamespace. You may have more if your setup includes multiple namespaces.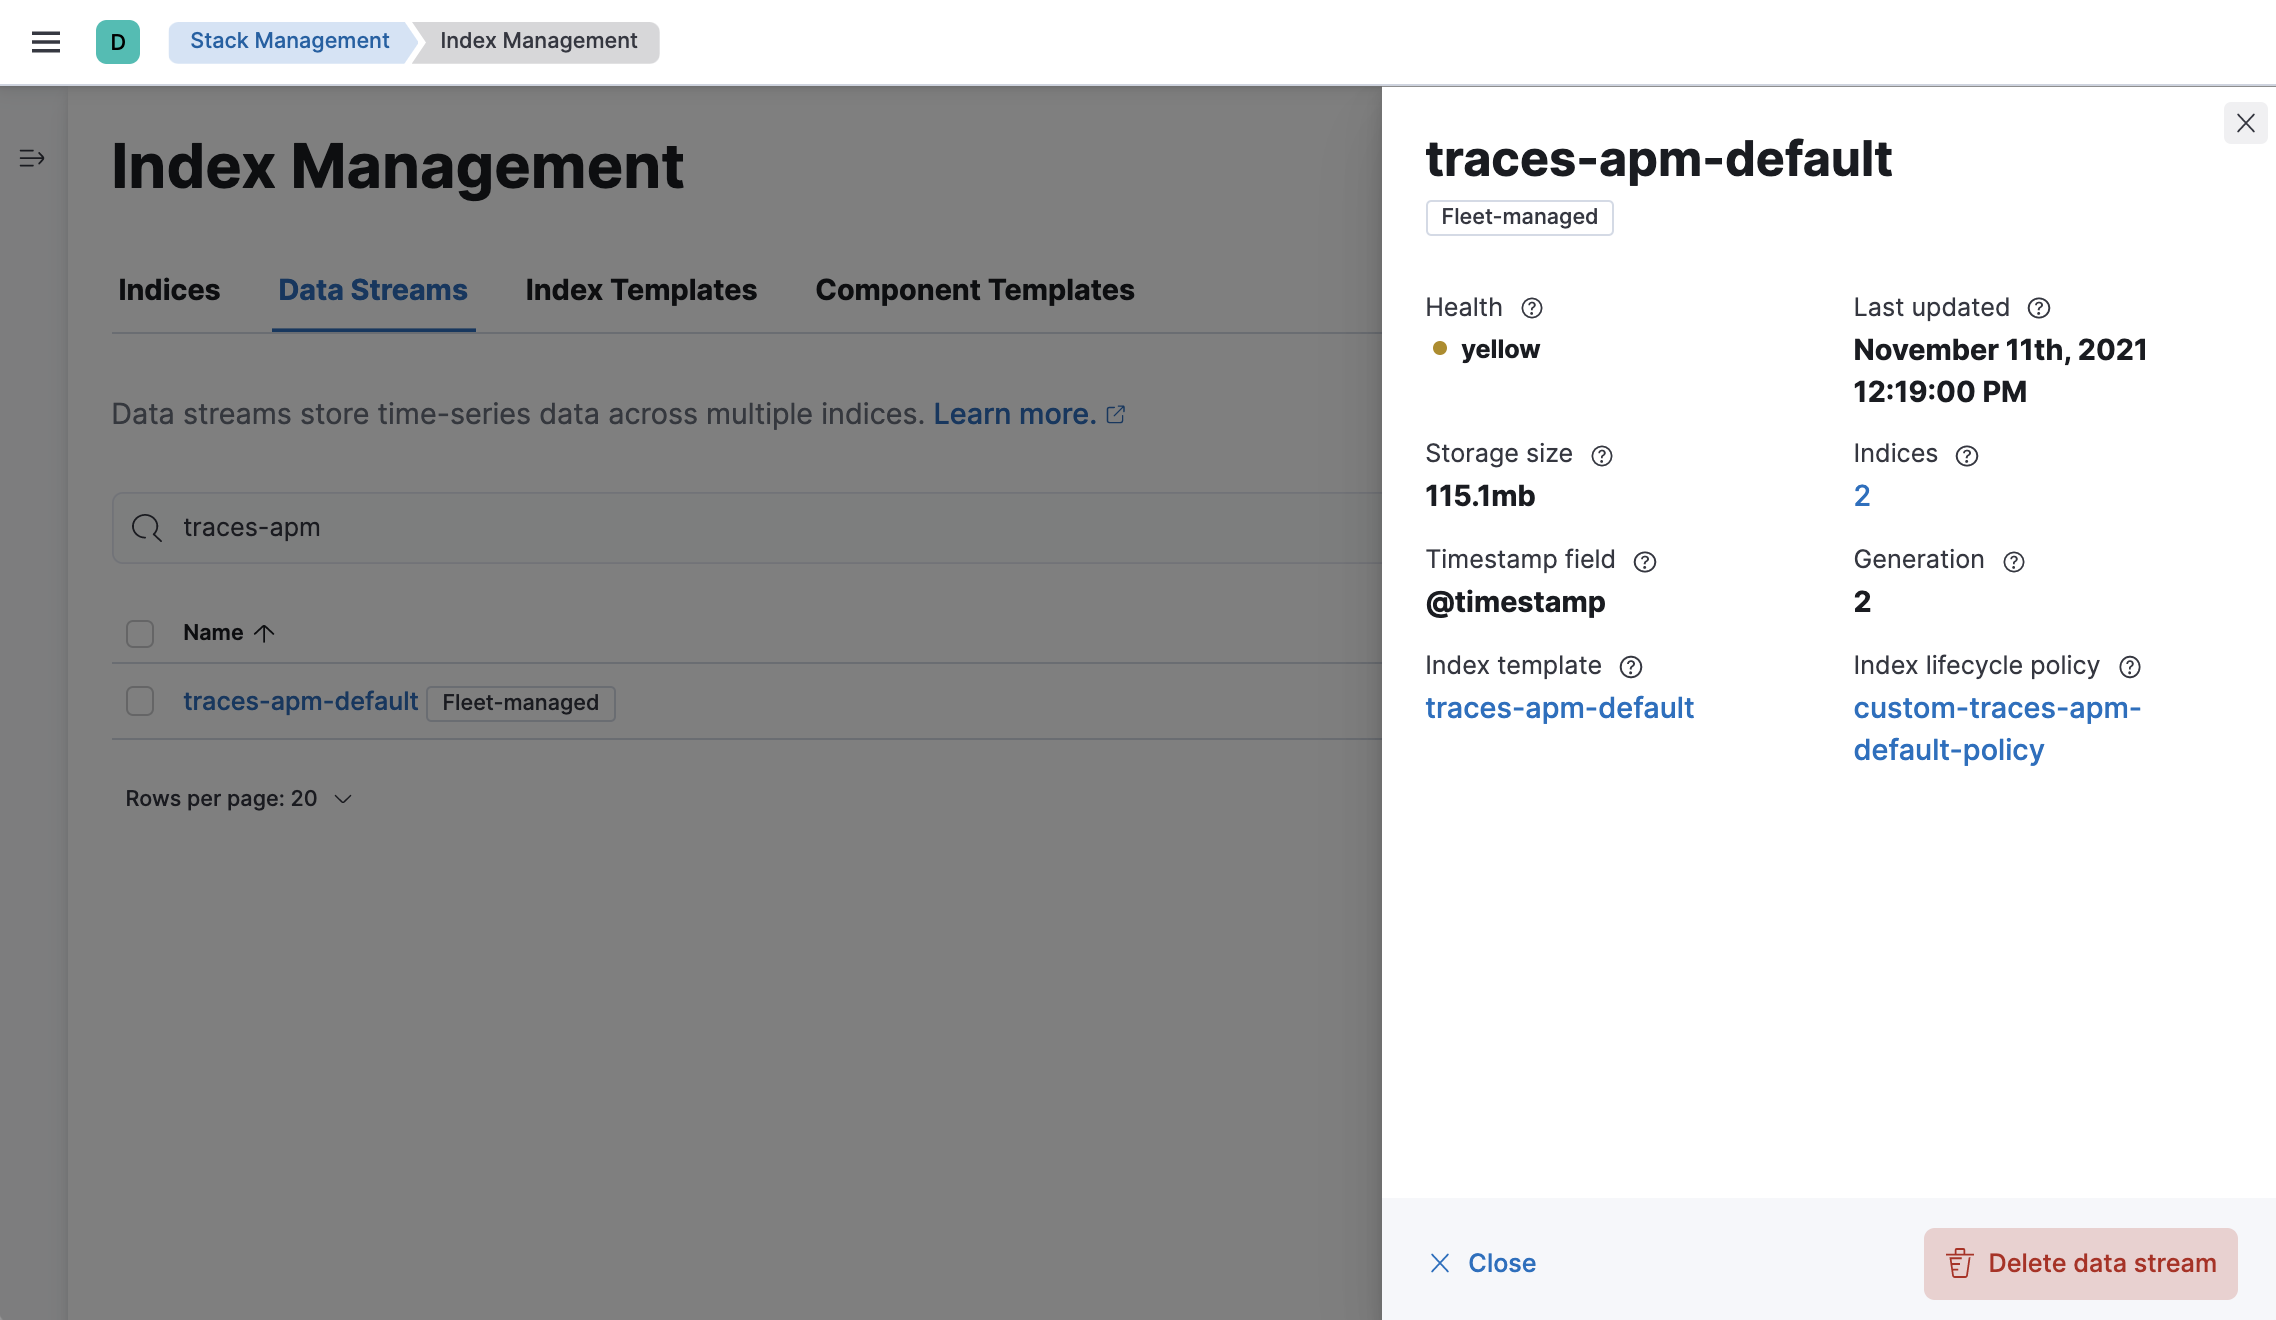
Step 2: Create an index lifecycle policyedit
- Navigate to Stack Management > Index Lifecycle Policies.
- Click Create policy.
Name your new policy; For this tutorial, I’ve chosen custom-traces-apm-policy.
Customize the policy to your liking, and when you’re done, click Save policy.
Step 3: Apply the index lifecycle policyedit
To apply your new index lifecylce policy to the traces-apm-* data stream,
edit the <data-stream-name>@custom component template.
-
Click on the Component Template tab and search for
traces-apm. -
Select the
traces-apm@customtemplate and click Manage > Edit. -
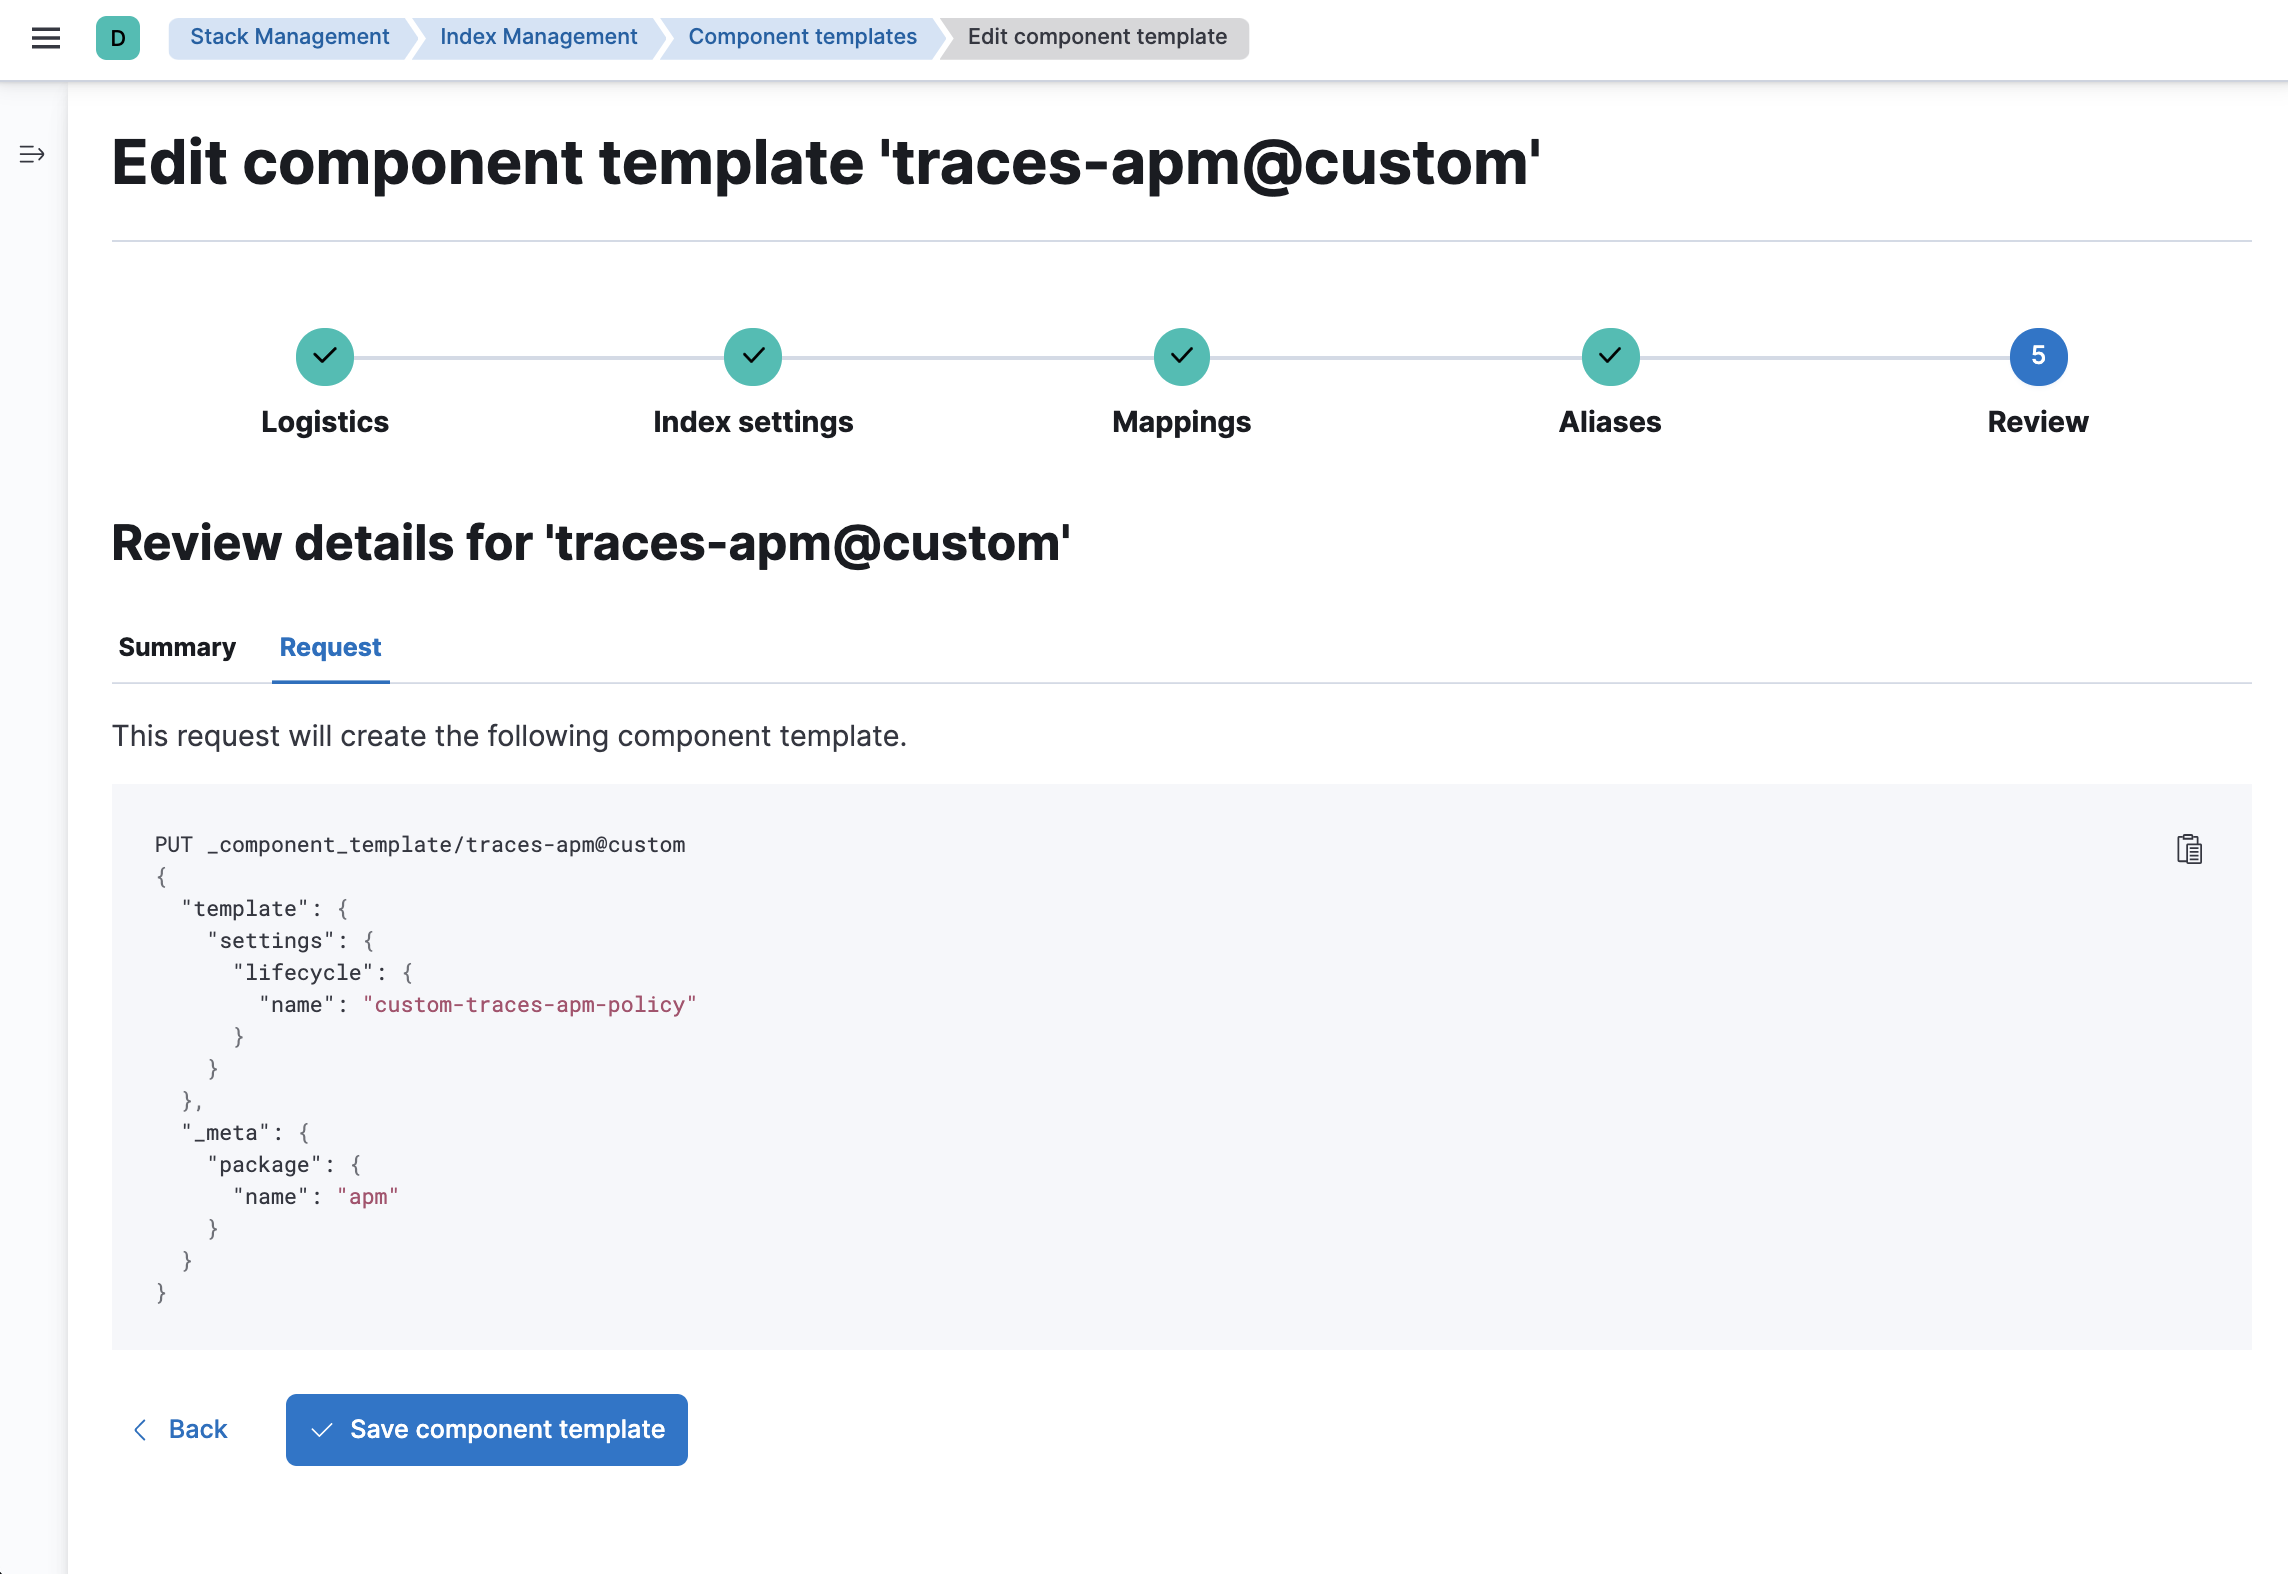
Under Index settings, set the ILM policy name created in the previous step:
{ "lifecycle": { "name": "custom-traces-apm-policy" } } -
Continue to Review and ensure your request looks similar to the image below. If it does, click Create component template.
Step 4: Roll over the data stream (optional)edit
To confirm that the data stream is now using the new index template and ILM policy, you can either repeat step one, or navigate to Dev Tools and run the following:
The result should include the following:
{
  "data_streams" : [
    {
      ...
      "template" : "traces-apm-default",
      "ilm_policy" : "custom-traces-apm-policy",
      ...
    }
  ]
}
|
The name of the custom index template created in step three |
|
|
The name of the ILM policy applied to the new component template in step two |
New ILM policies only take effect when new indices are created, so you either must wait for a rollover to occur (usually after 30 days or when the index size reaches 50GB), or force a rollover using the Elasticsearch rollover API:
POST /traces-apm-default/_rollover/
Namespace-level index lifecycle policiesedit
It is also possible to create more granular index lifecycle policies that apply to individual namespaces.
This process is similar to the above tutorial, but includes cloning and modify the existing index template to use
a new *@custom component template.