Upgrading the Elastic Stack with the 7.x Upgrade Assistant
In Kibana 6.7 we introduced the 7.0 Upgrade Assistant to guide you through upgrading your Elastic Stack to 7.x, available for free with the default distribution. In this post, we walk through how to use the Upgrade Assistant and the new Kibana Upgrade APIs to ensure a smooth upgrade.
Preparing for your upgrade
Before performing any major upgrade (6.x -> 7.x), we highly recommend that you back up your Elasticsearch cluster. You can use the Elasticsearch Snapshot and Restore API to back up specific indices or your entire cluster.
Upgrading can be a bit daunting — before getting started, definitely check out the Stack Upgrade Guide. This guide gives a great overview of the entire process and helps you determine the right upgrade strategy for your cluster. In addition, we recommend you test your upgrade process on a new cluster seeded with a snapshot backup of your production cluster.
Finally, we recommend using the Upgrade Assistant with the latest version available for 6.x. With the latest version, you’ll be sure to have the complete list of deprecation warnings and upgrade tools.
Find and fix breaking changes
Let’s start with a review of what you may need to fix before upgrading. To find the Upgrade Assistant, open Kibana, and then navigate to the Management tab > Elasticsearch > 7.0 Upgrade Assistant.
On the overview page, you’ll find a summary of the issues currently known that must be fixed in order to begin your upgrade. They’re broken down by cluster-level issues and index-level issues.
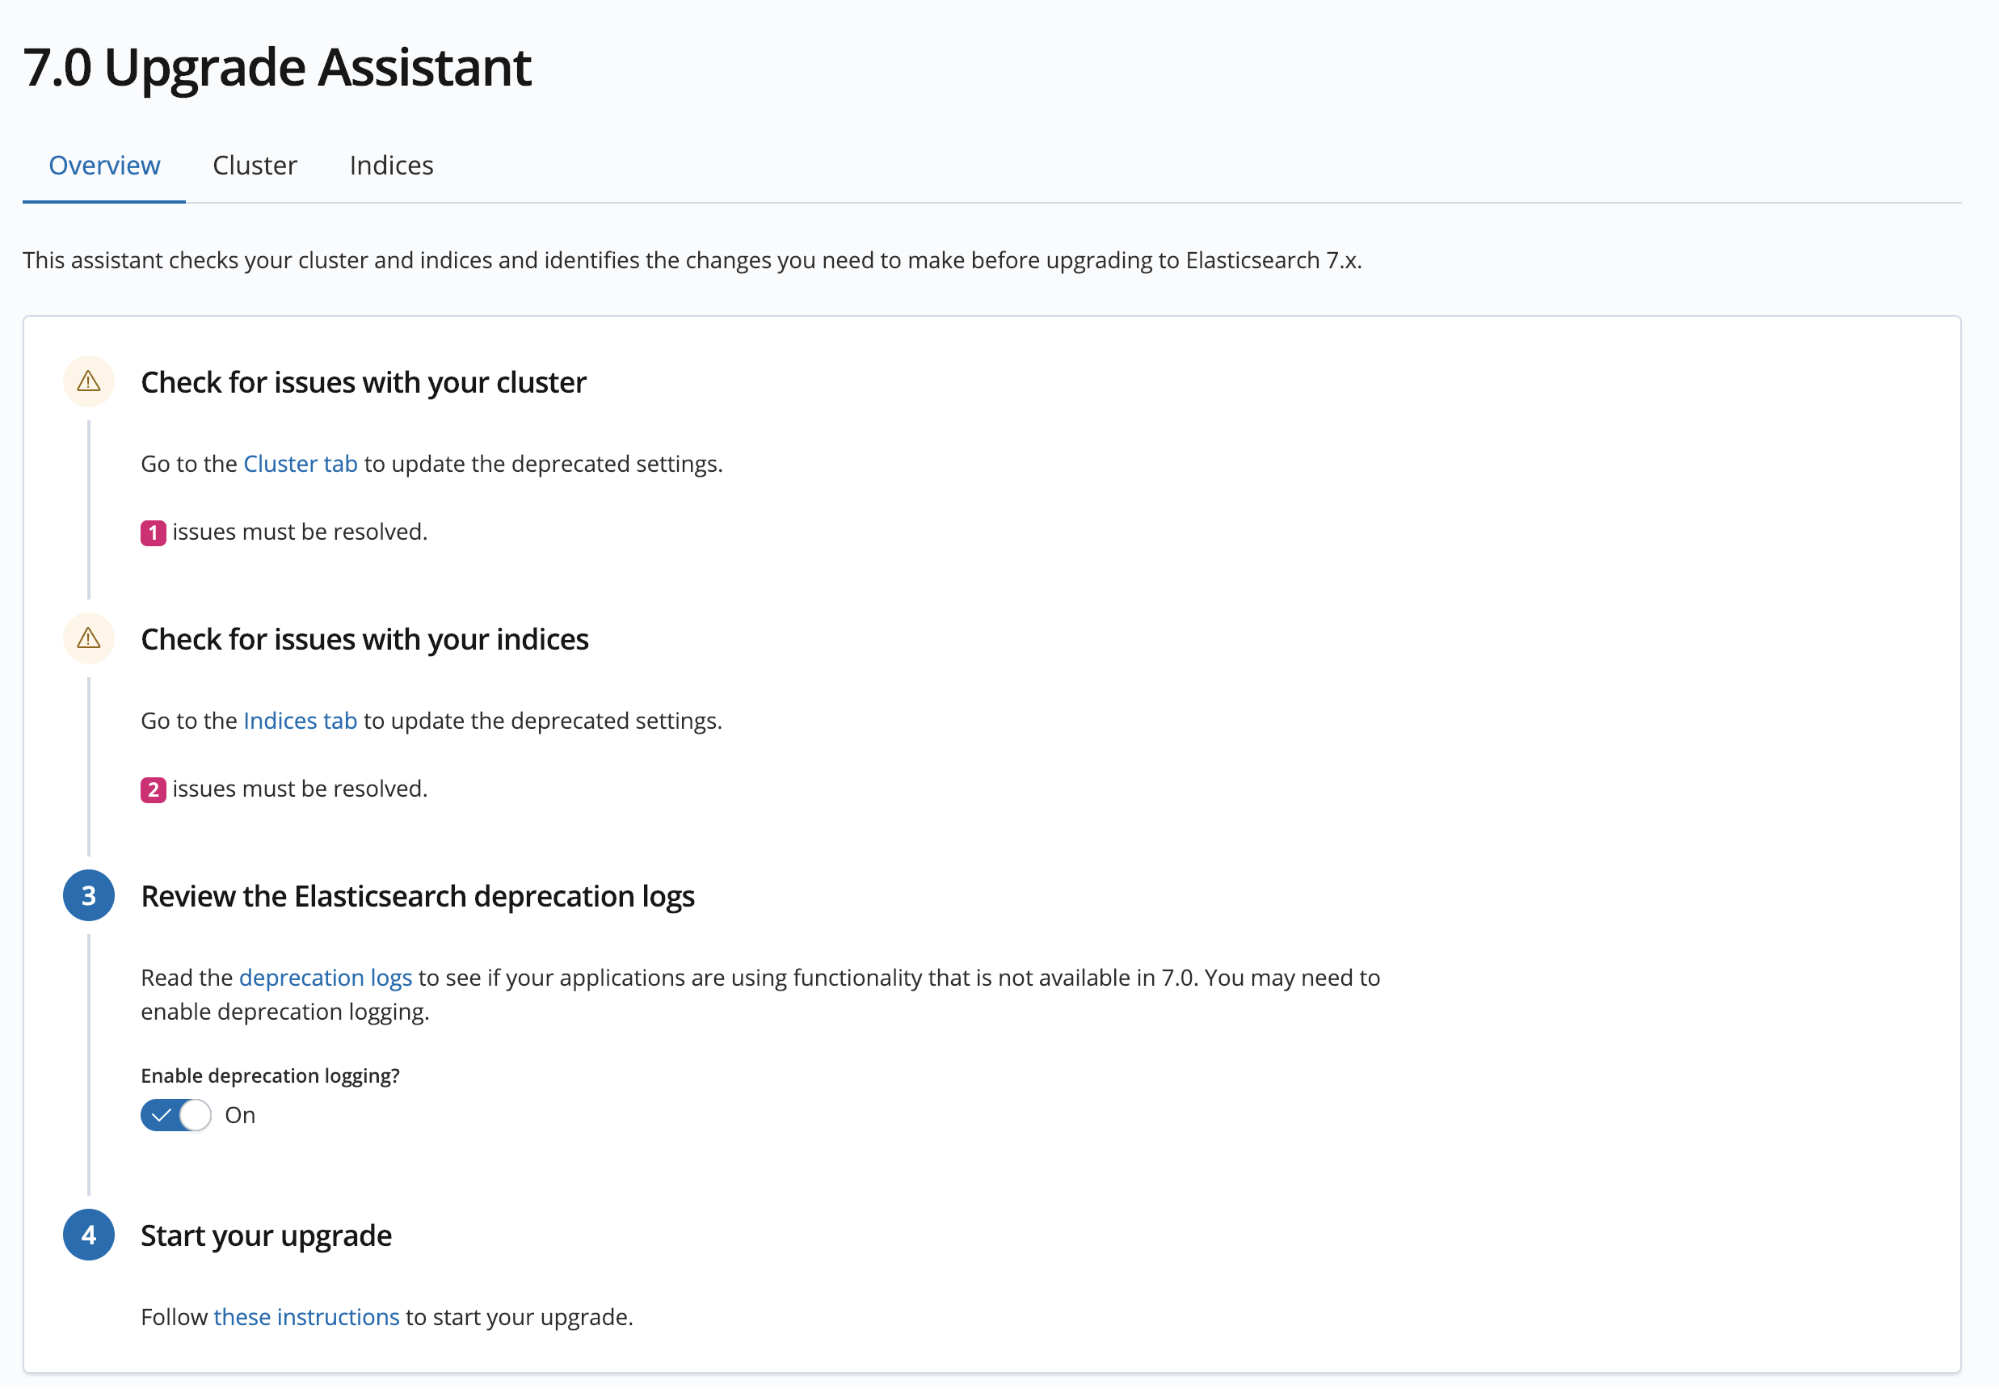
In the Cluster tab, you’ll find a list of configuration deprecations that apply to your entire cluster or to specific nodes in your cluster. In the Index tab, you’ll find index settings and mappings options that are no longer supported. This tab also includes a few tools to automatically repair common issues, such as reindexing old indices, which we cover below.
Each item in these lists includes a link to documentation for more information. Clicking the Refresh button makes issues disappear once they’ve been fixed.
Reindex 5.x indices
Indices created in 5.x need to be reindexed in order to upgrade to Elasticsearch 7.x. The Upgrade Assistant has a built-in reindexing tool that ensures a smooth transition.
To get started, open the Indices tab and find the deprecation item titled “Index created before 6.0.” If you don’t have this item, then lucky you, no work to do here!
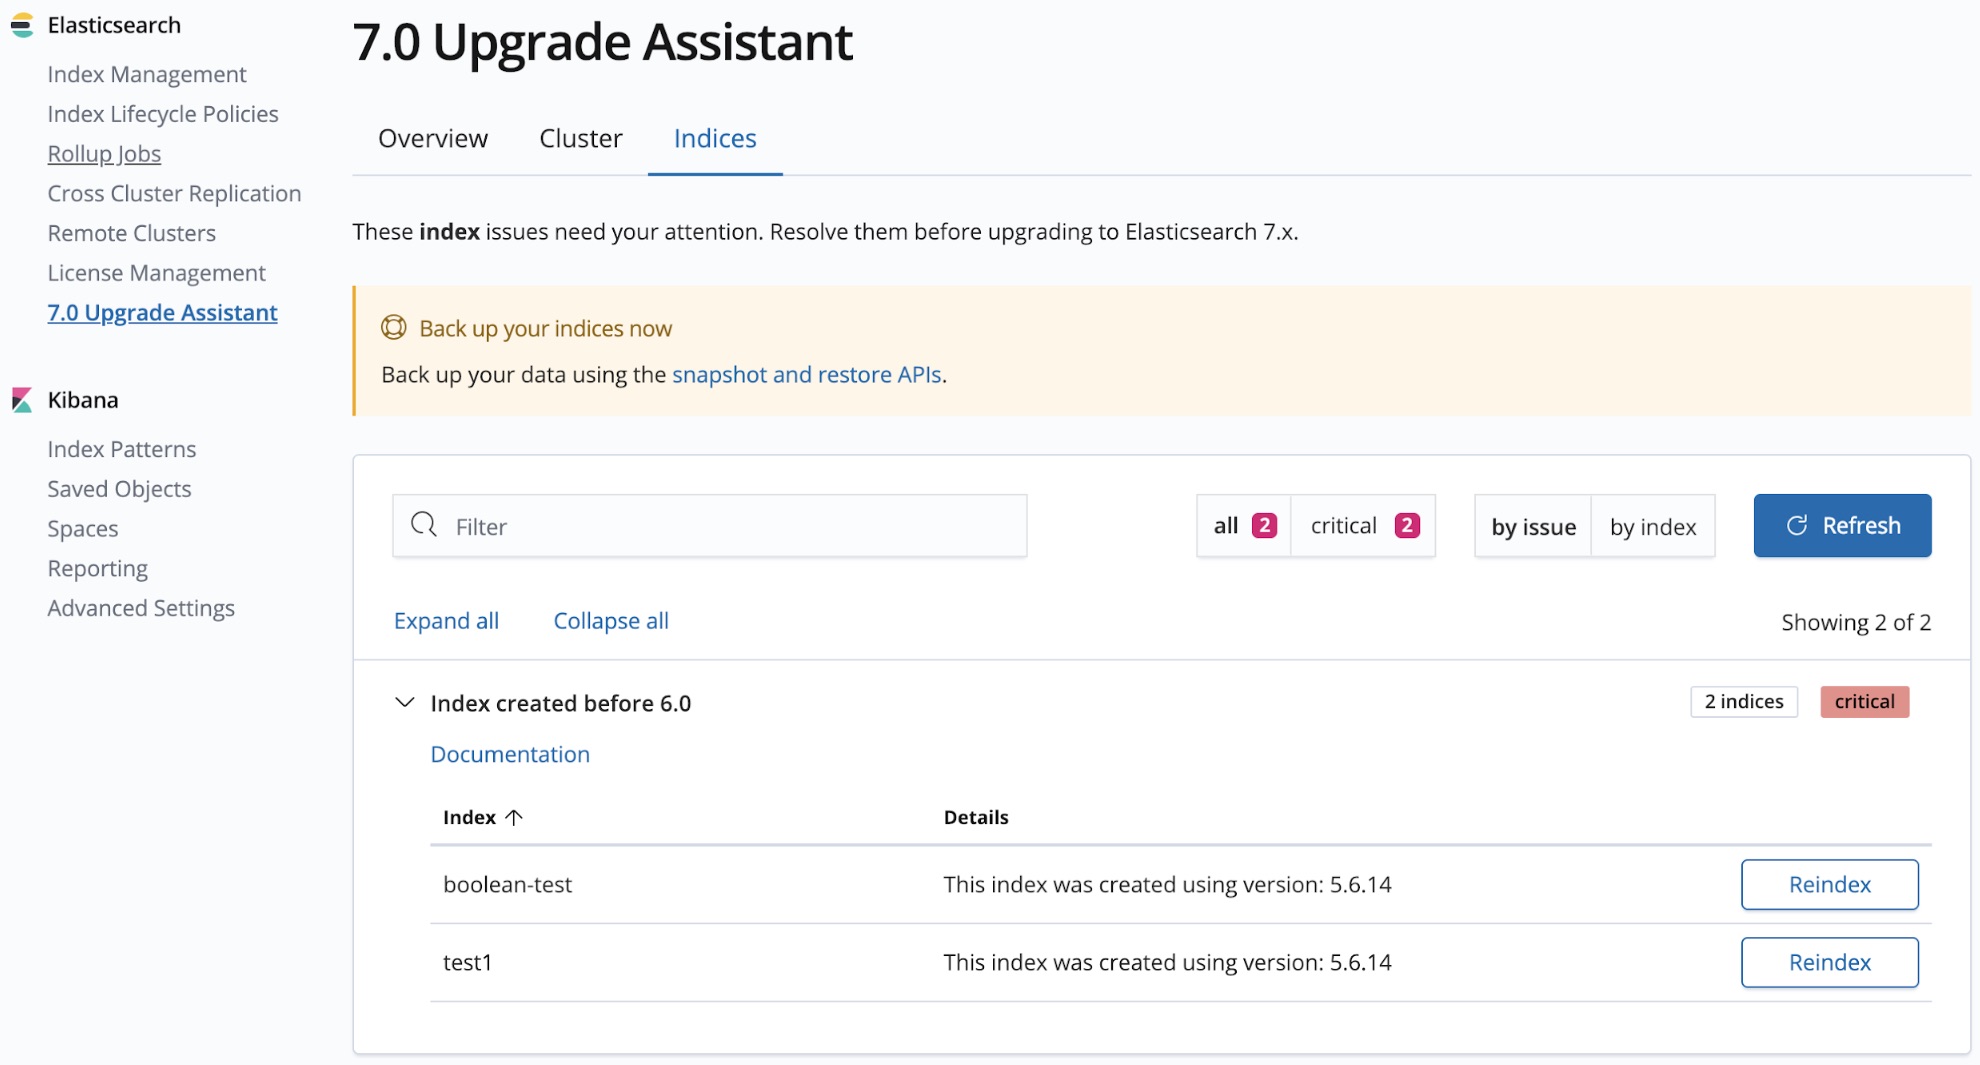
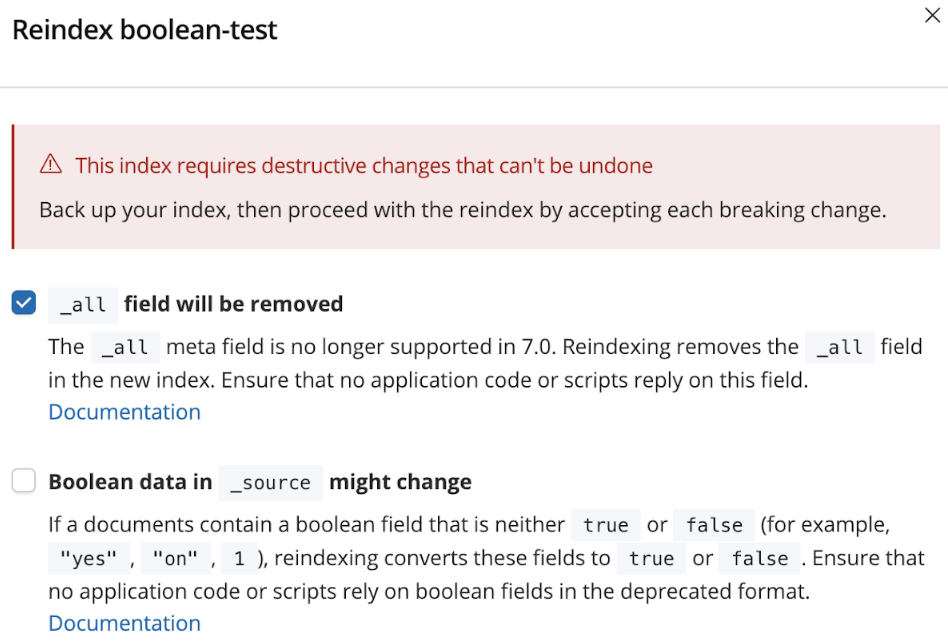
Here you’ll see a table of indices that need to be reindexed. You can start this process by clicking the Reindex button on the right side of the table row. This opens a UI that guides you through any changes required to reindex this index. Once you’ve confirmed the changes, you’ll be able to track the progress of the reindex, cancel it if needed, and view any errors if they occur.
Keep in mind that while this reindex is running, documents cannot be created, updated, or deleted from the index until the reindex has completed. If this will break an application in your system, you may need to try a more advanced reindex strategy.
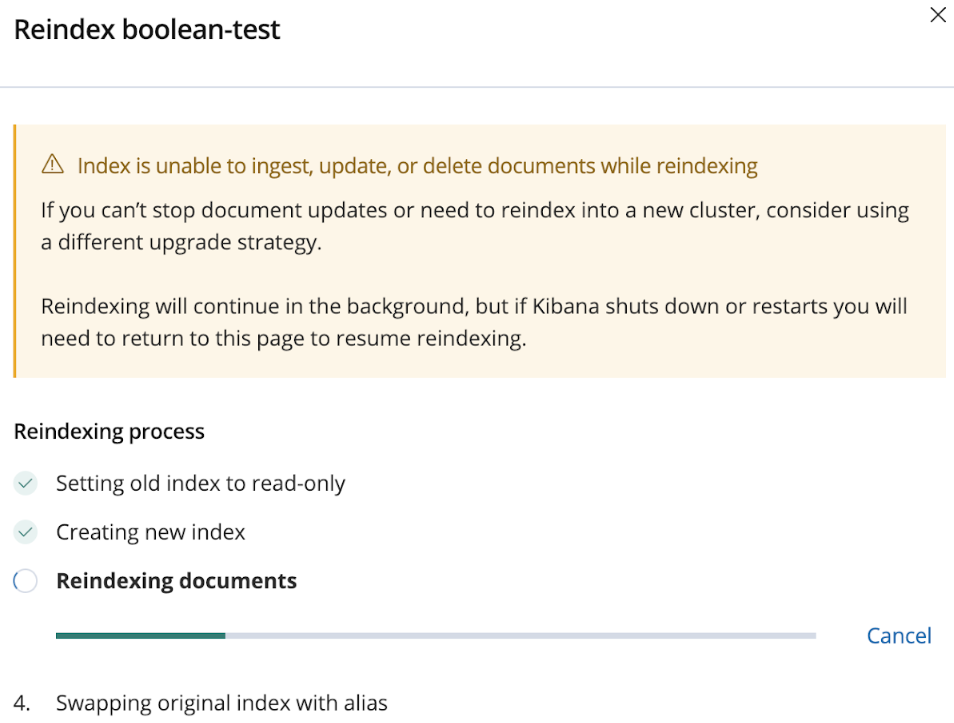
The reindexing tool allows multiple reindex operations to be running at once, but you’ll want to monitor the load on your cluster while these are running. Until the reindex is complete, an entire second copy of the index will exist in your cluster. Make sure you have enough disk and memory space to reindex large indices.
Reindex at scale with the Upgrade Assistant API
For clusters with a large number of indices, you may want to automate the reindexing step of your migration. Kibana offers an Upgrade Assistant API to start, stop, and check the status of reindex operations. You can use this API to script your upgrade process for thousands of indices.
Here’s a sample request to begin reindexing myIndex:
curl -XPOST mykibana.com/api/upgrade_assistant/reindex/myIndex
To check the status of the reindex:
curl -XGET mykibana.com/api/upgrade_assistant/reindex/myIndex
{
  "reindexOp": {
    "indexName": "myIndex",
    "newIndexName": "reindexed-v7-myIndex",
    "status": 0,
    "lastCompletedStep": 40,
    "reindexTaskId": "QprwvTMzRQ2MLWOW22oQ4Q:11819",
    "reindexTaskPercComplete": 0.3,
    "errorMessage": null
  },
  "warnings": [],
  "hasRequiredPrivileges": true
}
For more details on how to read these results (and other options available), see the API documentation.
Find deprecated APIs being used from other applications
In addition to the information available in the Upgrade Assistant, you’ll want to review the Elasticsearch deprecation logs. These logs help you find API calls made by other applications that are using deprecated functionality.
You can use the Upgrade Assistant to turn this logging feature on, if it isn’t already turned on. You’ll then need to collect the logs from each Elasticsearch node to see which deprecated features other apps or scripts may be using.
Begin the upgrade and cleanup
Once you’ve fixed all deprecation warnings and reviewed your deprecation logs, you’re ready to upgrade. If you haven’t backed up your indices, now is the time.
If you’re using Elastic Cloud, the upgrade is as simple as opening your deployment and clicking the Upgrade link next to your cluster version number. Otherwise, review our Stack Upgrade documentation.
Once you’ve upgraded all of your Elasticsearch nodes, and Kibana, Logstash, and Beats, give the Upgrade Assistant another visit. For some use cases, there may be a few follow-up tasks needed, which the Assistant will guide you through. For instance, APM indices must be reindexed in order to support the new Elastic Common Schema (ECS) format.
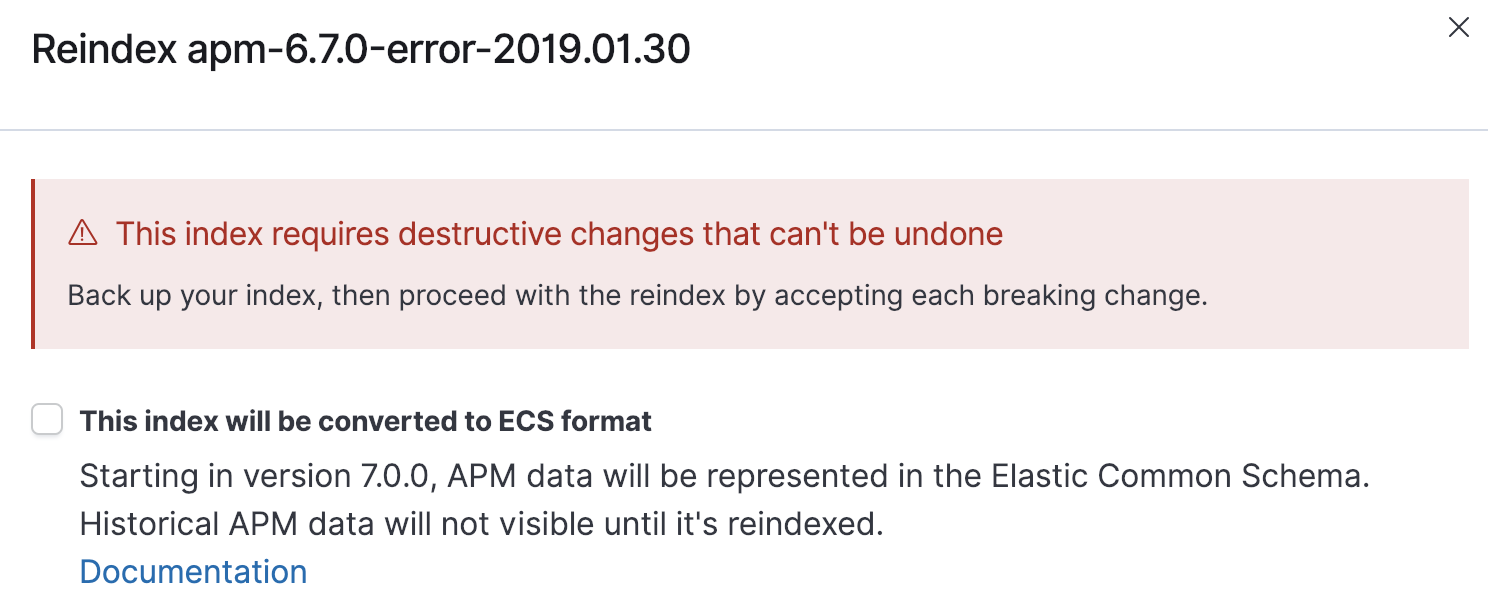
Congrats on making it this far, and welcome to Elastic Stack 7.x!
Looking for a little more guidance on your all-important upgrade process? Catch the Upgrading Your Elastic Stack to 7.x webinar for all the considerations, best practices, and caveats for upgrading to 7.x.