Storing Snapshots in Elastic Cloud Enterprise with Minio
Introduction
My all-time favourite opening scene of a movie is in Trainspotting. A crazed Ewan McGregor (Renton) runs at top speed through the streets of Edinburgh to the kinetic beat of Iggy Pop. He dodges pursuers, jumps down staircases, and just when he thinks he’s in the clear, he gets hit by a car. And then he just laughs it off. The world of enterprise software may be less exciting than the exploits of Renton, Begbie and friends, but an on-call rotation without backups can feel a lot like that — running, dodging, and ultimately, getting blindsided. With our snapshot backup update in ECE 1.1 — we’re hoping we can help you laugh it off too.
In ECE, our support for snapshot backups to date has focused mainly on storage to the public cloud (AWS S3 and Google GCS). Many have asked for options for local snapshot storage to address privacy and security requirements. Starting in ECE 1.1, we have begun to address these queries with support for Minio as an on-premise storage solution.
Minio is a popular open source object storage server that supports the AWS S3 API. It is intended to provide scalable persistent storage using your Docker infrastructure.
Installing a single Minio node
We’re going to assume you’ve already installed ECE, so we will install Minio using the official Docker containers.
Many ECE customers run in an air-gapped environment where their servers are not connected to the public internet. It is possible to use a private Docker repository, but if you don’t have one it is easy to download the Docker images and copy to your offline network, as we will illustrate below. Of course, if you are connected to the public internet you can just skip the first three steps.
- On an internet-connected machine, download the Minio image from Docker:
~$ docker pull minio/minio Using default tag: latest latest: Pulling from minio/minio ff3a5c916c92: Pull complete 65fb7fed439b: Pull complete 427cece328be: Pull complete Digest: sha256:570421569de35d51ebd858fbdbec219f20d1b7b384cf6f228dc92f796574ccf7 Status: Downloaded newer image for minio/minio:latest - Save the image to a tar file:
~$ docker save -o minio.tar minio/minio - Copy the tar file to your air-gapped server and load it:
~$ docker load < minio.tar - Install the Minio Docker image:
docker run -p 9000:9000 -e "MINIO_ACCESS_KEY=testkey" \
 -e "MINIO_SECRET_KEY=testsecret" -v /mnt/minio/data:/data \
 -v /mnt/minio/config:/root/.minio minio/minio server /data
There are many config options that can be passed to Minio (which are documented in the Minio Server Configuration Guide), but for our example:- Set a preconfigured S3 access key/secret of
testkey/testsecret - Specify a location for the persistent data mount and configuration directory. It is a good idea to use a persistent data mount even if you’re just evaluating Minio so that you maintain data after you restart the container.
- Set a preconfigured S3 access key/secret of
- When Minio starts up it will display some useful configuration information:
Drive Capacity: 17 GiB Free, 19 GiB Total Endpoint: http://172.17.0.1:9000 http://127.0.0.1:9000 AccessKey: testkey SecretKey: testsecret Browser Access: http://172.17.0.1:9000 http://127.0.0.1:9000 - Once Minio is installed, the admin UI should be running at http://<your_host>
:9000. You can use the big red plus (+) button in the admin UI to create a bucket. Here we’ve called it ece-backup:
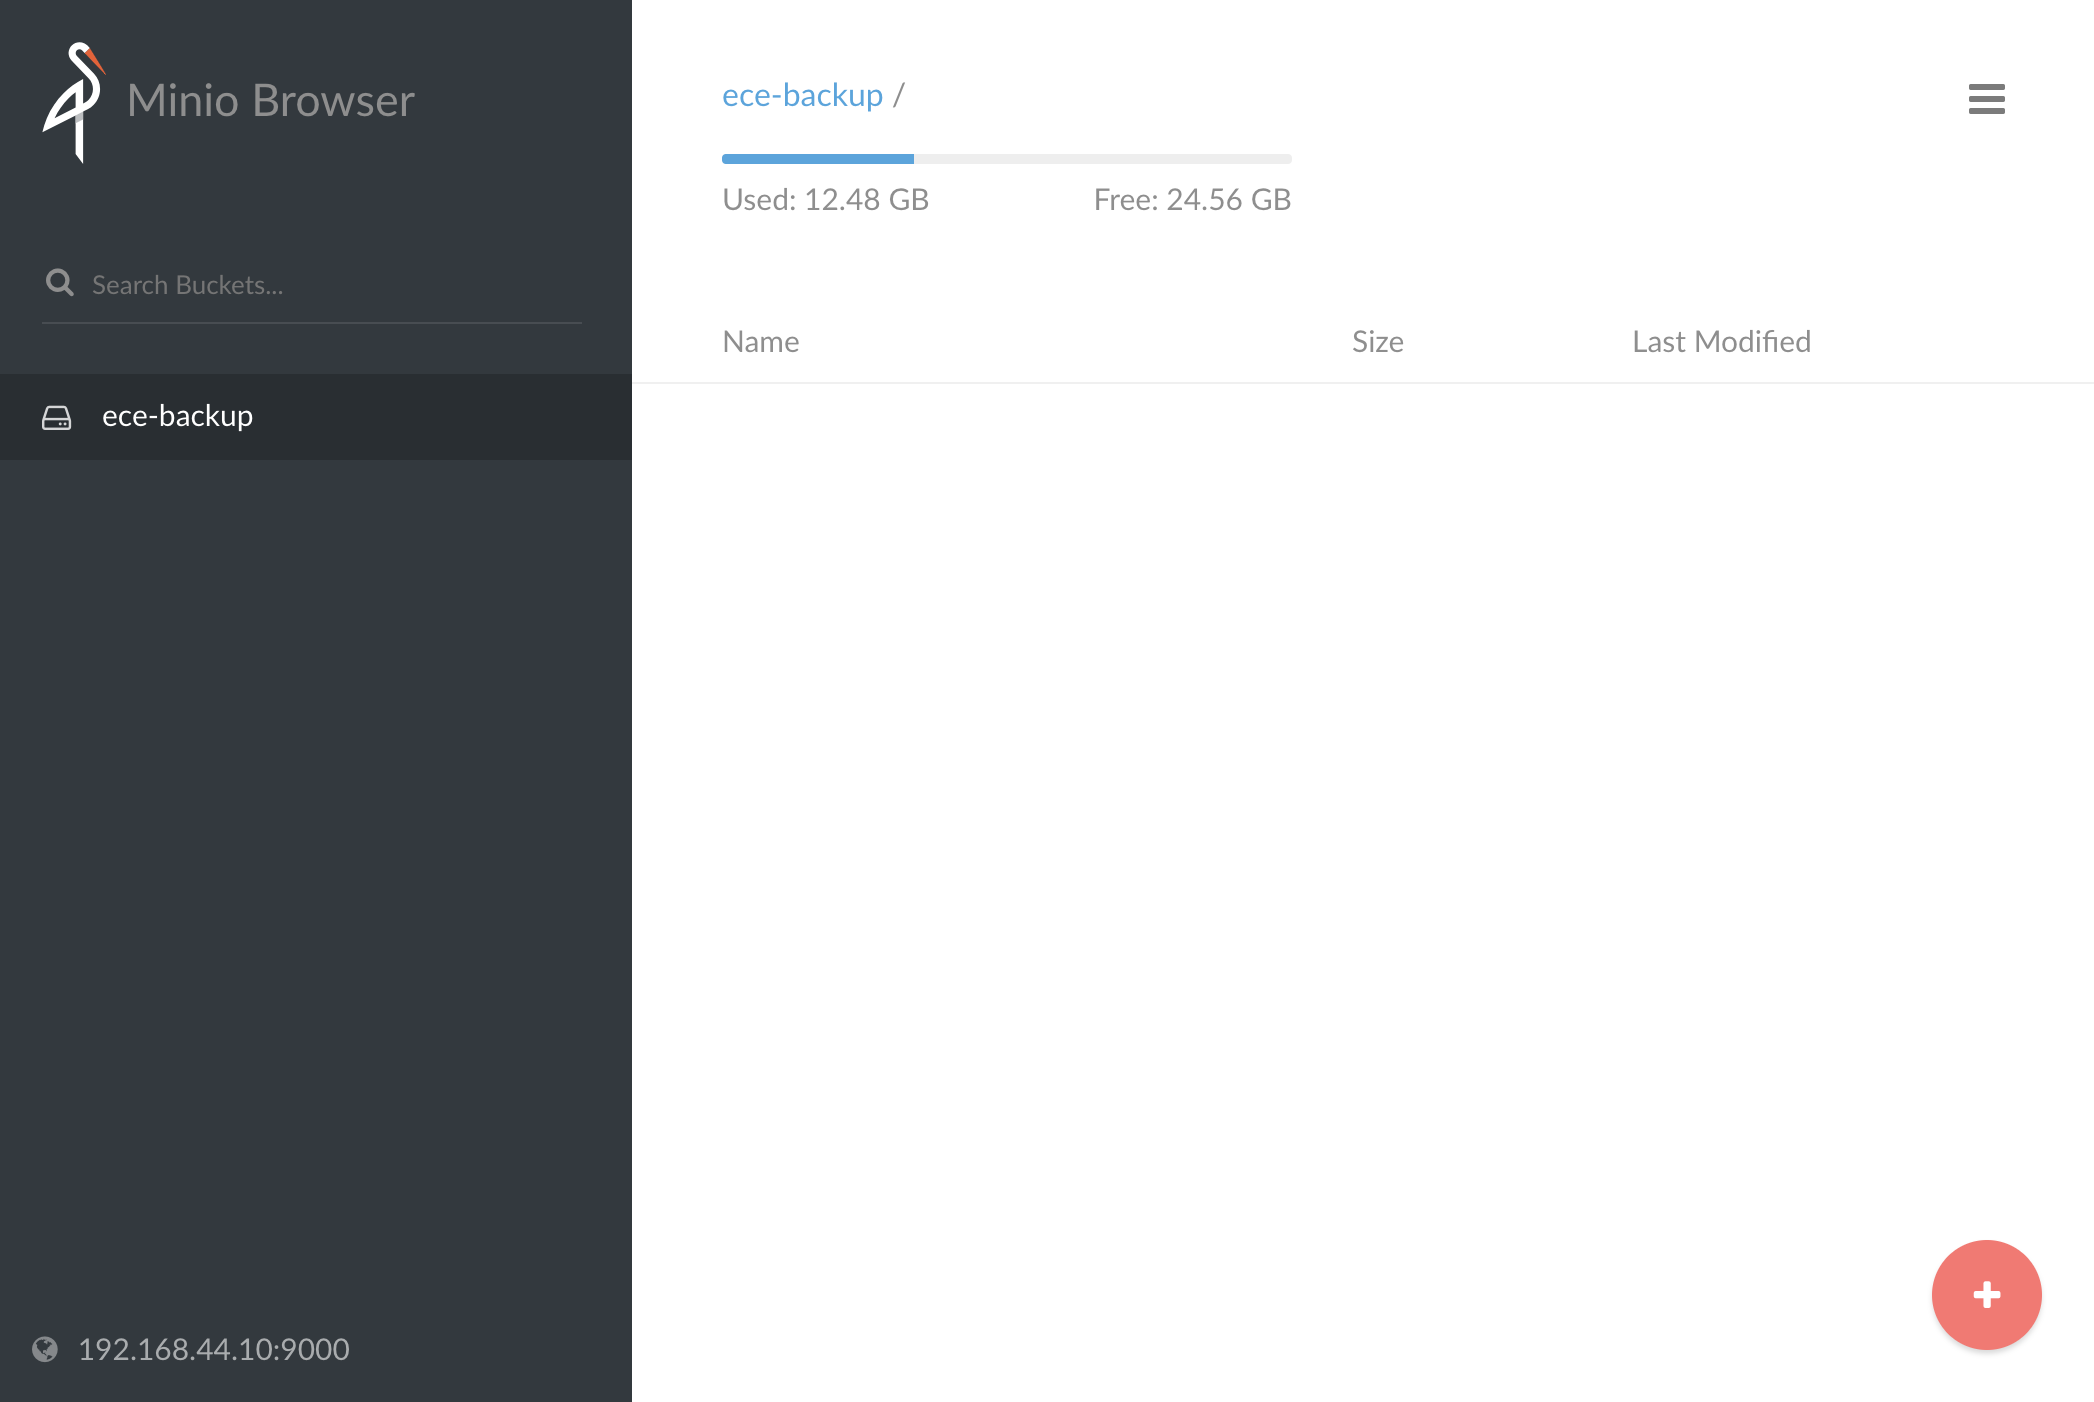
We’ve only done a basic installation of a single Minio node for test or evaluation purposes. When installing in production it will be necessary to use Docker Swarm or Kubernetes to manage the high-availability deployment of multiple nodes. For more information, see the Minio Deployment Quickstart Guide.
Configuring ECE
First we need to add a snapshot repository to ECE. From the ECE admin UI:
- Navigate to Platform > Repositories.
- Click the Add Repository button.
- From the Repository Type drop-down list, select Advanced.
- In the Configuration text area, provide the repository JSON. You must specify the bucket, access_key, secret_key, endpoint, and protocol.
{
   "type": "s3",
   "settings": {
      "bucket": "ece-backup",
      "access_key": "testkey",
      "secret_key": "testsecret",
      "endpoint": "<your Minio endpoint>:9000",
      "protocol": "http"
   }
}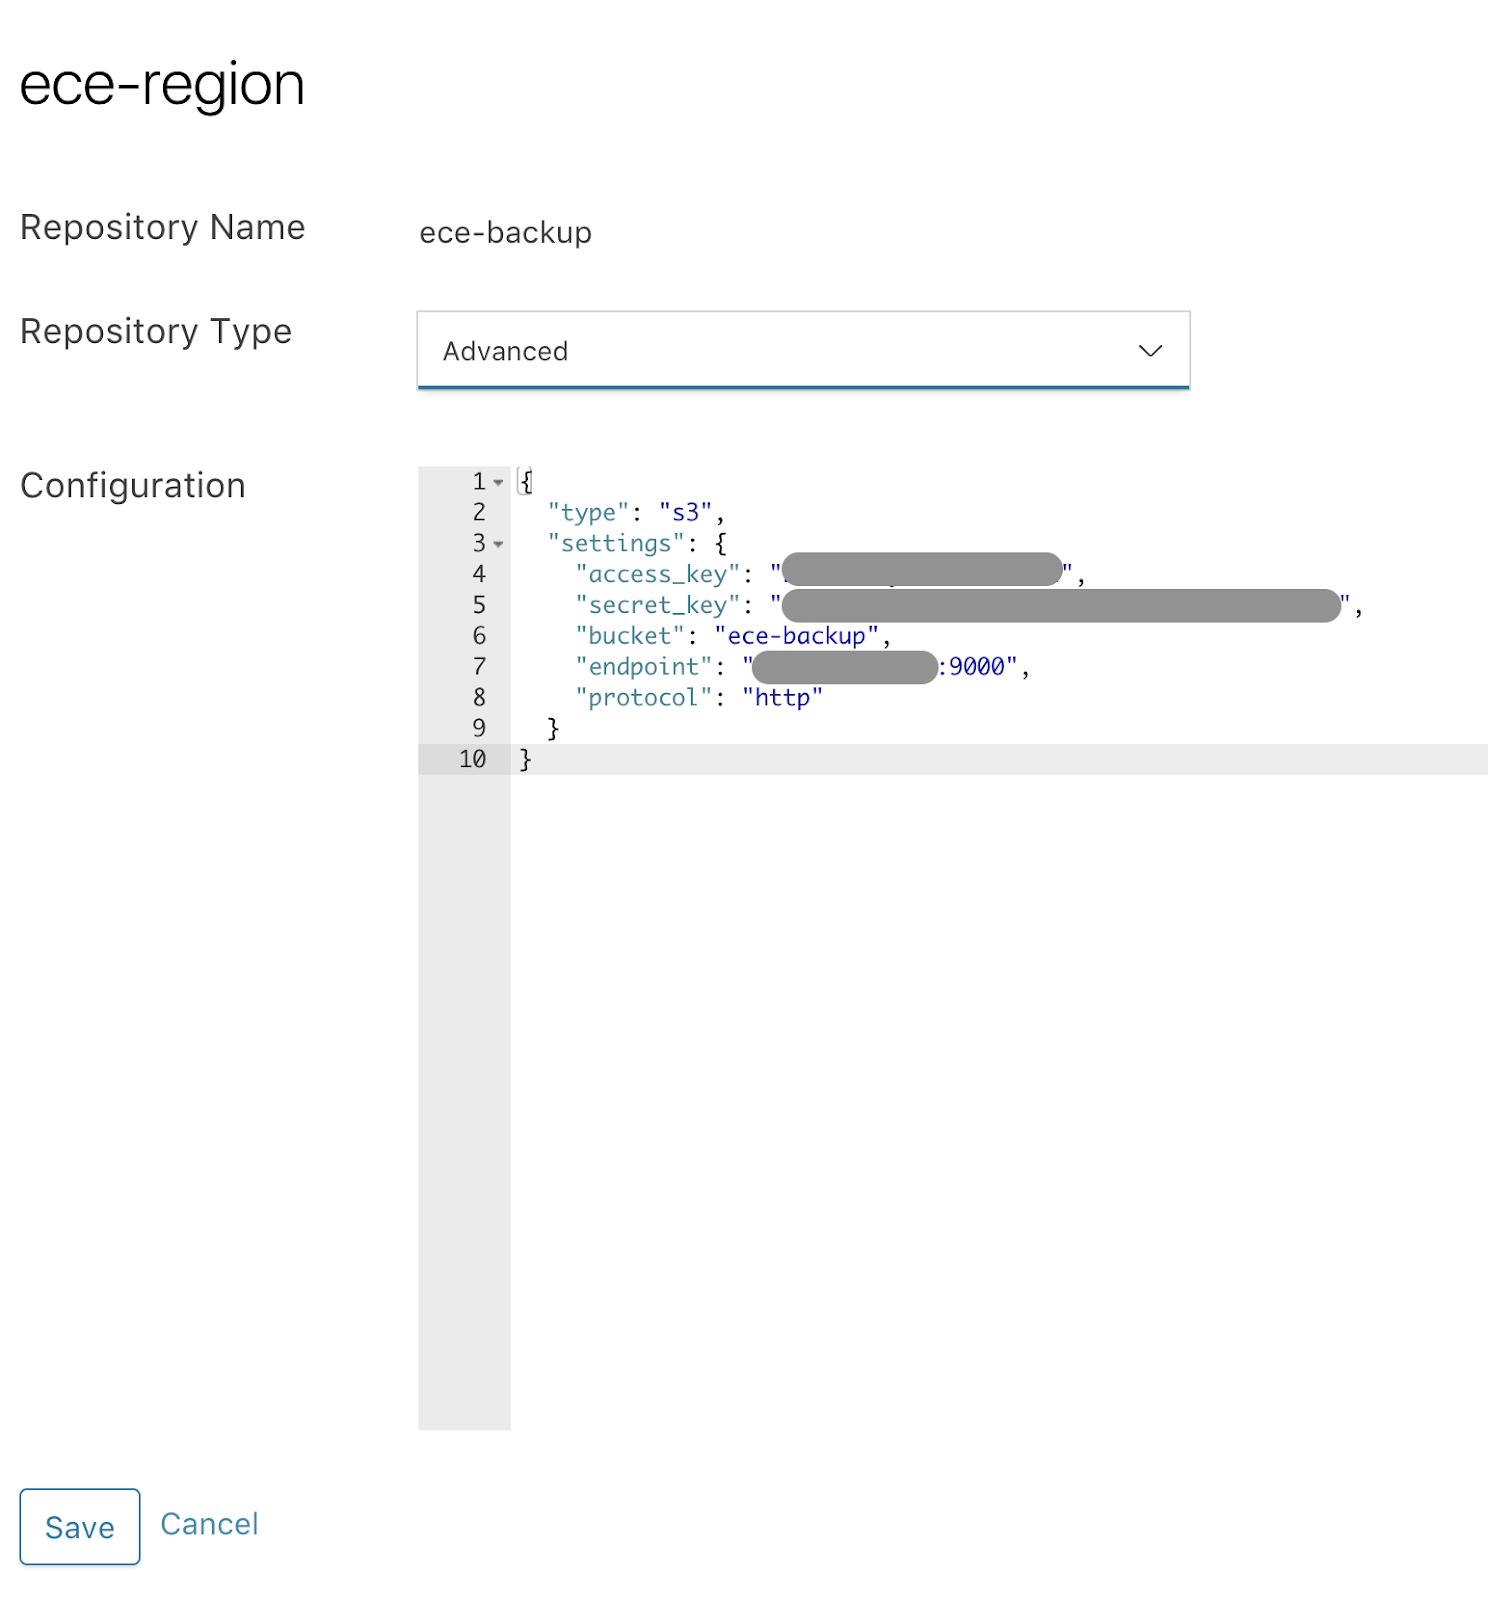
- Save the repository config.
Next, we can create a new cluster or update an existing cluster to use our snapshot repository. Under the Snapshot Repository drop-down you should select your new ece-backup repository. In addition, if you have a 6.x cluster you need to add the following settings in the User Settings section:
s3.client.default.endpoint: "<your Minio endpoint>:9000"
s3.client.default.protocol: http
Once the cluster has been created or updated, you should start to see snapshots being created in the Elasticsearch > Snapshots page. By default, snapshots are created every 30 minutes.
If you’re curious, you can see the snapshot data by visiting the Minio browser and looking at the ece-backup/snaphots/<your_cluster_id> directory:
Conclusion
We’ve walked through the simple process of adding a single Minio node to an ECE installation so you can make local backups from your clusters, without crossing the public internet.
Installing Minio in production environment will involve a more sophisticated installation process, with considerations such as encryption and high-availability. If you want to read more, full details are in the online Minio documentation. Stay tuned for a future blog post where we will discuss these features and support for additional backends, including Network Attached Storage (NAS), Azure Blob Storage and Google Cloud Storage.
Hopefully it will be better than Trainspotting 2*!
* - This movie was a travesty IMHO.