Get started with CSPM for GCP
editGet started with CSPM for GCP
editOverview
editThis page explains how to get started monitoring the security posture of your cloud assets using the Cloud Security Posture Management (CSPM) feature.
Set up CSPM for GCP
editTo set up CSPM for GCP, first add the CSPM integration, then enable cloud account access.
Add your CSPM integration
edit- From the Elastic Security Get started page, click Add integrations.
-
Search for
CSPM, then click on the result. - Click Add Cloud Security Posture Management (CSPM).
-
Give your integration a name that matches the purpose or team of the GCP account you want to monitor, for example,
dev-gcp-project.
Set up cloud account access
editTo setup CSPM for a GCP project, you will need to have admin privileges for the project.
For most users, the simplest option is to use a Google Cloud Shell script to automatically provision the necessary resources and permissions in your GCP account. This method, as well as two manual options, are described below.
Cloud Shell script setup (recommended)
edit- Under Setup Access, select Google Cloud Shell.
-
Under Where to add this integration:
- Select New Hosts.
-
Name the Elastic Agent policy. Use a name that matches the purpose or team of the cloud account or accounts you want to monitor. For example,
dev-gcp-account. - Click Save and continue, then Add Elastic Agent to your hosts. The Add agent wizard appears and provides Elastic Agent binaries, which you can download and deploy to a VM in your GCP account.
- Click Save and continue.
- Copy the command that appears, then click Launch Google Cloud Shell. It opens in a new window.
-
Check the box to trust Elastic’s
cloudbeatrepo, then click Confirm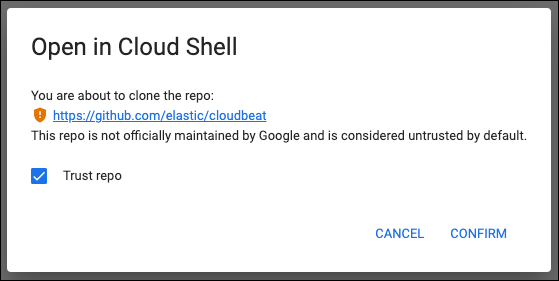
- In Google Cloud Shell, execute the command you copied earlier. Once it finishes, return to Kibana and wait for the confirmation of data received from your new integration. Then you can click View Assets to see your data.
During Cloud Shell setup, the CSPM integration adds roles to Google’s default service account, which enables custom role creation and attachment of the service account to a compute instance. After setup, these roles are removed from the service account. If you attempt to delete the deployment but find the deployment manager lacks necessary permissions, consider adding the missing roles to the service account: Project IAM Admin, Role Administrator.
Manual authentication
editTo authenticate manually, you’ll first need to generate credentials for a new GCP service account with the necessary roles, then provide those credentials to the CSPM integration.
Generate GCP credentials:
- Access the GCP console and select your project.
- Navigate to IAM & Admin → Service accounts.
- Click Create Service Account.
- Provide an account name.
-
Enable the required roles:
-
Cloud Asset Viewer: Grants read access to cloud asset metadata. -
Browser: Grants read access to the project hierarchy.
-
- Click Continue, then click Done.
- Select the new service account from the list.
- Go to the KEYS tab, then click ADD KEY.
- Select JSON as the key type, then click CREATE.
The credentials JSON will download to your local machine. Keep it secure since it provides access to your GCP resources.
Provide credentials to the CSPM integration:
- On the CSPM setup screen under Setup Access, select Manual.
- Enter your GCP Project ID.
- Select either Credentials File or Credentials JSON, and enter the credentials information in your selected format.
-
Under Where to add this integration:
-
If you want to monitor a GCP project where you have not yet deployed Elastic Agent:
- Select New Hosts.
-
Name the Elastic Agent policy. Use a name that matches the purpose or team of the cloud account or accounts you want to monitor. For example,
dev-gcp-account. - Click Save and continue, then Add Elastic Agent to your hosts. The Add agent wizard appears and provides Elastic Agent binaries, which you can download and deploy to a VM in your GCP account.
-
If you want to monitor a GCP project where you have already deployed Elastic Agent:
- Select Existing hosts.
- Select an agent policy that applies the GCP project you want to monitor.
-
- Click Save and continue.
Wait for the confirmation that Kibana received data from your new integration. Then you can click View Assets to see your data.