


Importing CSV and Log Data into Elasticsearch with File Data Visualizer
Introduced in Elastic Stack 6.5 is the new File Data Visualizer feature. This new feature allows a user to upload a file containing delimited (e.g. CSV), NDJSON or semi-structured text (e.g. log files) where the new Elastic machine learning find_file_structure endpoint will analyse it and report back its findings about the data. This includes a suggested ingest pipeline and mappings which can be used to import the file into elasticsearch from the UI.
The aim of this feature is to enable users who wish to explore their data with Kibana or Machine Learning to easily get small amounts of data into Elasticsearch without having to learn the intricacies of the ingest process.
A great recent example is this blog post by a member of Elastic’s marketing team, who doesn’t have a development background. Using the File Data Visualizer he was easily able to import earthquake data into Elasticsearch to help him explore and analyse earthquake locations using geo_point visualizations in Kibana.
Example: Importing a CSV File into Elasticsearch
The best way to demonstrate this functionality is to step through an example. The following example will use data from a CSV file containing imaginary data from a flight booking website. Here we’re showing only the first five lines of the file to give you an idea of what the data looks like:
time,airline,responsetime
2014-06-23 00:00:00Z,AAL,132.2046
2014-06-23 00:00:00Z,JZA,990.4628
2014-06-23 00:00:00Z,JBU,877.5927
2014-06-23 00:00:00Z,KLM,1355.4812
Configure the CSV Import within File Data Visualizer
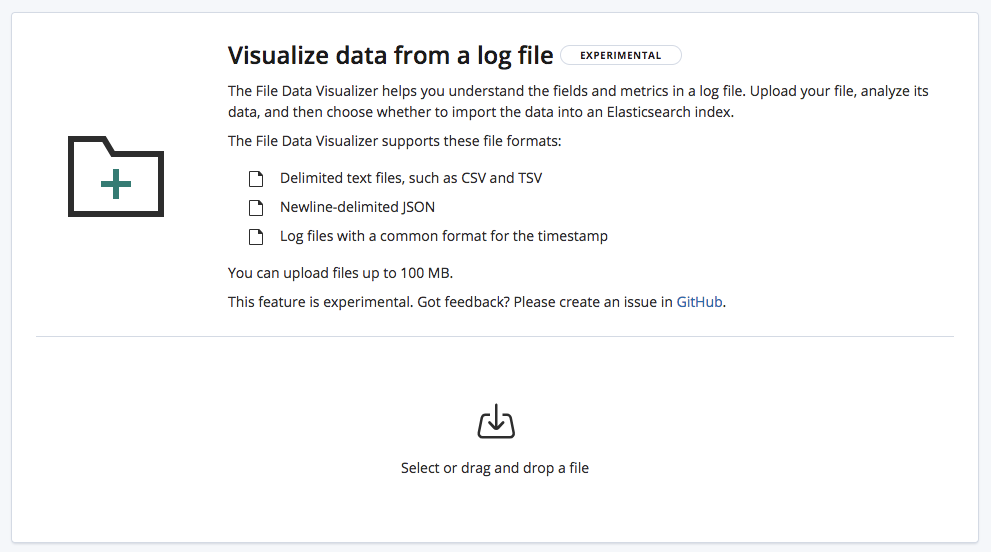
The File Data Visualizer feature can be found in Kibana under the Machine Learning > Data Visualizer section. The user is presented with a page which allows them to select or drag and drop a file. As of 6.5, we’re limited to a maximum file size of 100MB.
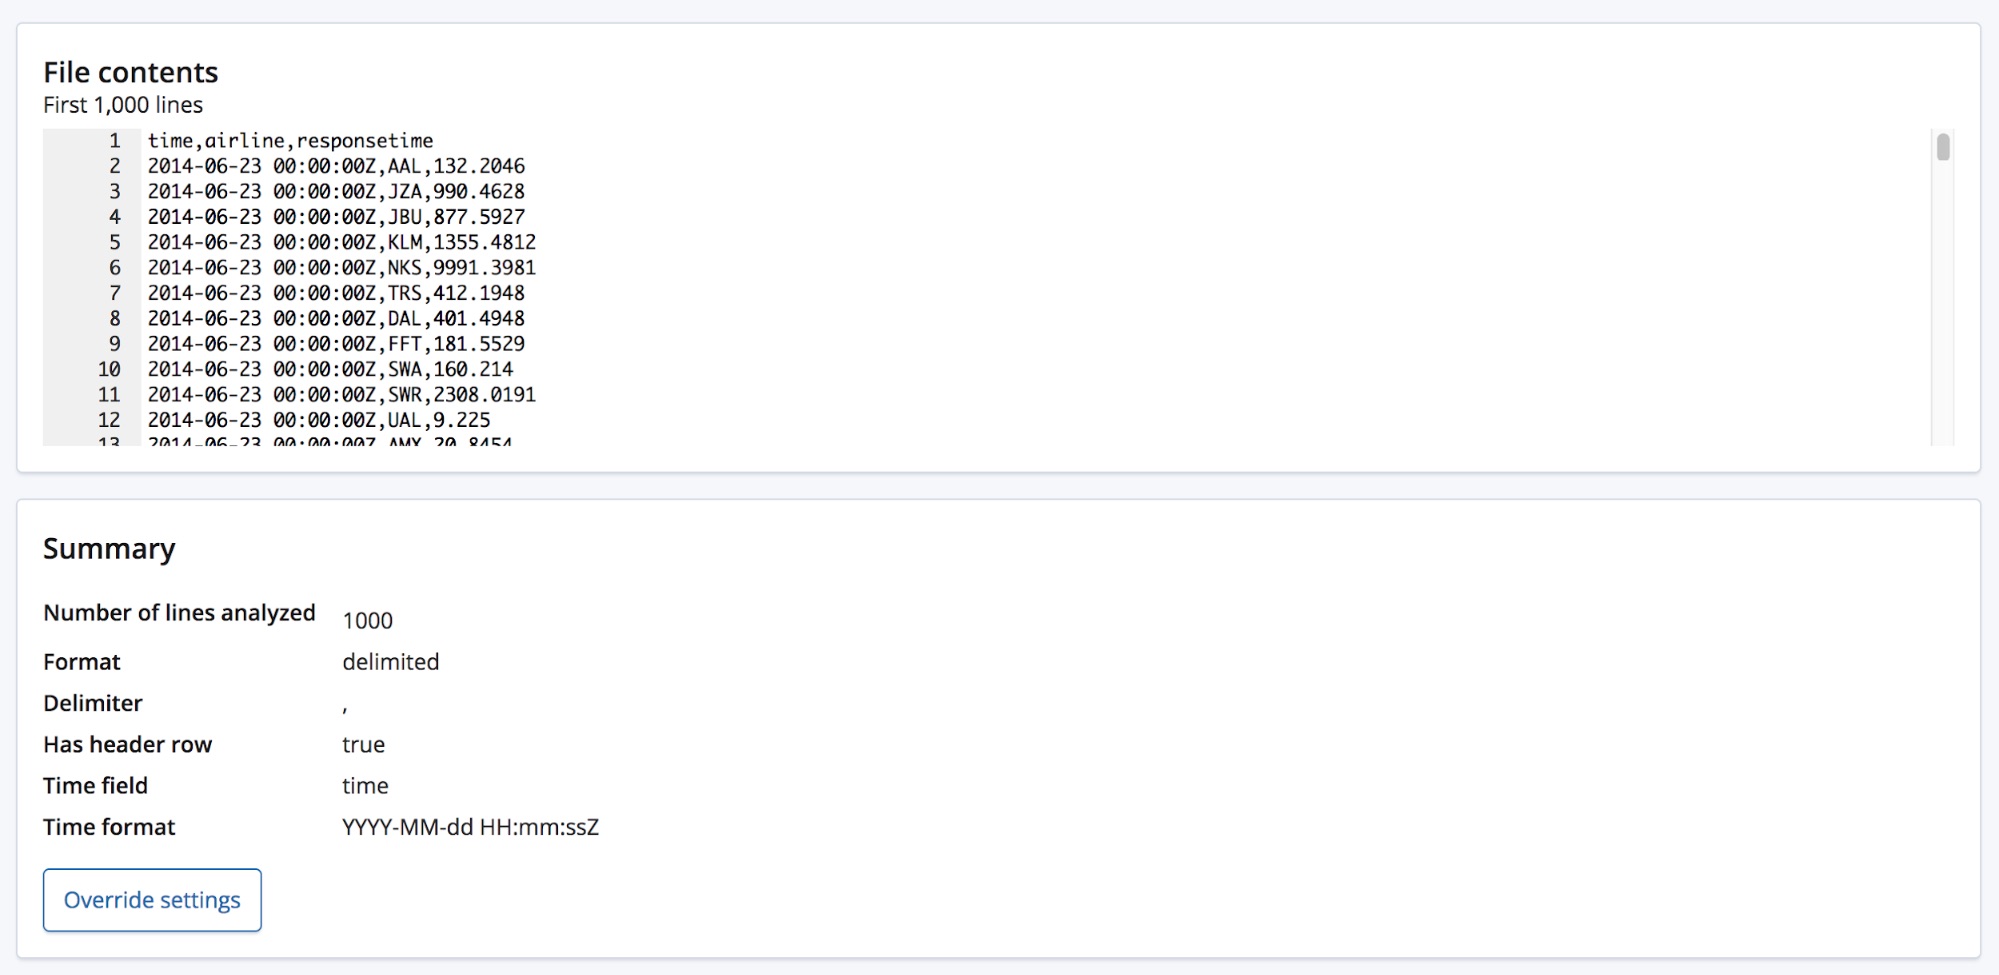
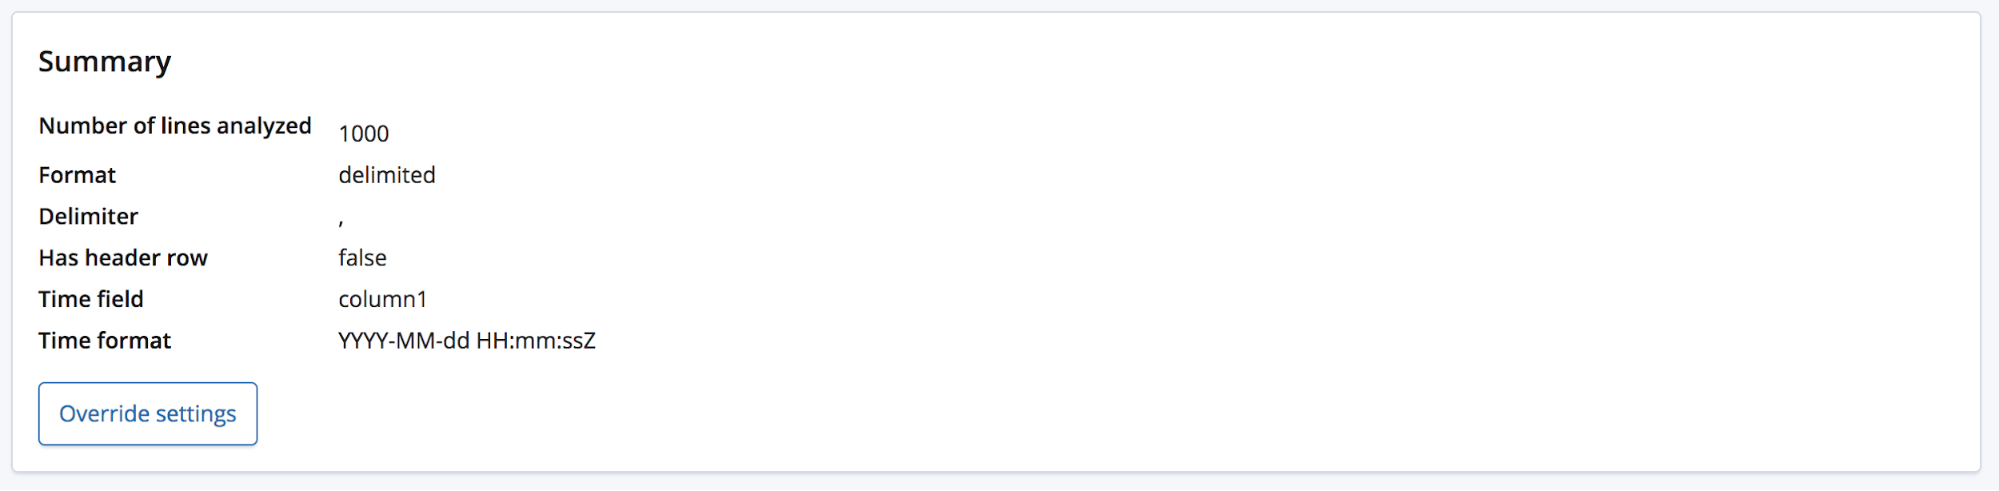
When we select the CSV file, the page sends the first 1000 lines from the file to the find_file_structure endpoint which runs its analysis and returns back its findings. Looking at the Summary section in the UI we can see that it has correctly detected that the data is in a delimited format and that the delimiter is a comma character.
It has also detected that there is a header row, and has used these field names to label the data in each column. The first column has matched a known date format and so is highlighted as being the Time field.
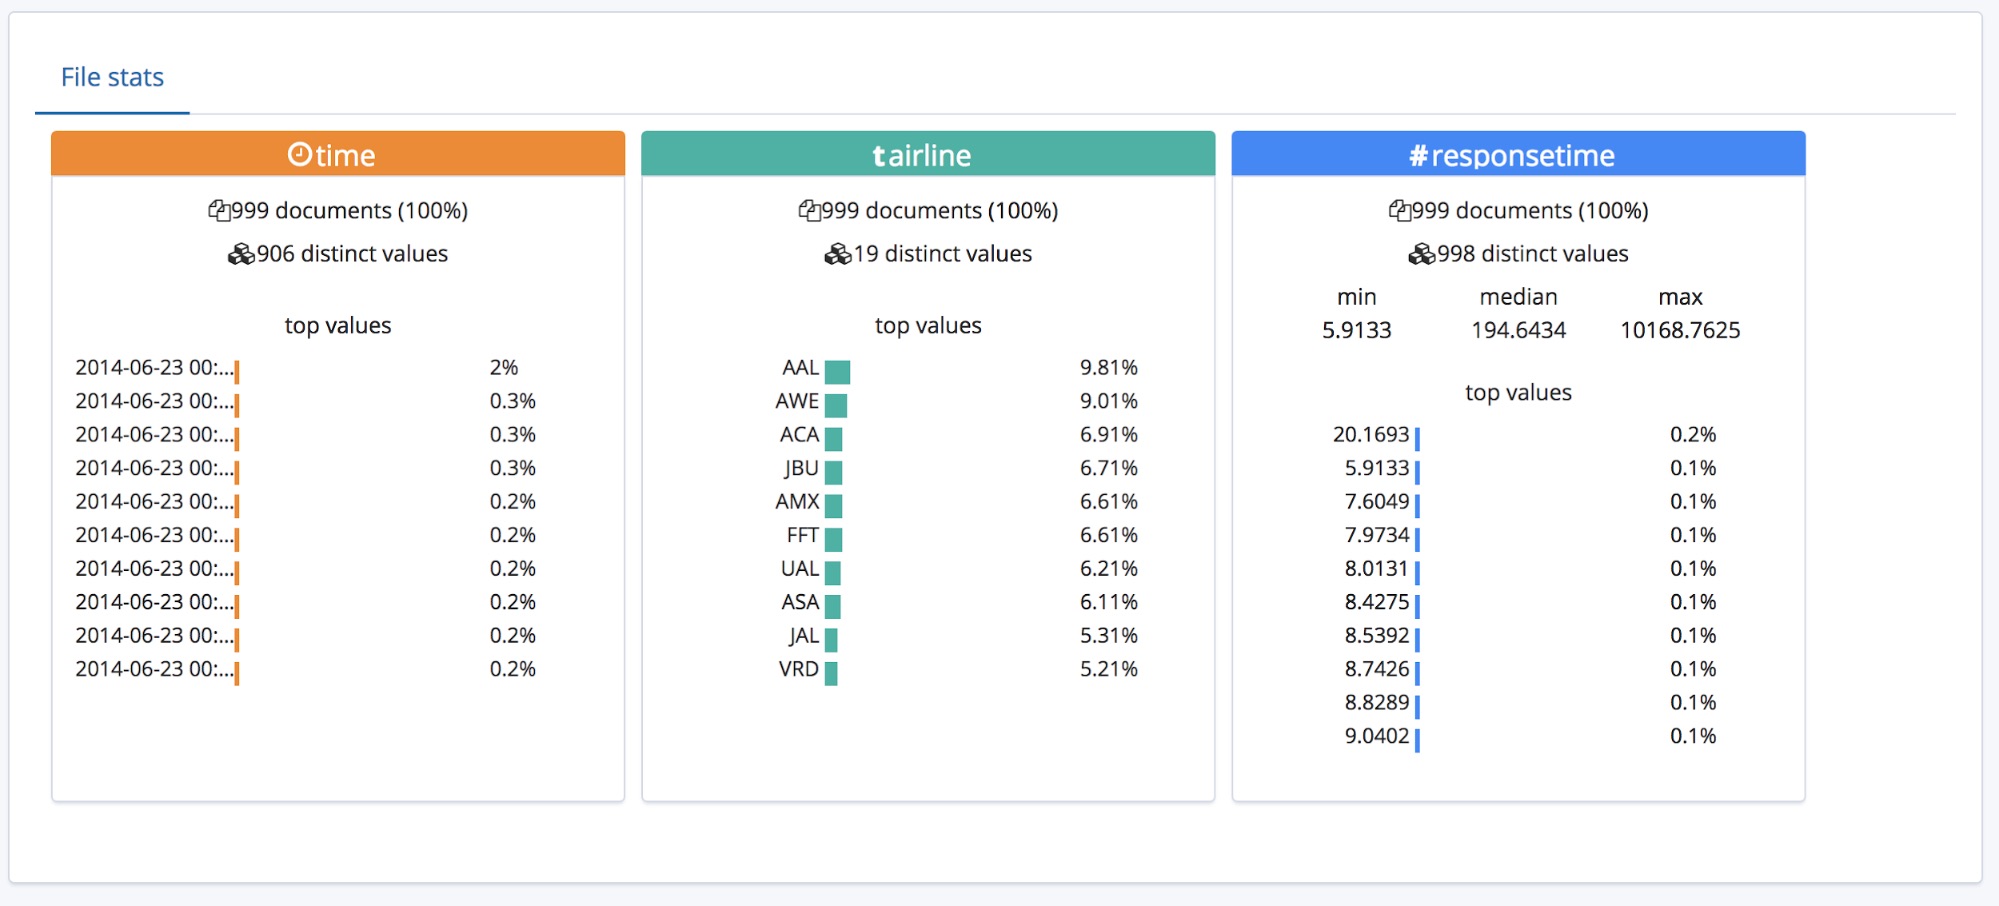
Underneath this Summary section is the fields section, this should be familiar with people who have used the original Data Visualizer feature.
We can see that the types of the three fields have been correctly identified, with some high level statistics listed for each one. The top 10 occuring values are listed for each field. For responsetime, which has been identified as being a numerical field the min, median and max values are also displayed.
This is all very well for a CSV file which has a header, but what if the data does not contain a header row at the top?
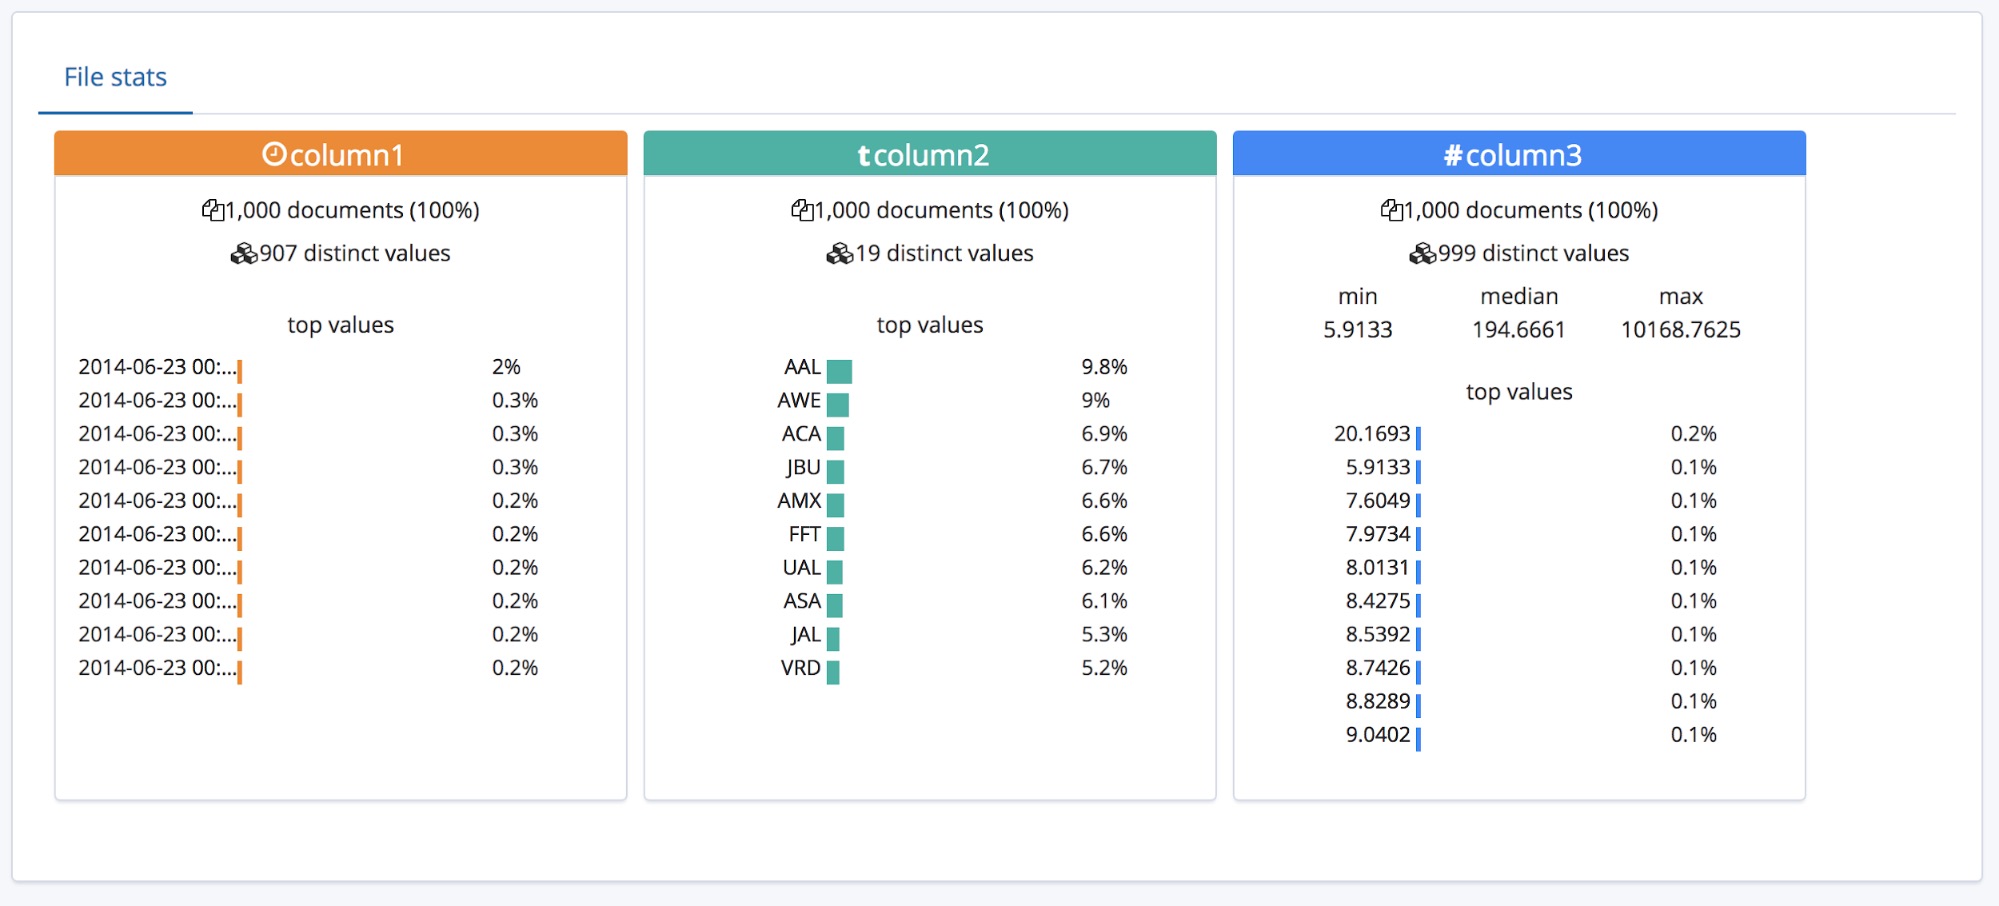
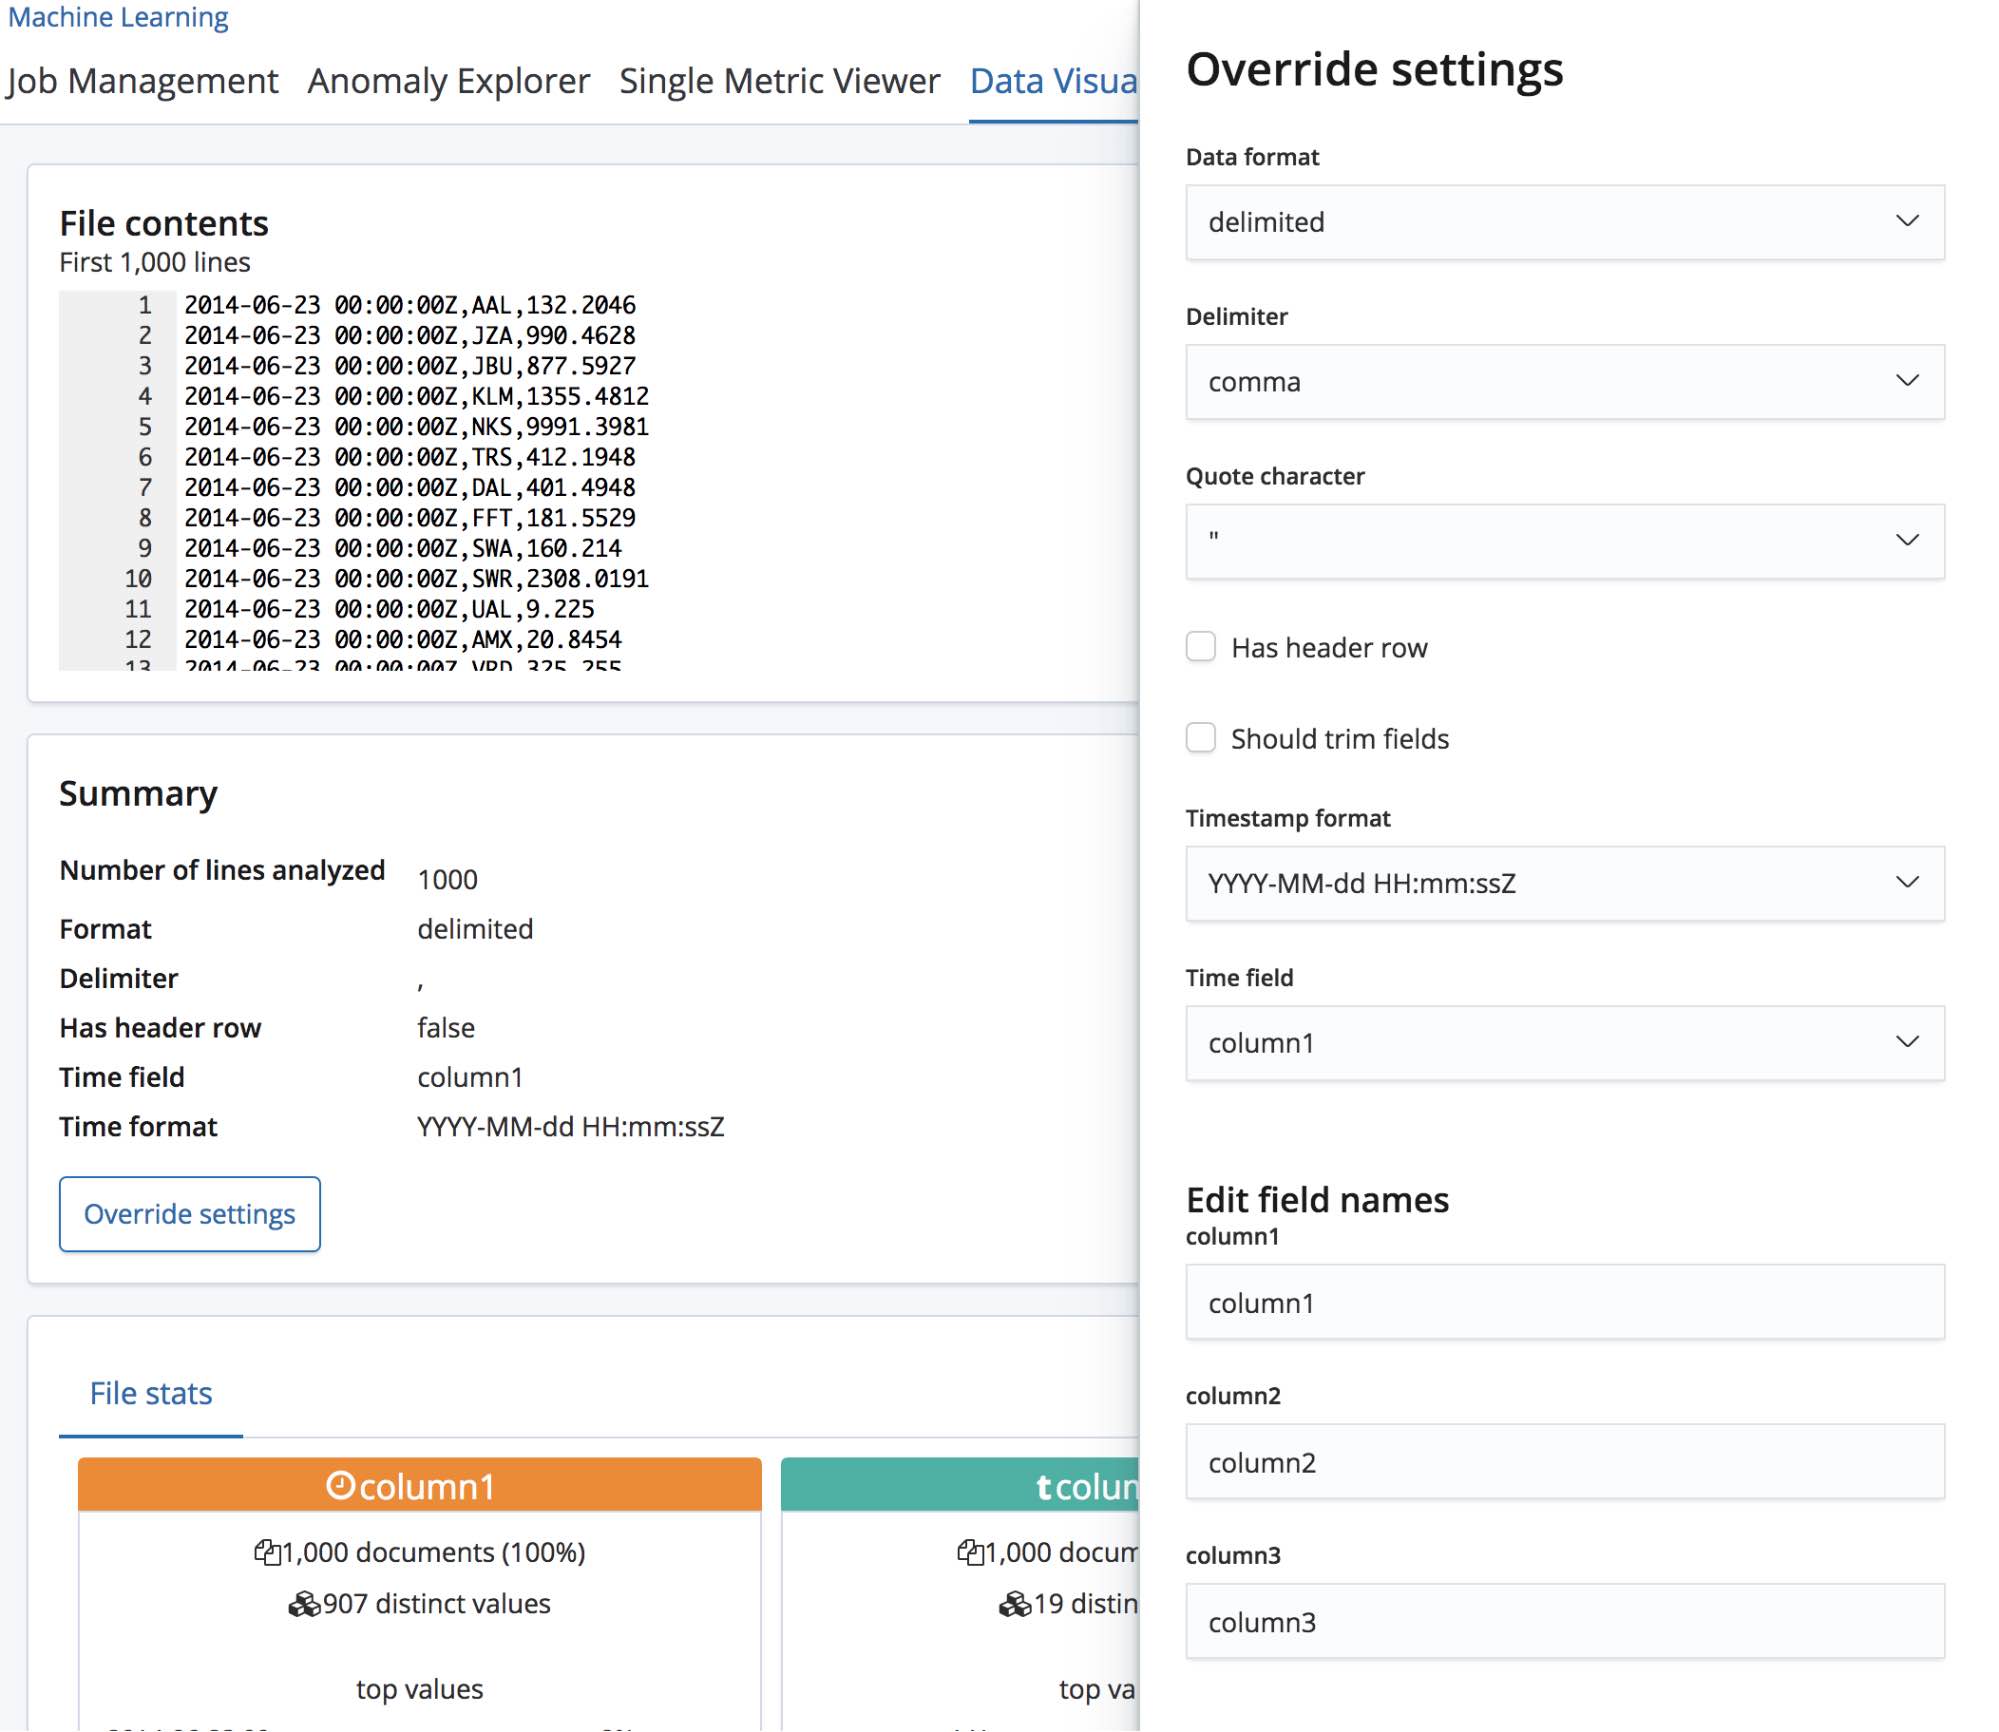
In this case, the find_file_structure endpoint will use temporary field names. We can demonstrate this by removing the first line from the example file and uploading it again. Now the fields have been given the general names column1, column2 and column3.
The user will probably have some domain knowledge and may want to rename these fields to something better, they can do this by using the Override settings button.
Along with renaming these fields, the user is also able to edit other settings such as the Data format, Delimiter and Quote character. Think of this section as supplying a way to correct the educated guess that the find_file_structure endpoint has made with regards to the data. You may have multiple date fields, of which it has chosen the first. Or you may just want to completely change the field names even though the file contained a header row.
Once we’re happy with these settings, we can hit the Import button located at the bottom left of the page.
Import the CSV Data into Elasticsearch
This takes us to the Import page where we can import the data into Elasticsearch. Note, this feature is not intended for use as part of a repeated production process, but just for initial exploration of the data. The main reason being the lack of automation options but also because this feature is currently experimental.
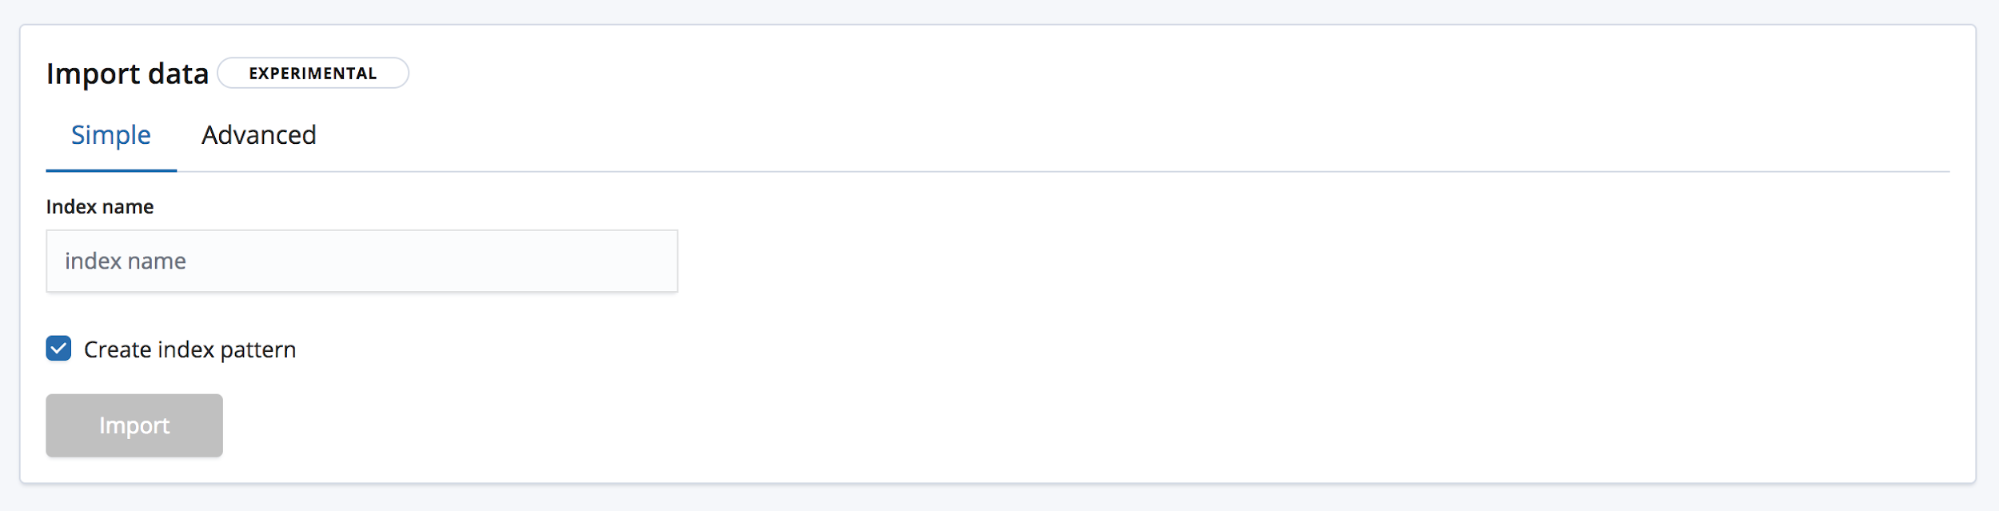
There are two modes for importing. Simple, where all the user need supply is a new unique index name and choose whether you want to also create an index pattern.
And Advanced, here the user has a finer control over the settings which will be used to create the index.
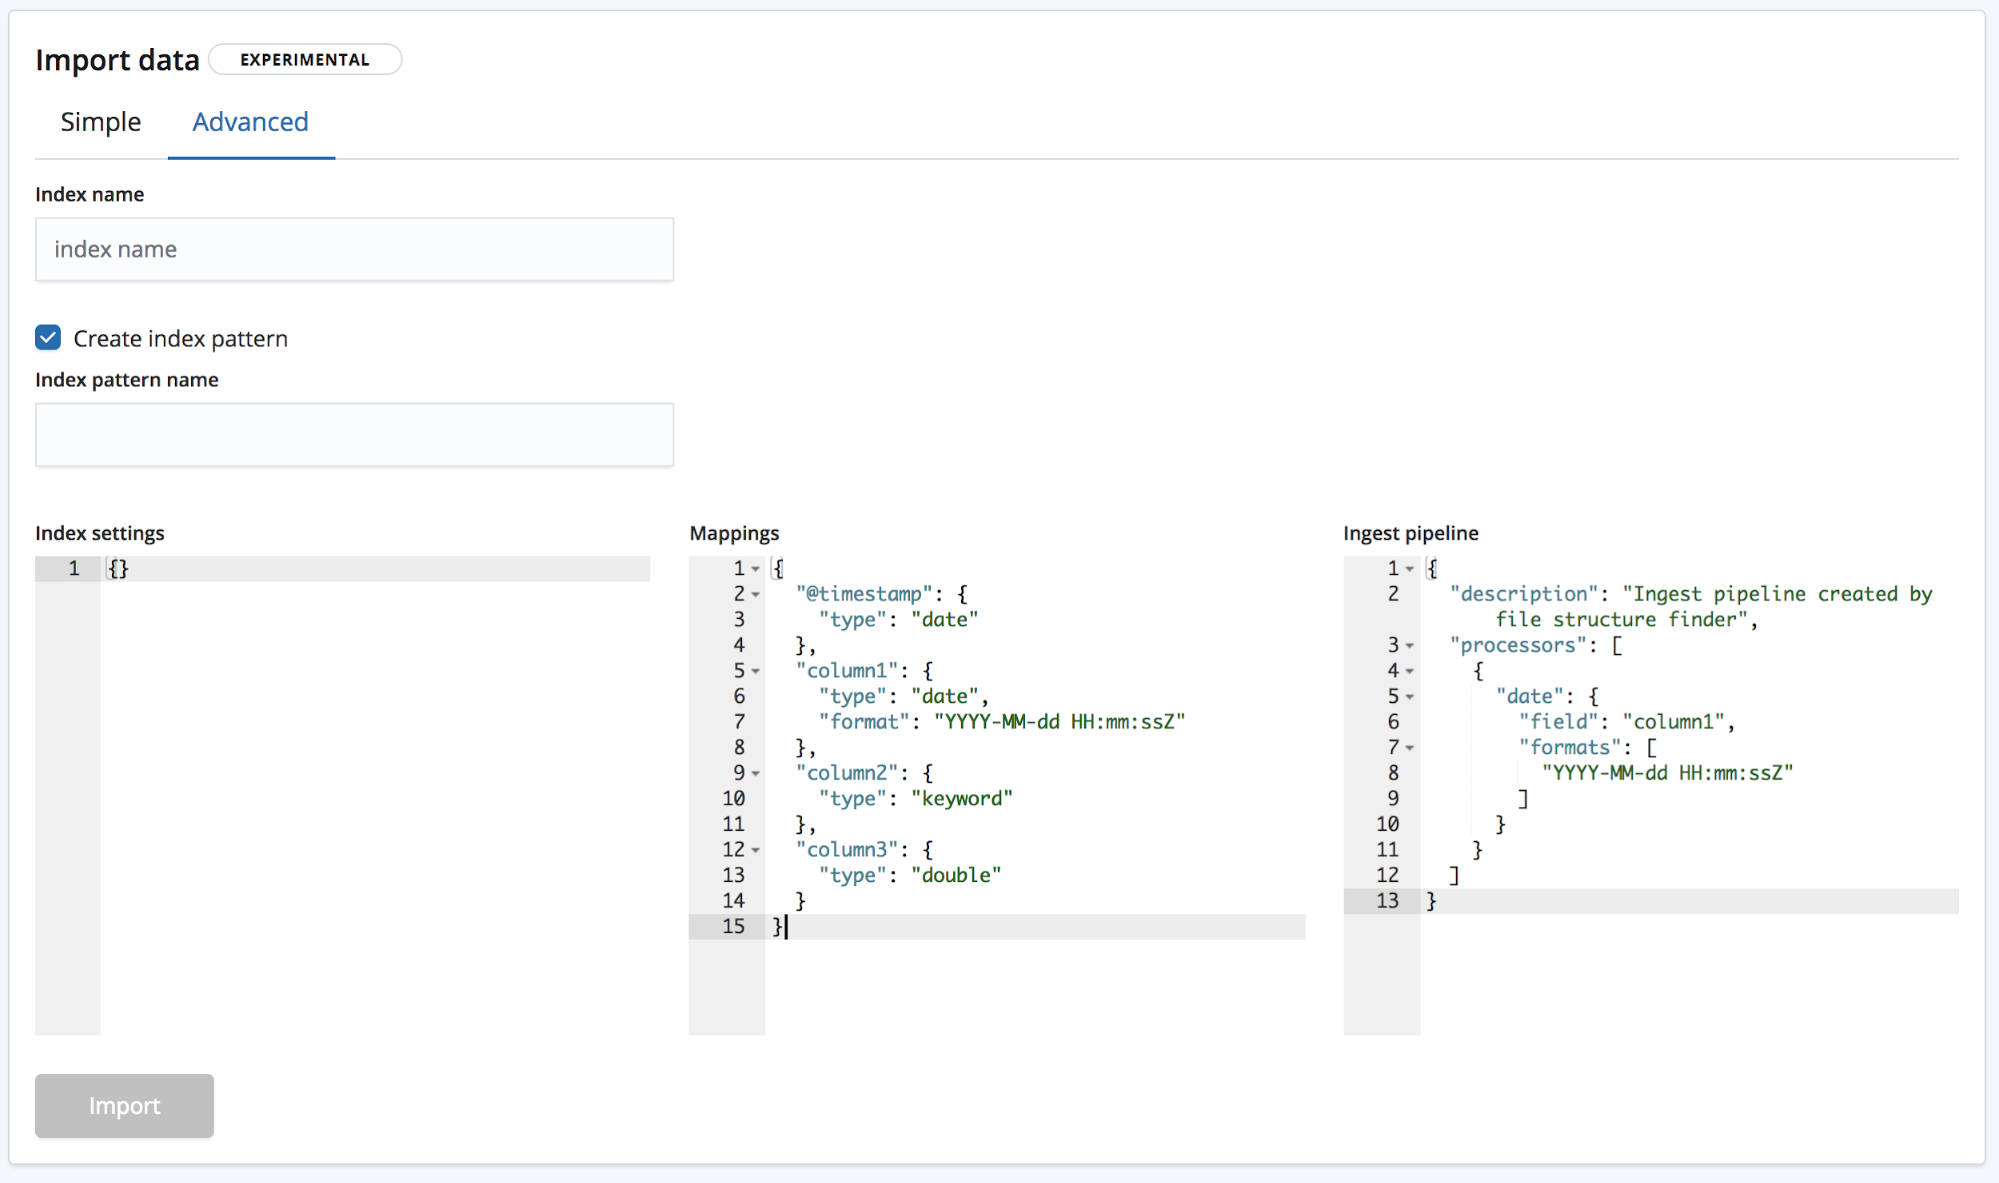
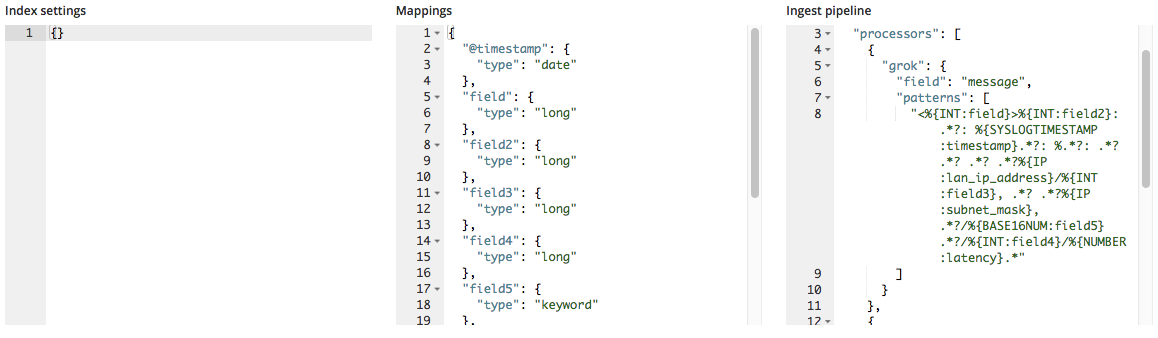
- Index settings - By default, no additional settings are needed for the creation of the index and the import, but the option to customise the index settings is still made available.
- Mappings - The find_file_structure provides a mappings object based on the fields and the types it has identified. For a list of possible mappings, see our Elasticsearch mapping documentation.
- Ingest pipeline - The find_file_structure provides a default ingest pipeline object. This will be used when ingesting the data and can be used for uploading any additional data.
Within 6.5, we only allow the creation of new indices and not the ability to add data to an existing index to reduce the risk of damaging the index.
Clicking the import button starts the import process. This consists of various numbered steps:
- Processing file - Turning the data into NDJSON documents so they can be ingested using the bulk api
- Creating index - Creating the index using the settings and mappings objects
- Creating ingest pipeline - Creating the ingest pipeline using the ingest pipeline object
- Uploading the data - Loading data into the new Elasticsearch index
- Creating index pattern - Create a Kibana index pattern (if the user has opted to)

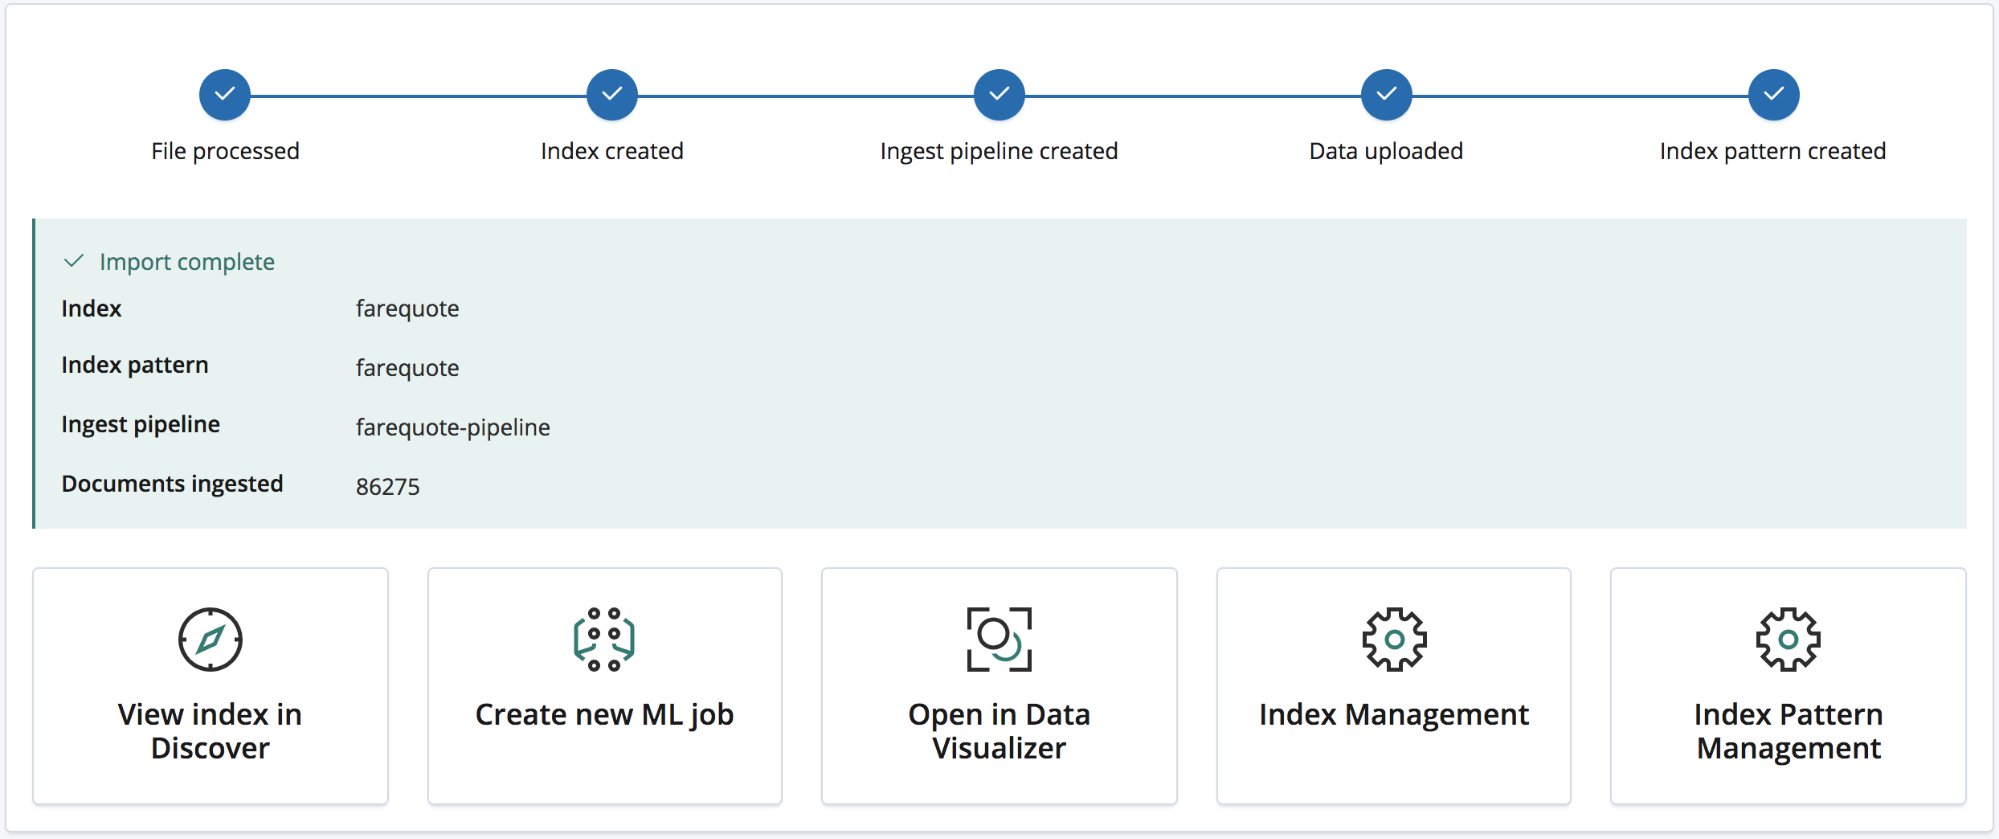
Once the import is complete the user is presented with a summary listing the names of the index, index pattern and ingest pipeline which have been created as well as the number of documents ingested.
As well as a number of Kibana links for exploring the newly imported data. Platinum and Trial subscription users will also be given a link to quickly create a machine learning job from the data.
Example: Importing Log Files and other Semi-Structured Text into Elasticsearch
So far this has covered CSV data — and NDJSON is even simpler with little processing needed for import — but what about semi-structured text? Let’s look at how the analysis of CSV data differs from typical log file data, aka semi-structured text.
Below are three lines from a log file generated by a router.
<190>38377: GOW45-AR002: Apr 18 08:44:02.434 GMT: %JHG_MS-6-ROUTE_EVENT_INFO: Route changed Prefix 10.156.26.0/23, BR 10.123.11.255, i/f Ki0/0/0.849, Reason None, OOP Reason Timer Expired
<190>38378: GOW45-AR002: Apr 18 08:44:07.538 GMT: %JHG_MS-6-ROUTE_EVENT_INFO: Route changed Prefix 10.156.72.0/23, BR 10.123.11.255, i/f Ki0/0/0.849, Reason None, OOP Reason Timer Expired
<190>38379: GOW45-AR002: Apr 18 08:44:08.818 GMT: %JHG_MS-6-ROUTE_EVENT_INFO: Route changed Prefix 10.156.55.0/24, BR 10.123.11.255, i/f Ki0/0/0.849, Reason None, OOP Reason Timer Expired
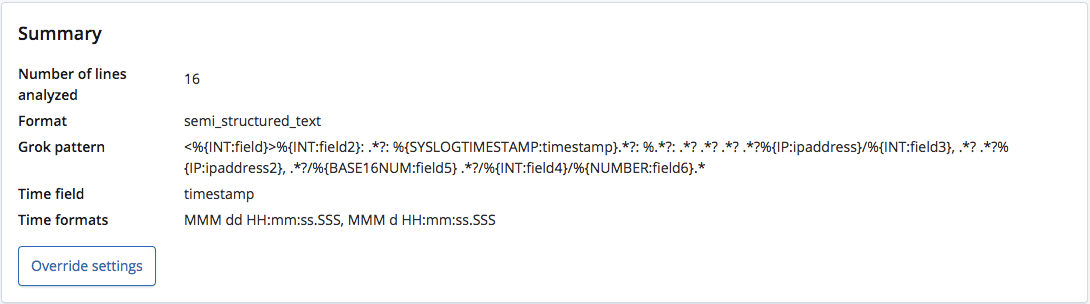
When analysed by the find_file_structure endpoint, it correctly recognizes that the format is semi-structured text and creates a grok pattern to extract the fields and their types from each line. Of these fields, it also recognises which one is the time field and its format.
Unlike a CSV file with a header or a NDJSON file, there is no way on knowing the correct names for these fields, so the endpoint gives them general names based on their types.

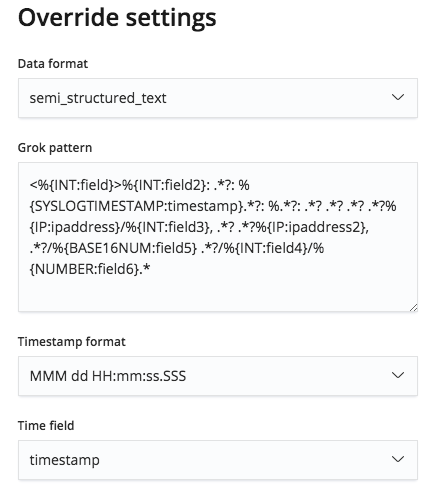
However, this grok pattern is editable via the Override settings menu, and so we are able to correct the field names and their types.
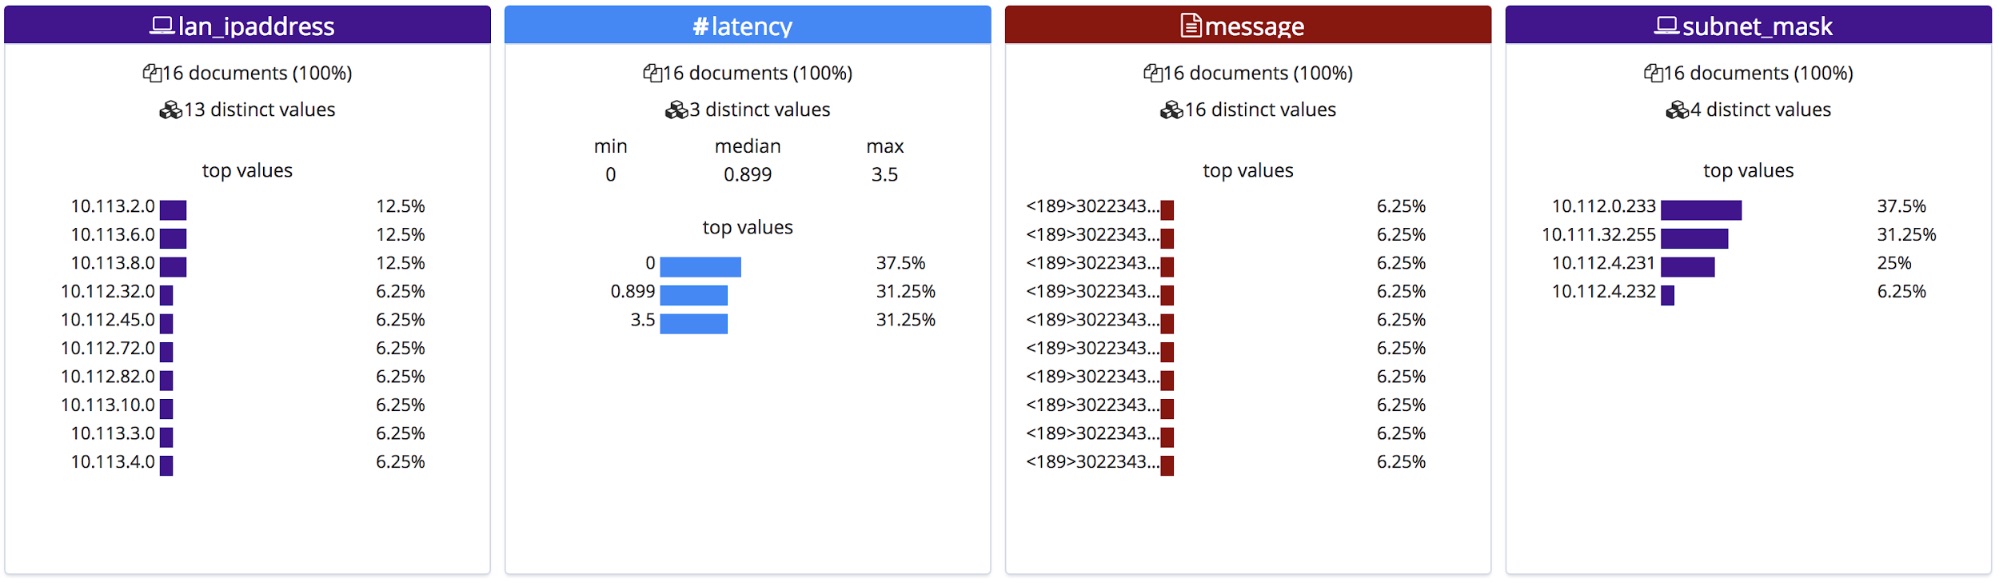
These corrected field names will then be displayed in the File stats section. Note they are ordered alphabetically, and so have changed order slightly.
When imported, these new field names are added to the mappings object and the grok pattern is added to the processors list in the ingest pipeline.
Wrapping Up
Hopefully this has whetted your appetite to try out the new File Data Visualizer feature in 6.5. This is still an experimental feature in 6.5, and so may not match every file format correctly, but, try it out and let us know how you get on. Your feedback will help us get this feature to GA faster. You can also get a deeper overview on how to structure and process data into Elasticsearch.